This summer, I spent a lot of precious time with my mom at her home in Peja, Kosova. One quiet afternoon, as I was flipping through some of her colouring books, I felt overwhelmed with admiration, and a spark of inspiration. You see, for the last seven years, my mom has been on a colourfulContinue reading "A Gallery Wall for My Mom: A Tribute to Her Colourful Journey"
Dopamine Décor: My Colourful Bedroom Makeover
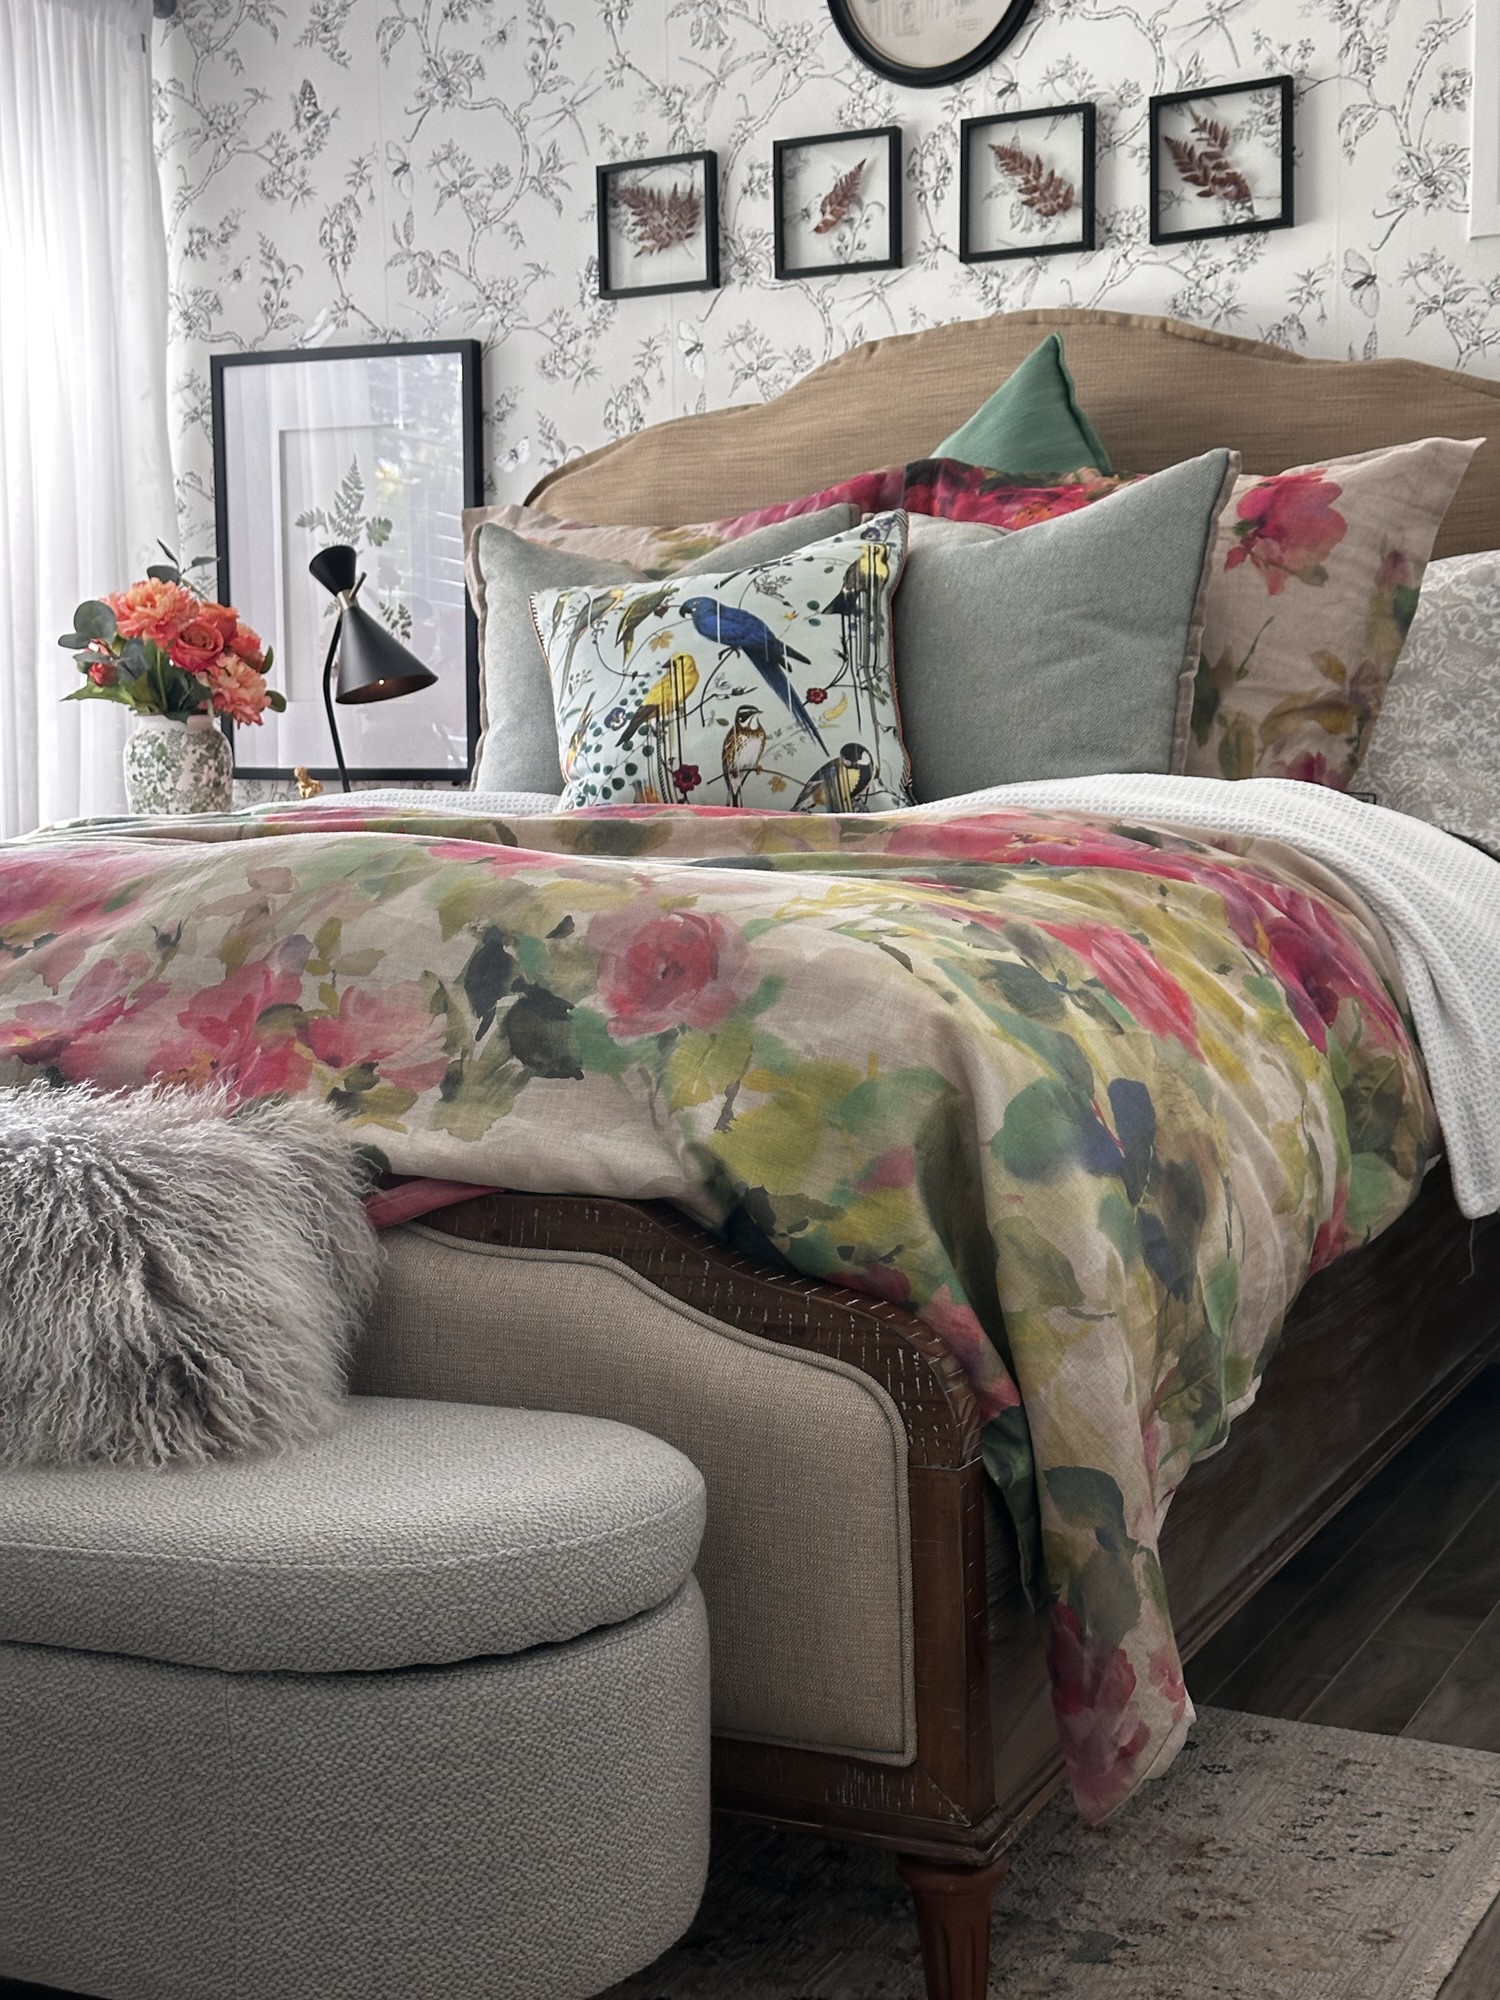
“Design with joy in mind.” Inspired by the bright, expressive world of dopamine décor, I’ve transformed my bedroom into a joyful retreat layered with colour, pattern, texture—and personality. Bold and Colourful Where Colour Meets Comfort At the centre of it all is my new queen bed from Emerald Furniture—bought via Chintz & Co classic wood frame with aContinue reading "Dopamine Décor: My Colourful Bedroom Makeover"
My Covid-19 Escape
Since the beginning of last year I have been trapped in my home! No travels, no family and friends gatherings, no dining outs…. NOTHING!!! And this has been very, vey hard on my mental and overall wellbeing, but I am sure that this is what everyone in the world is going through these days. ItContinue reading "My Covid-19 Escape"
“To Make Or Not To Make The Bed; That Is The Question”
I am pretty sure that Hamlet, being who he was, would have never bothered to discuss such a dilemma; but we ordinary people, with extraordinary busy lives, who are faced with this tedious chore every single morning may ask this question and seek a reasonable answer. There is no doubt that there are two typesContinue reading "“To Make Or Not To Make The Bed; That Is The Question”"
Simple and Cosy Living Room Holiday Decor
This year I was too late with any Holiday decorating, and it was only two days ago that I was, finally, able to put up my Holiday decor in the living room. Even though I decorate for the Holidays, my approach for the seasonal decor is keeping it simple and easy, meaning that I doContinue reading "Simple and Cosy Living Room Holiday Decor"
An Outdoor Room
It’s natural to think of home and garden as two separate entities with a strict boundary in between. But linking indoor and outdoor spaces, even if it’s only a tiny garden or terrace, makes an interior feel larger. With the exterior connected to the house your eye sees further and a garden-facing room appears larger.Continue reading "An Outdoor Room"
Pouf Slipcovers
Poufs are expensive, but they are pretty and quite versatile. You can use them in every room around the house be it as an extra seating, as a feet rest, as a table with a tray on top and the list goes on. Few years back I made a pretty fuchia coloured pouf. It wasContinue reading "Pouf Slipcovers"
Boho Backyard Corner
I am a summer person, and just love being outside whenever there is a good weather. Having a good sized backyard gives me the opportunity to create different sitting corners so I can enjoy the view of my backyard from different angles. Depending on the mood, I style and restyle these corners very often andContinue reading "Boho Backyard Corner"
Weekend Makeover – My Niece’s Bedroom
My niece is a busy bee. She is an university student, soon to graduate on two majors Accounting and Finance, so if she is not in a class or at the library studying for her exams, she will be either at the gym lifting weights, boxing, running on treadmill, or taking a class on advancedContinue reading "Weekend Makeover – My Niece’s Bedroom"
How To Decorate A Room From Scratch
Working in the field of home styling for a few years now, I am constantly approached by clients who are faced with decorating dilemmas as the time to move into their new empty place, be it a house or an apartment, approaches. That’s because decorating a room or the whole place completely from scratch isContinue reading "How To Decorate A Room From Scratch"
Repurposing A Dining Room Into A Bedroom/Reading Room
It is no news that people live more casually today than they did when formal dining rooms were put into homes. If you like the idea of inhabiting every room in your home rather than setting aside a formal space that is only used a handful of times a year, than this post is forContinue reading "Repurposing A Dining Room Into A Bedroom/Reading Room"
Living Room Styling On A Budget
My sister’s living room is not a spacious space. Moreover, in one of the living room walls there is a door that leads to the basement as well as a small corridor leading to the powder bathroom and the mud room, so it really gets complicated to come up with a good furniture layout. HerContinue reading "Living Room Styling On A Budget"
DIY Kitchen Makeover On A Budget
No matter how comfortable the rest of a house might be, everyone loves to meet in the kitchen be it for a tasty meal one just made, or just for grabbing a cup of coffee and catching up with the other members of the family. So, no wonder that everyone likes to have an organisedContinue reading "DIY Kitchen Makeover On A Budget"
DIY – An Artful Thermostat Cover
Thermostats!!!!! These eyesores which we find in almost every home! Due to the nature of this device it is recommended to be mounted in a plain sight, in a common room, at eye level. This makes it pretty easy to notice this unsightly device and make you yearn to have it gone: but, getting ridContinue reading "DIY – An Artful Thermostat Cover"
Decorative Rectangular Handcrafted Pillow
No room is completed without decorative pillows on a sofa or a chair, and everyone knows that pillows are a great decorative element by which you may inject style and colour to a space. I love using pillows, by the way a lot of them, in my styling projects, and I am sure that IContinue reading "Decorative Rectangular Handcrafted Pillow"
Facelift Of An Old Space Using Dark Colours
In cases when you are not in a position (financially or for any other reason ) to undertake any renovation of a dated space in your home, than giving a fresh coat of paint always is a good idea. Sometimes, only a coat of paint paired with some stylish details may transform the most datedContinue reading "Facelift Of An Old Space Using Dark Colours"
Disa nga stilet ne disajnin e enterierit dhe s’i t’i dallojme ato
foto: Pinterest Padyshim se egziston nje numer tejet i madh i stileve ne disajnin e enterierit, por ne kete post une do te fokusohem vetem ne disa nga ato te cilat kan qene me prezente ne dekaden e fundit. Secili nga ne, ne ndonje faze te jetes do te perballemi me nevojen ose thjesht deshirenContinue reading "Disa nga stilet ne disajnin e enterierit dhe s’i t’i dallojme ato"
DIY Line Art Decor – H&M Home Inspired
Most of you already know that H&M HOME is now widely spreading around the world and their HOME Line is full of incredibly modern home accent pieces at very affordable prices. I love shopping for accessories in their stores, but I have to travel to another country in order to visit their stores as thereContinue reading "DIY Line Art Decor – H&M Home Inspired"
Small Bedroom Styling On a Budget
In our busy lives bedroom should not be just a place to have a good night sleep. We all need a bedroom which may serve as an oasis within our homes where we can find an escape for some rest and relaxation. However, in order for a bedroom to serve as a place where oneContinue reading "Small Bedroom Styling On a Budget"
Si t’i perdorim ngjyrat e errta ne enterier
Foto: Instagram Per sa i perket perdorimit te ngjyrave te errta ne enterier, mbreteron supozimi se ambientet e brendshme te ngjyrosura me ngjyra te mbyllta jane depresive dhe e bejn qe dhoma te duket me e vogel dhe klaustrofobike. Nje supozim i tille i bene te pasigurt adhuruesit e ngjyrave te erreta per t’i perdorurContinue reading "Si t’i perdorim ngjyrat e errta ne enterier"
