
No matter how comfortable the rest of a house might be, everyone loves to meet in the kitchen be it for a tasty meal one just made, or just for grabbing a cup of coffee and catching up with the other members of the family. So, no wonder that everyone likes to have an organised and a pretty looking kitchen where a family can enjoy meals and time together.
However, as the time goes by, once pretty looking kitchen becomes dated and not so fresh looking anymore. Renovation of any kitchen, be it the smallest one, costs a lot so DIY updating it in some way is an easy and non costly option.
My sister’s kitchen is an old builder grade kitchen of a good quality. Originally, it was an oak kitchen or a wood stained in oak finish which 10 or 15 years ago everyone who had one of those kitchens started hating its colour, my sister being among the first ones.
She started hating its colour so much at the point that she couldn’t live with it anymore. Of course, renovating the kitchen wasn’t an option for her so I suggested her to take a paint route.
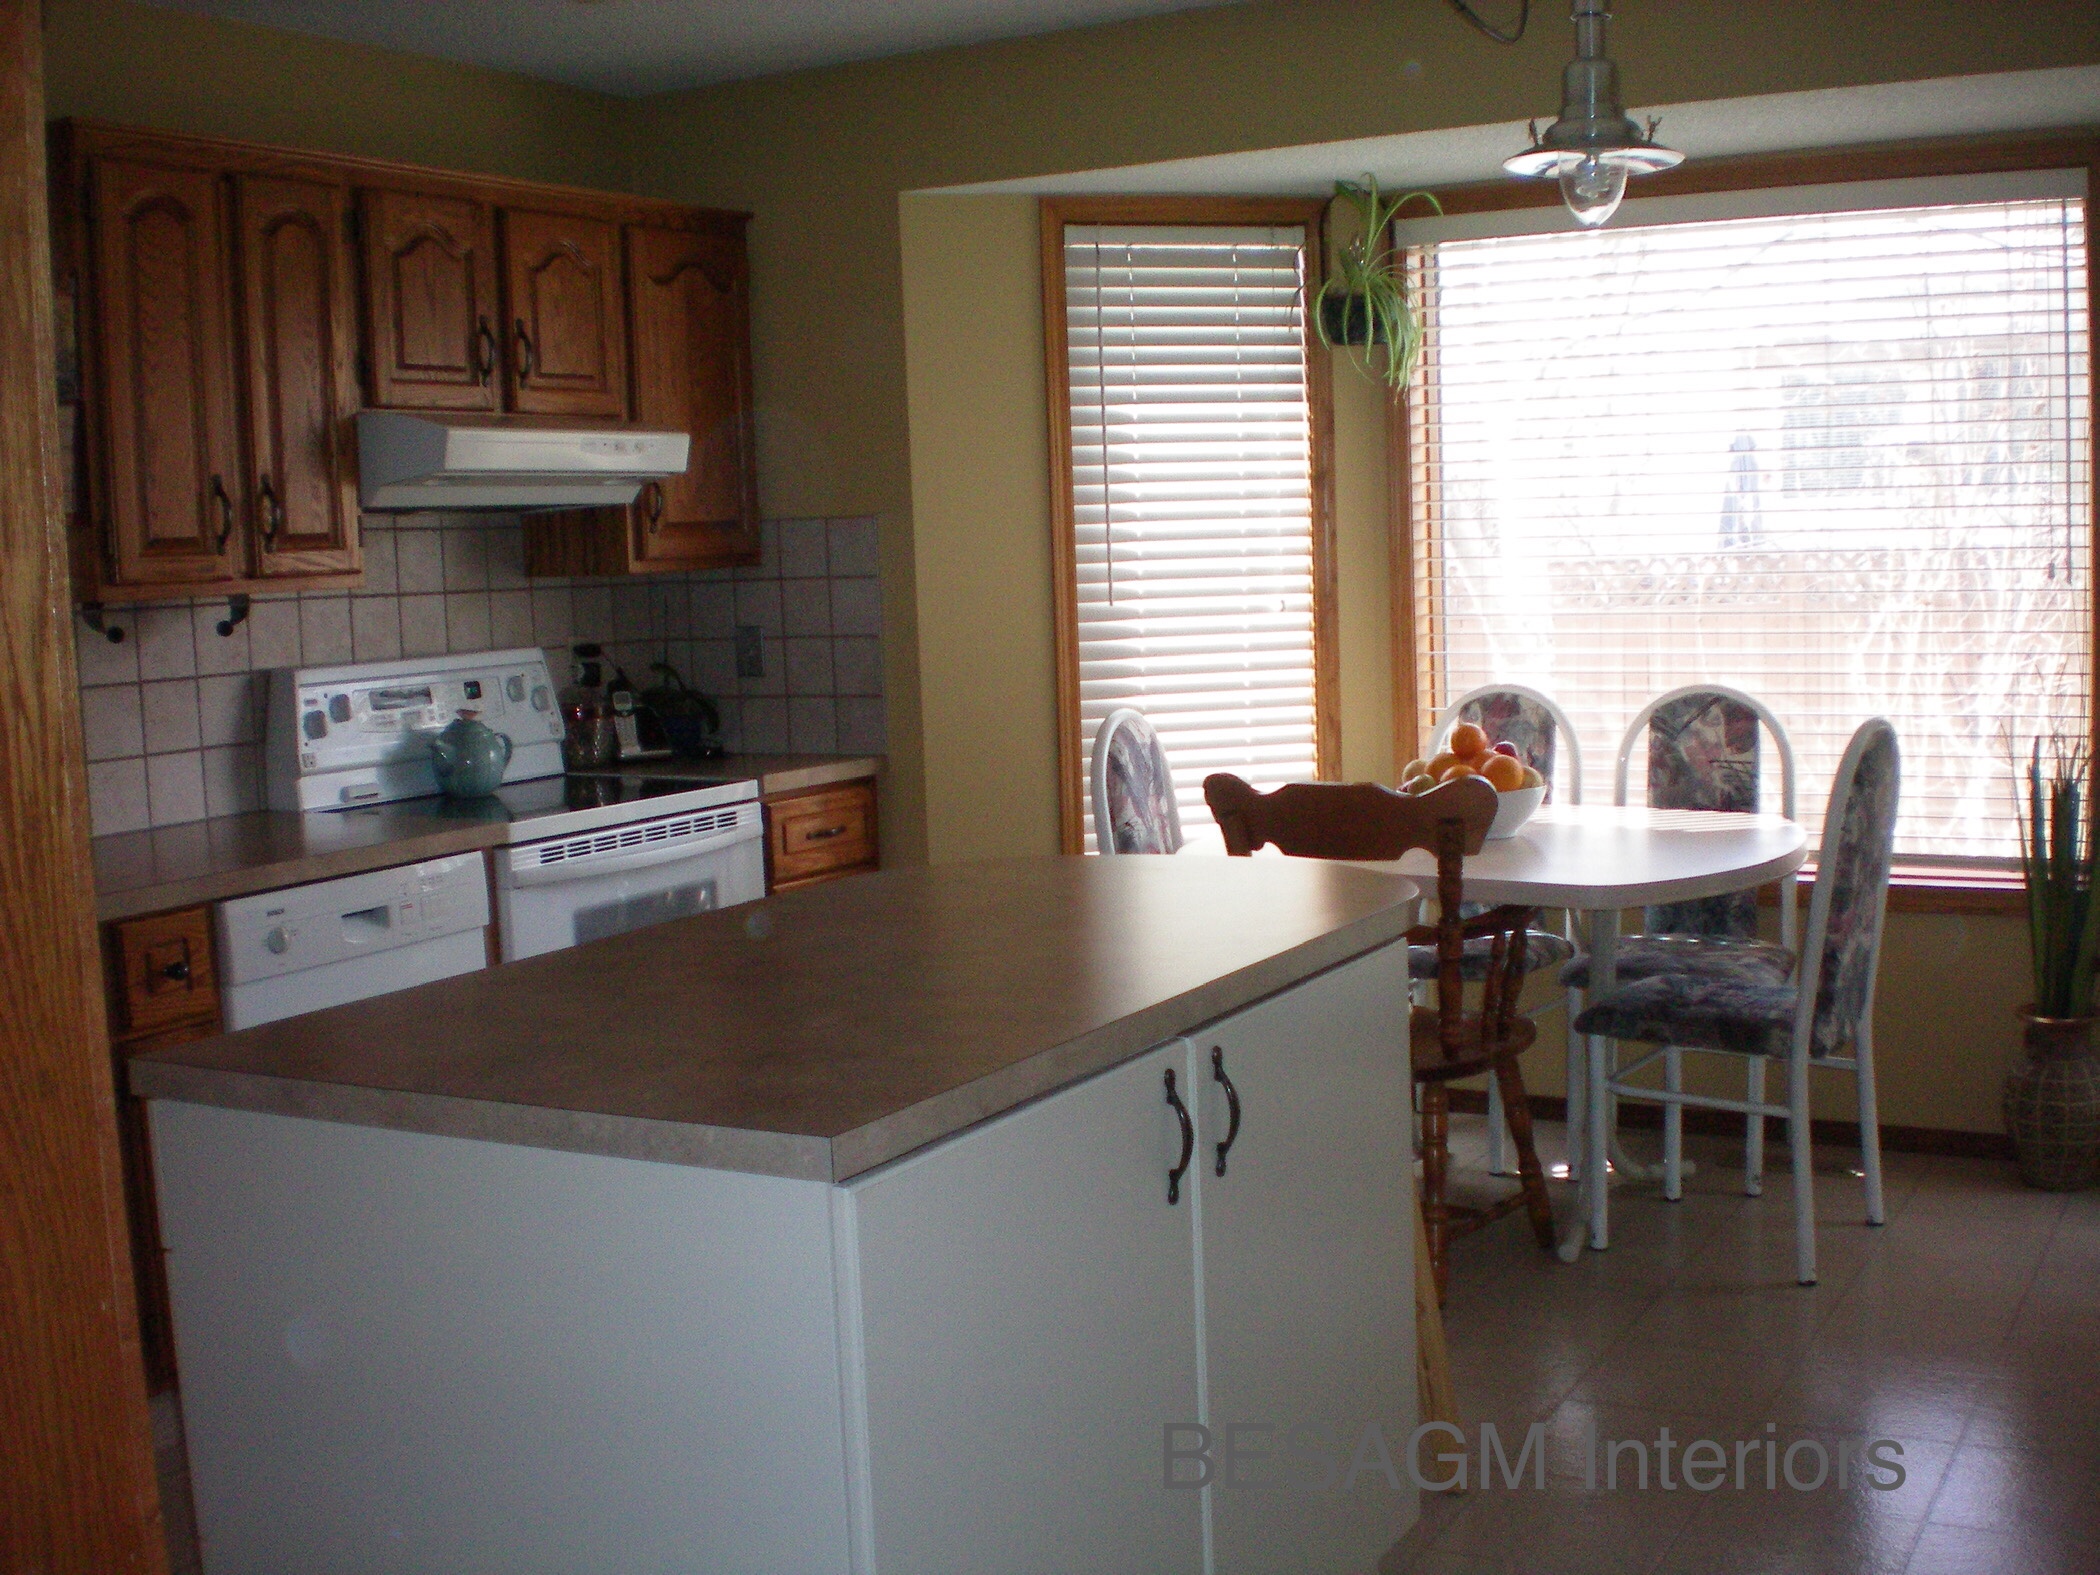
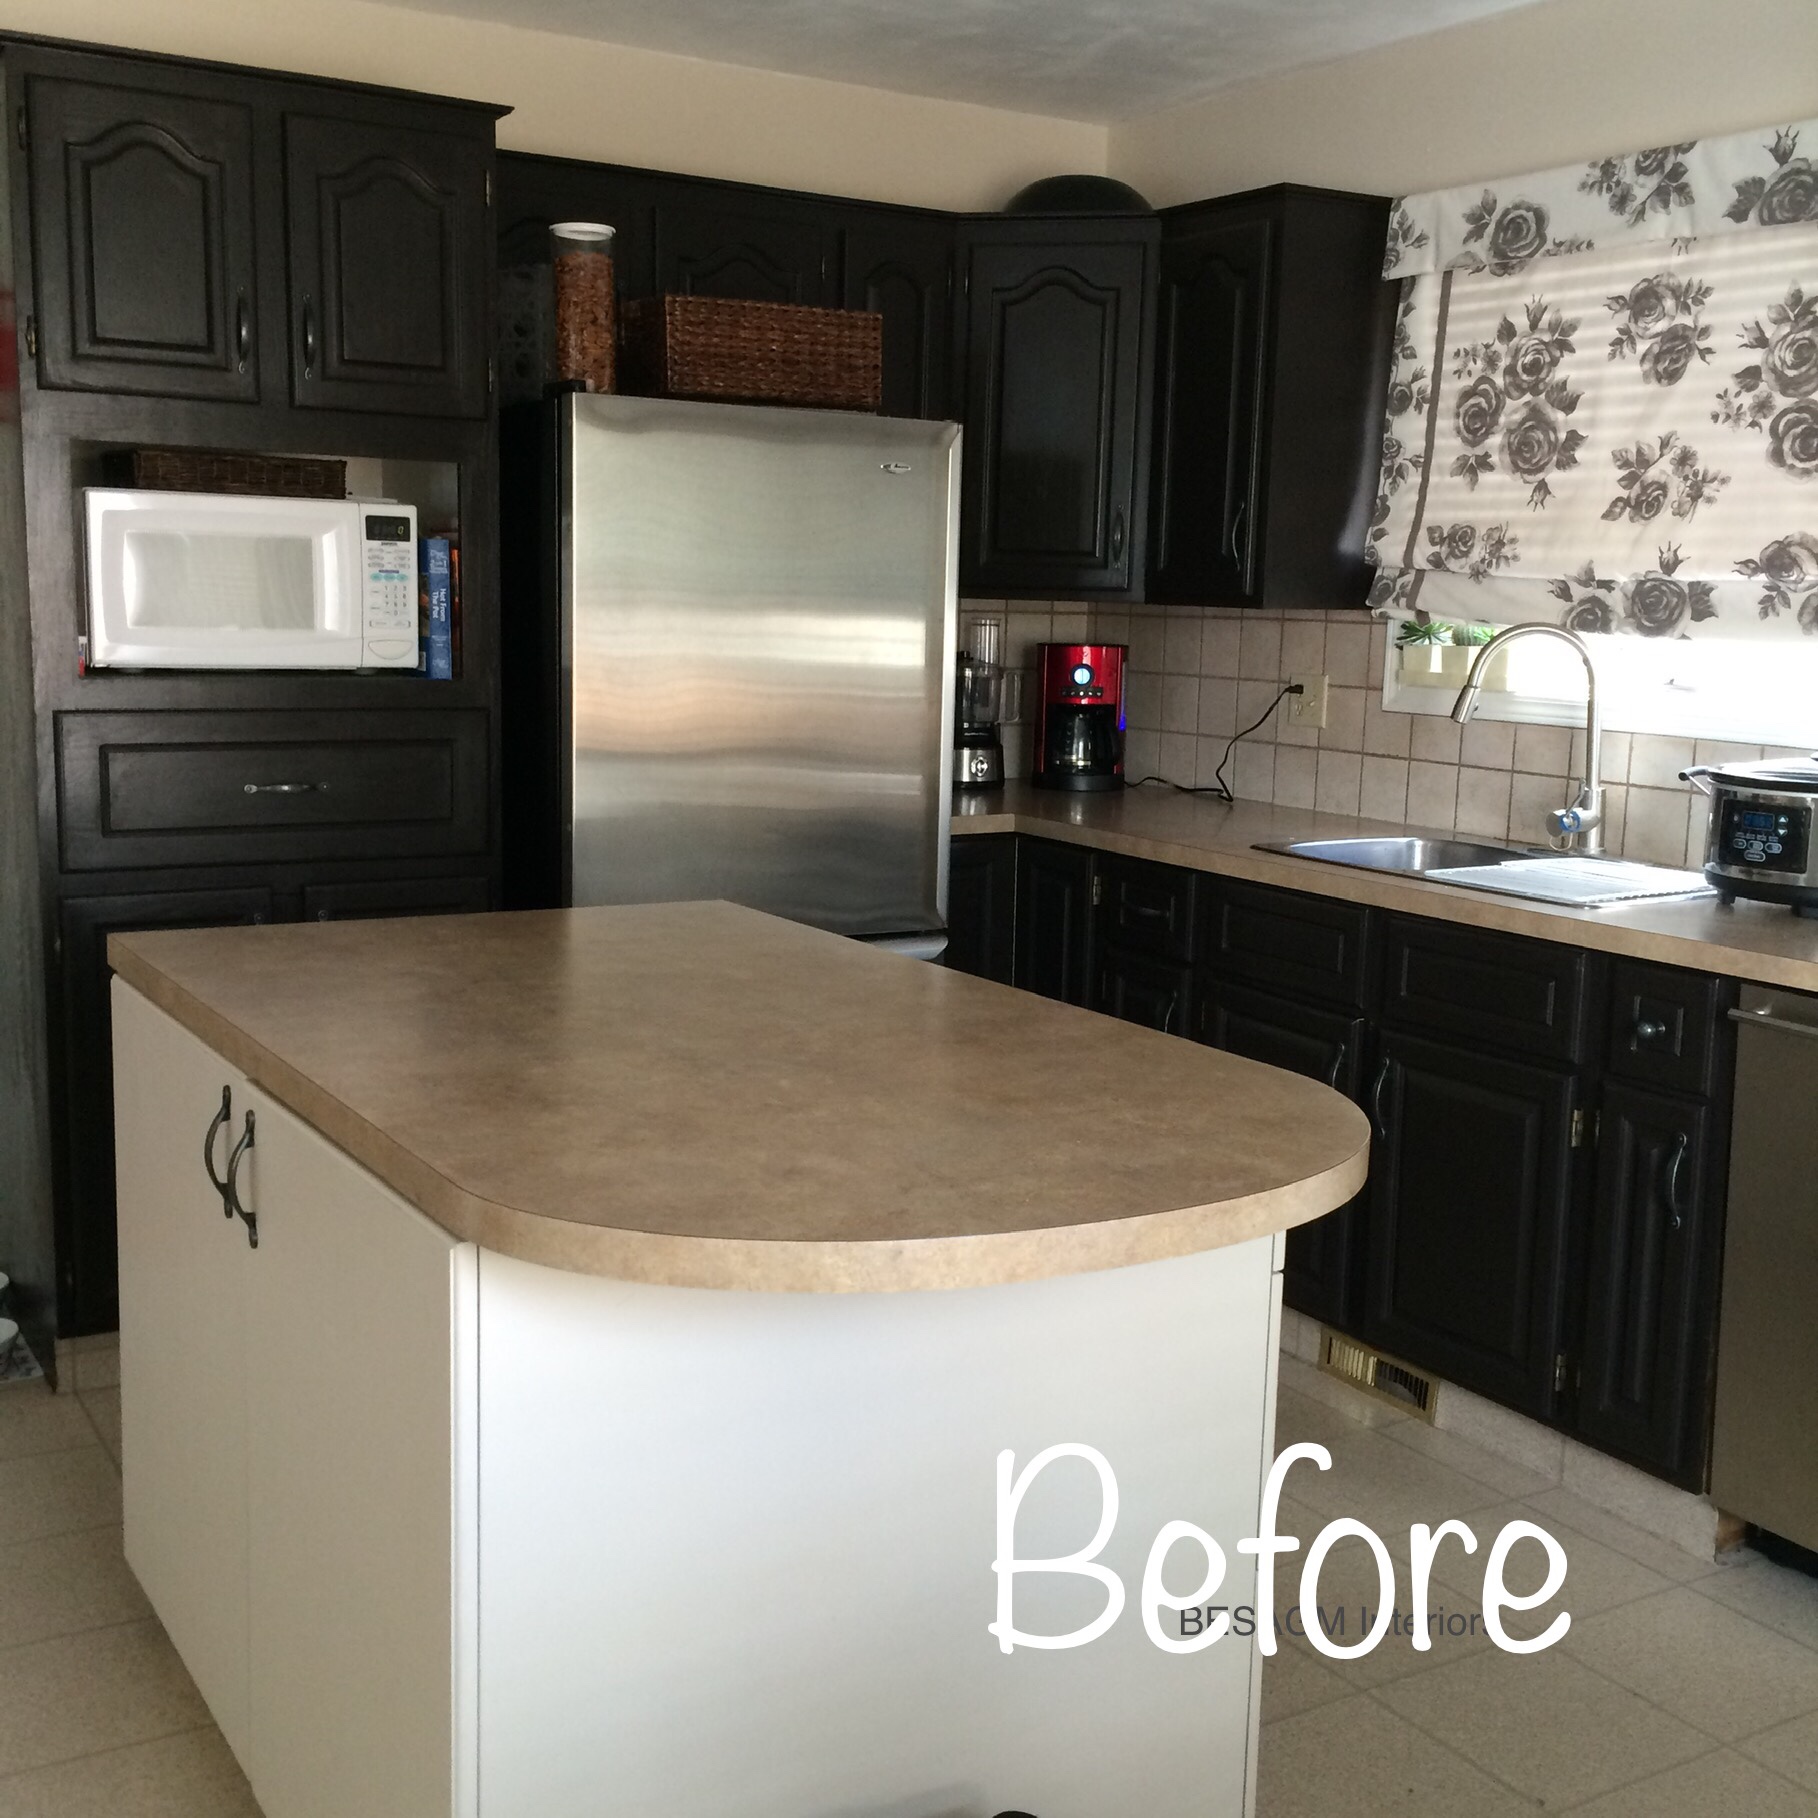
At first she thought that painting a kitchen was a huge and tedious job, so she wasn’t sure whether she could do it herself. After some words of encouragement by me and her strong will to make things happen, I convinced her that she could do it herself and suggested the paint colour, DARK BROWN.
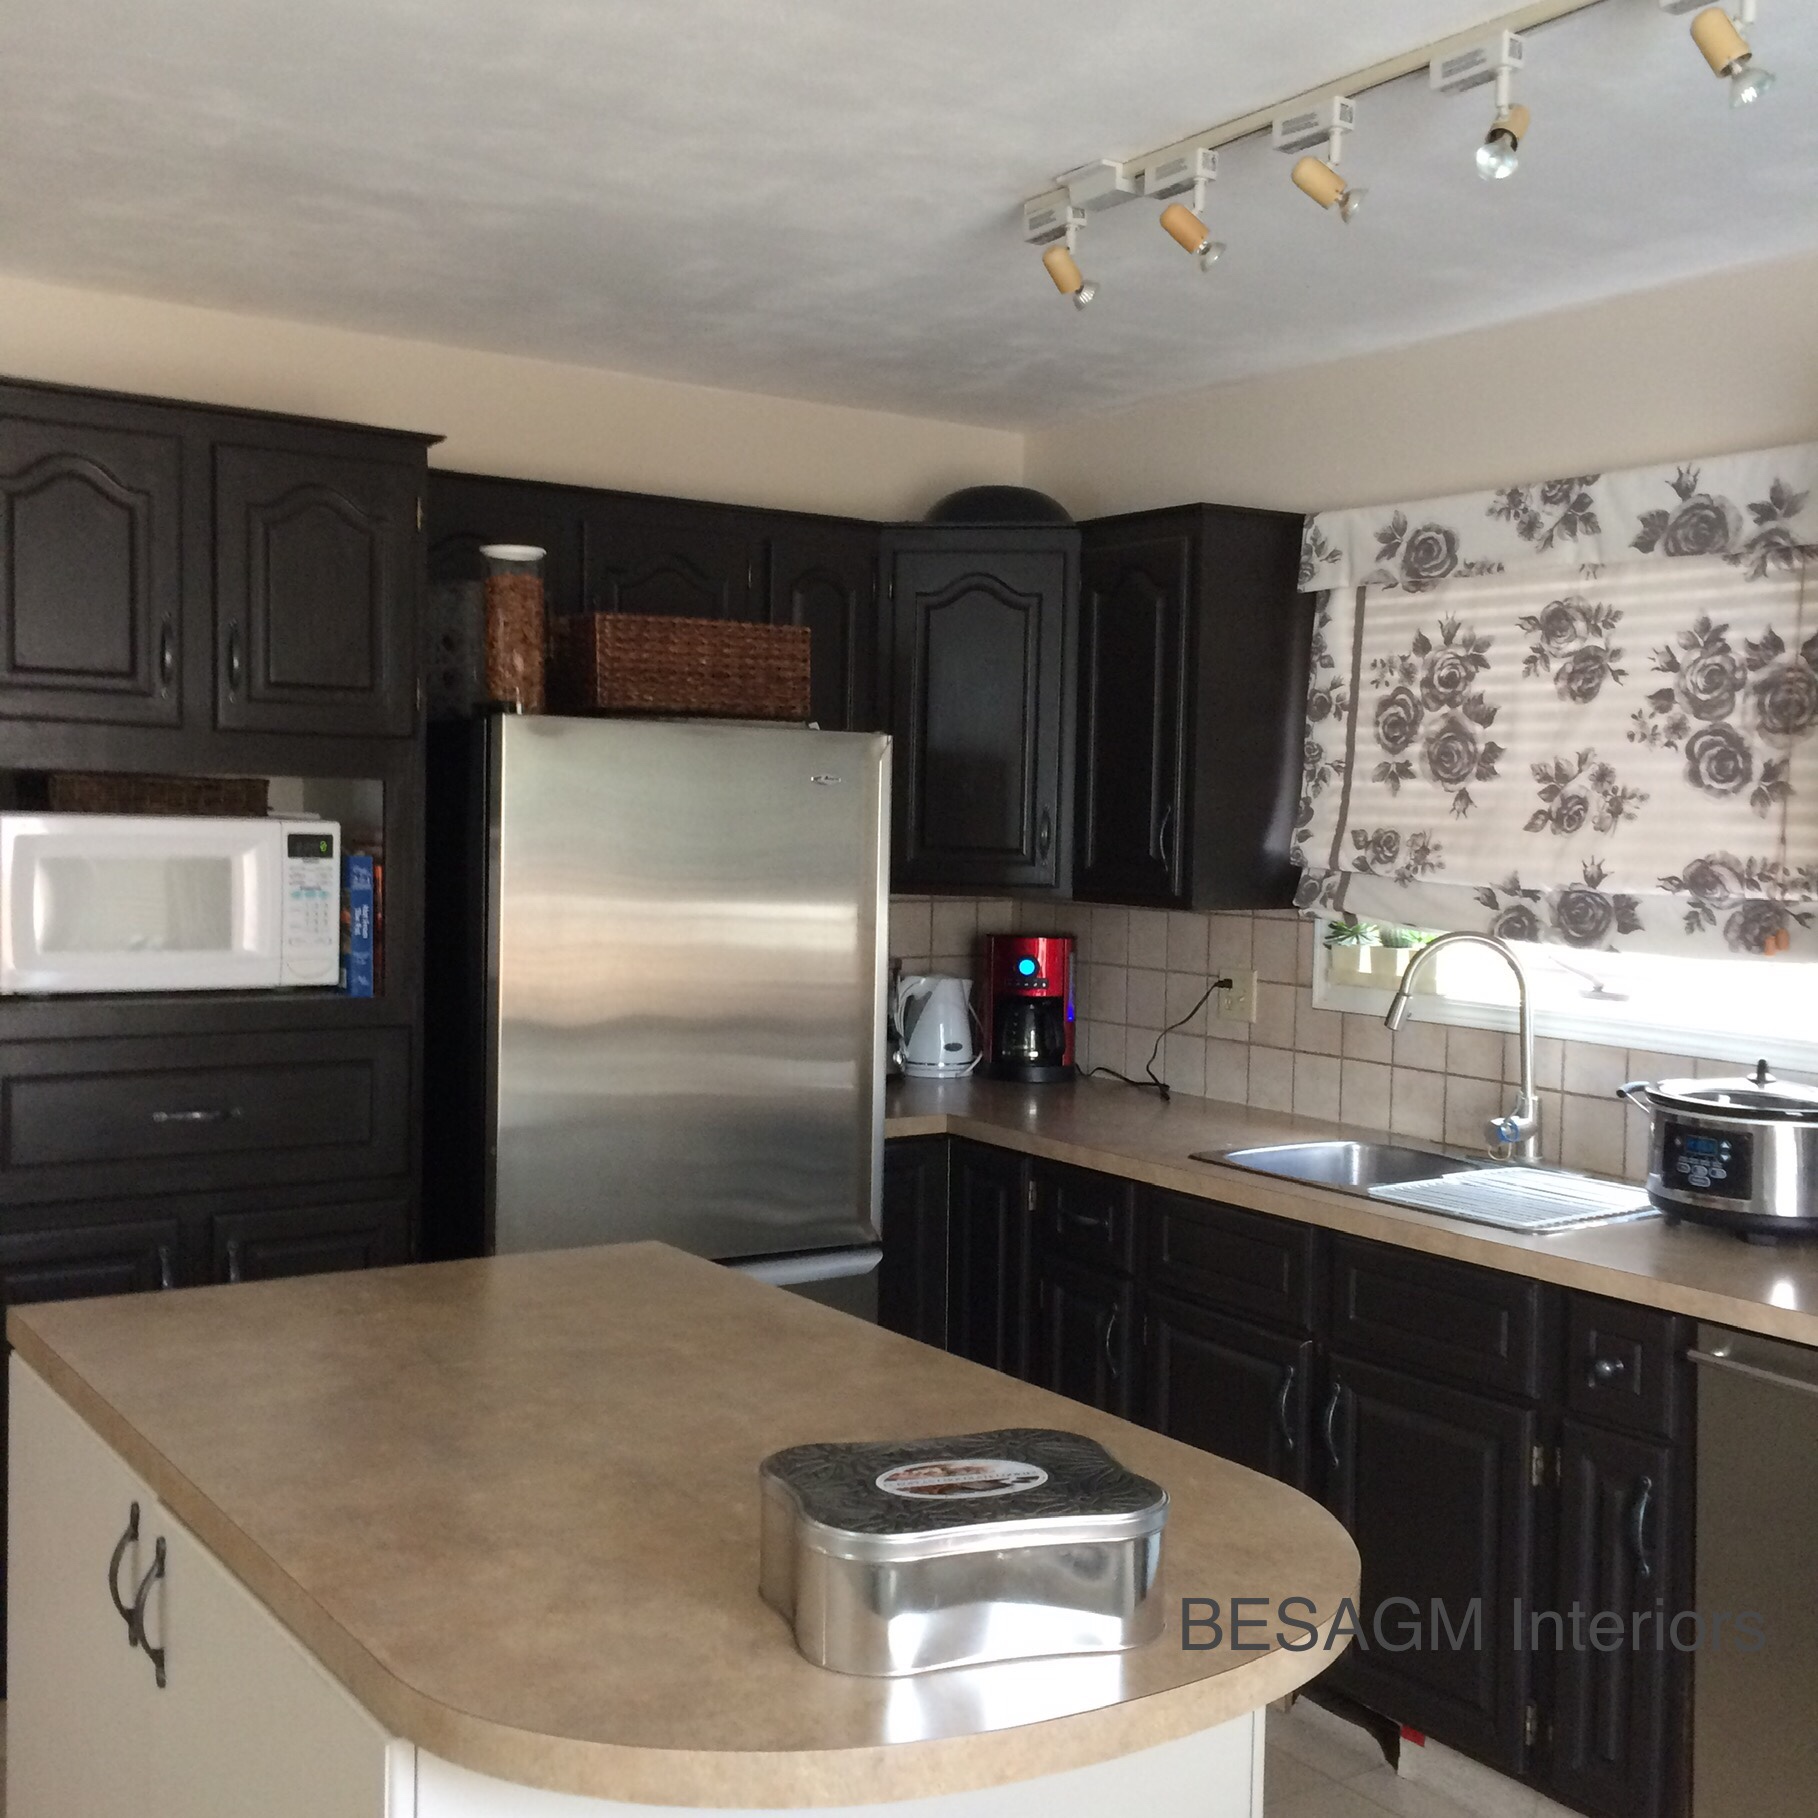
This was almost 10 years ago, when dark brown kitchens were trending. Her kitchen turned great in that colour then, it looked so updated and modern at that time, but sory, not anymore in 2019.
Sooo it was that right time now for another paint job and for some refreshing colours in her dark brown kitchen; therefore, here is now my sister’s facelifted kitchen with colours that have brought such a positive feeling and happiness to the family members and who can’t wait now to wake up and enjoy a morning coffee together before they all leave for work or school.

It all started as soon as I arrived at her home, for a lengthy visit this time! We immediately started talking about the kitchen makeover project, and came up with a colour pallete, as well as things that have to go, what stays in the kitchen and what should we get new for this project. We also allocated the budget of 200$, and luckily we were only a few bucks over the budget!
We got rid of the old kitchen table and chairs and bought an IKEA round table and slightly used set of six quality chairs which I DIY the seats to fit our colour scheme.
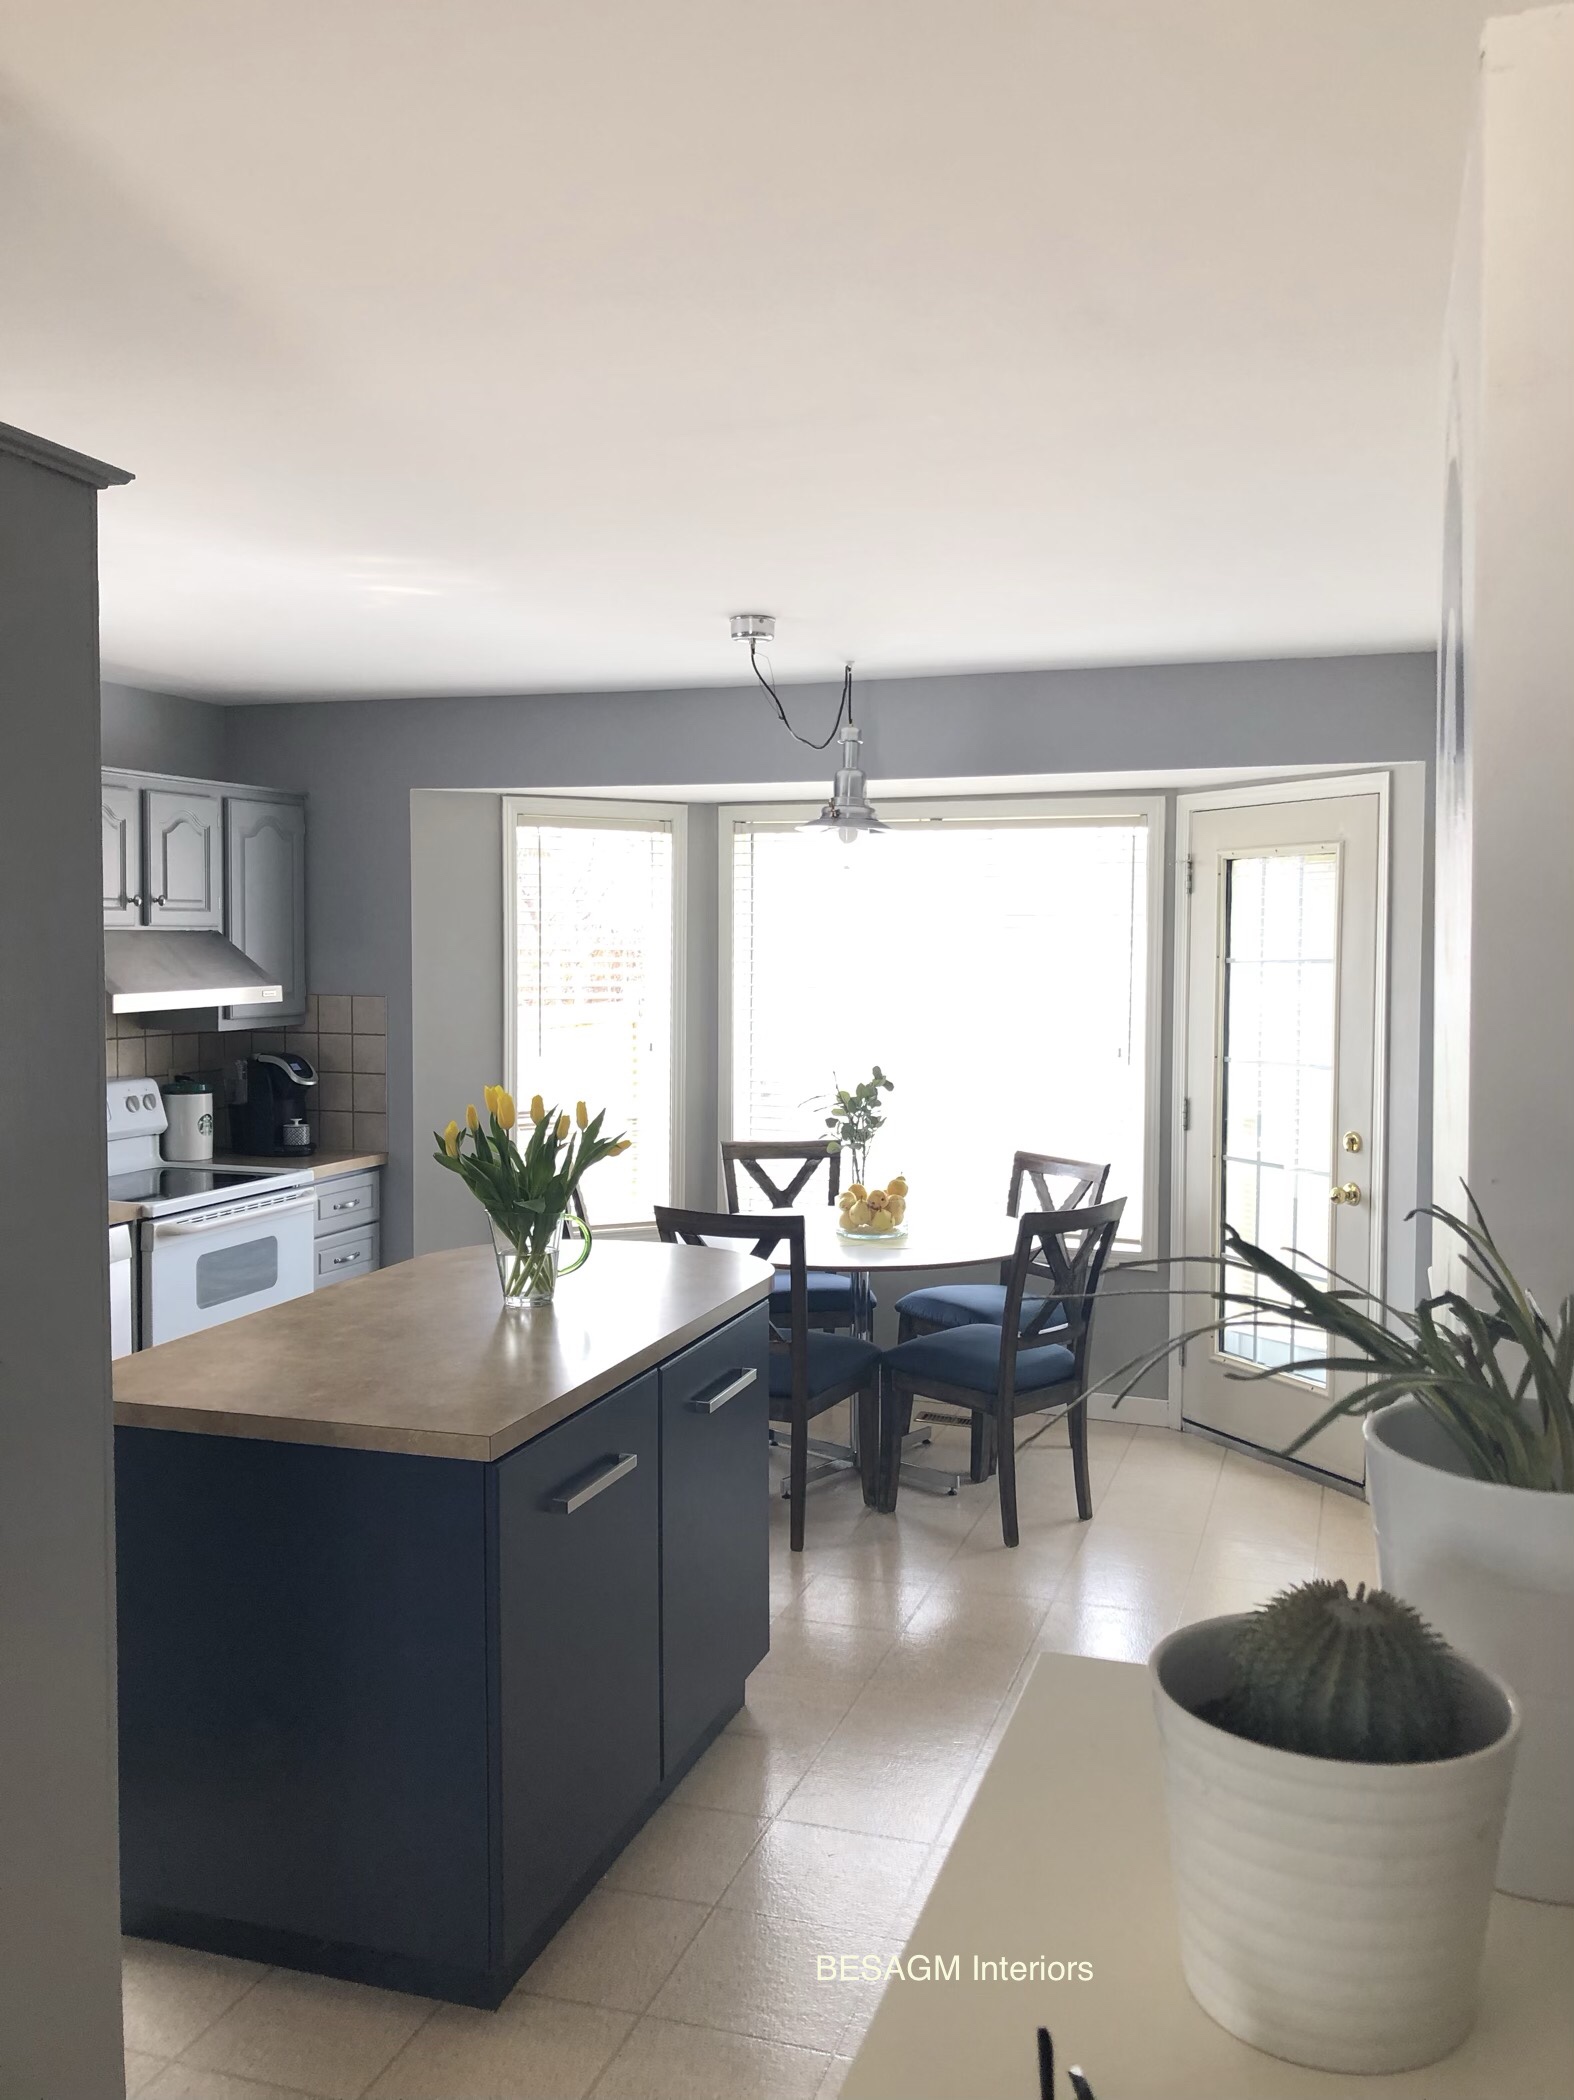
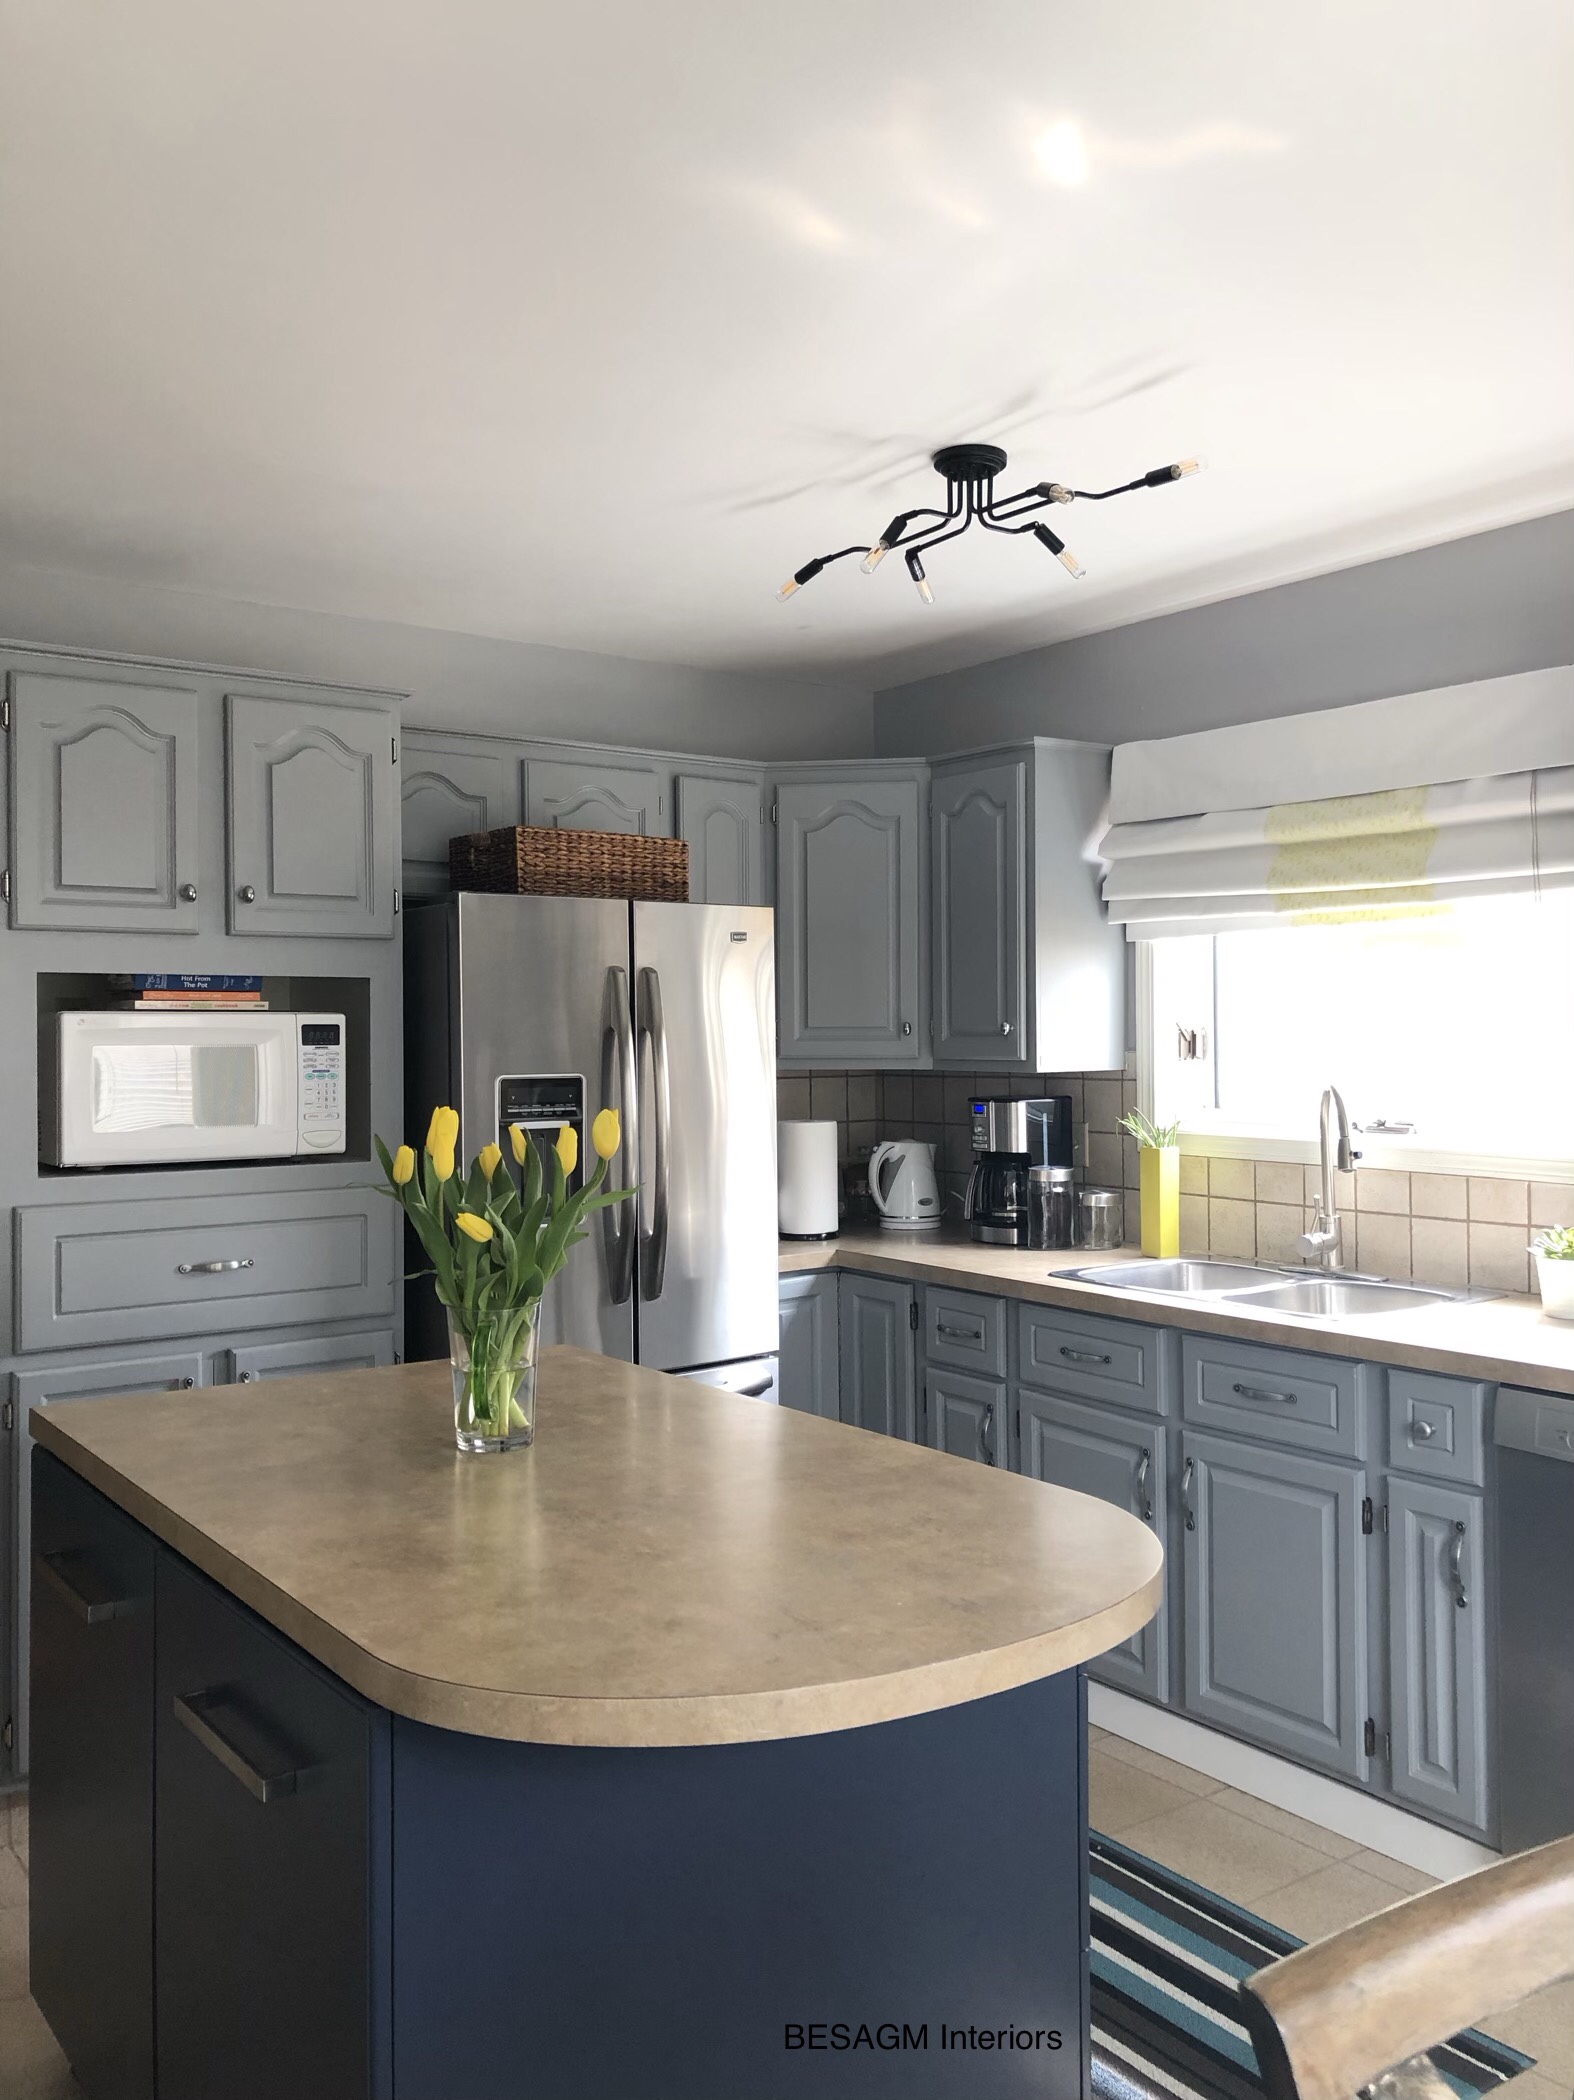
Getting rid of the kithchen light fixture which was really an eyesore in this kitchen was the first thing on my sister’s list, so this new spider shaped fixture that we purchased at the Home Depot, at a very affordable price, brought the whole new look to the space.

Navy blue seat covers really complement the kitchen island, which frankly was one of the kitchen parts that was kind of begging for a makeover, and I had the pleasure in painting the kitchen island.
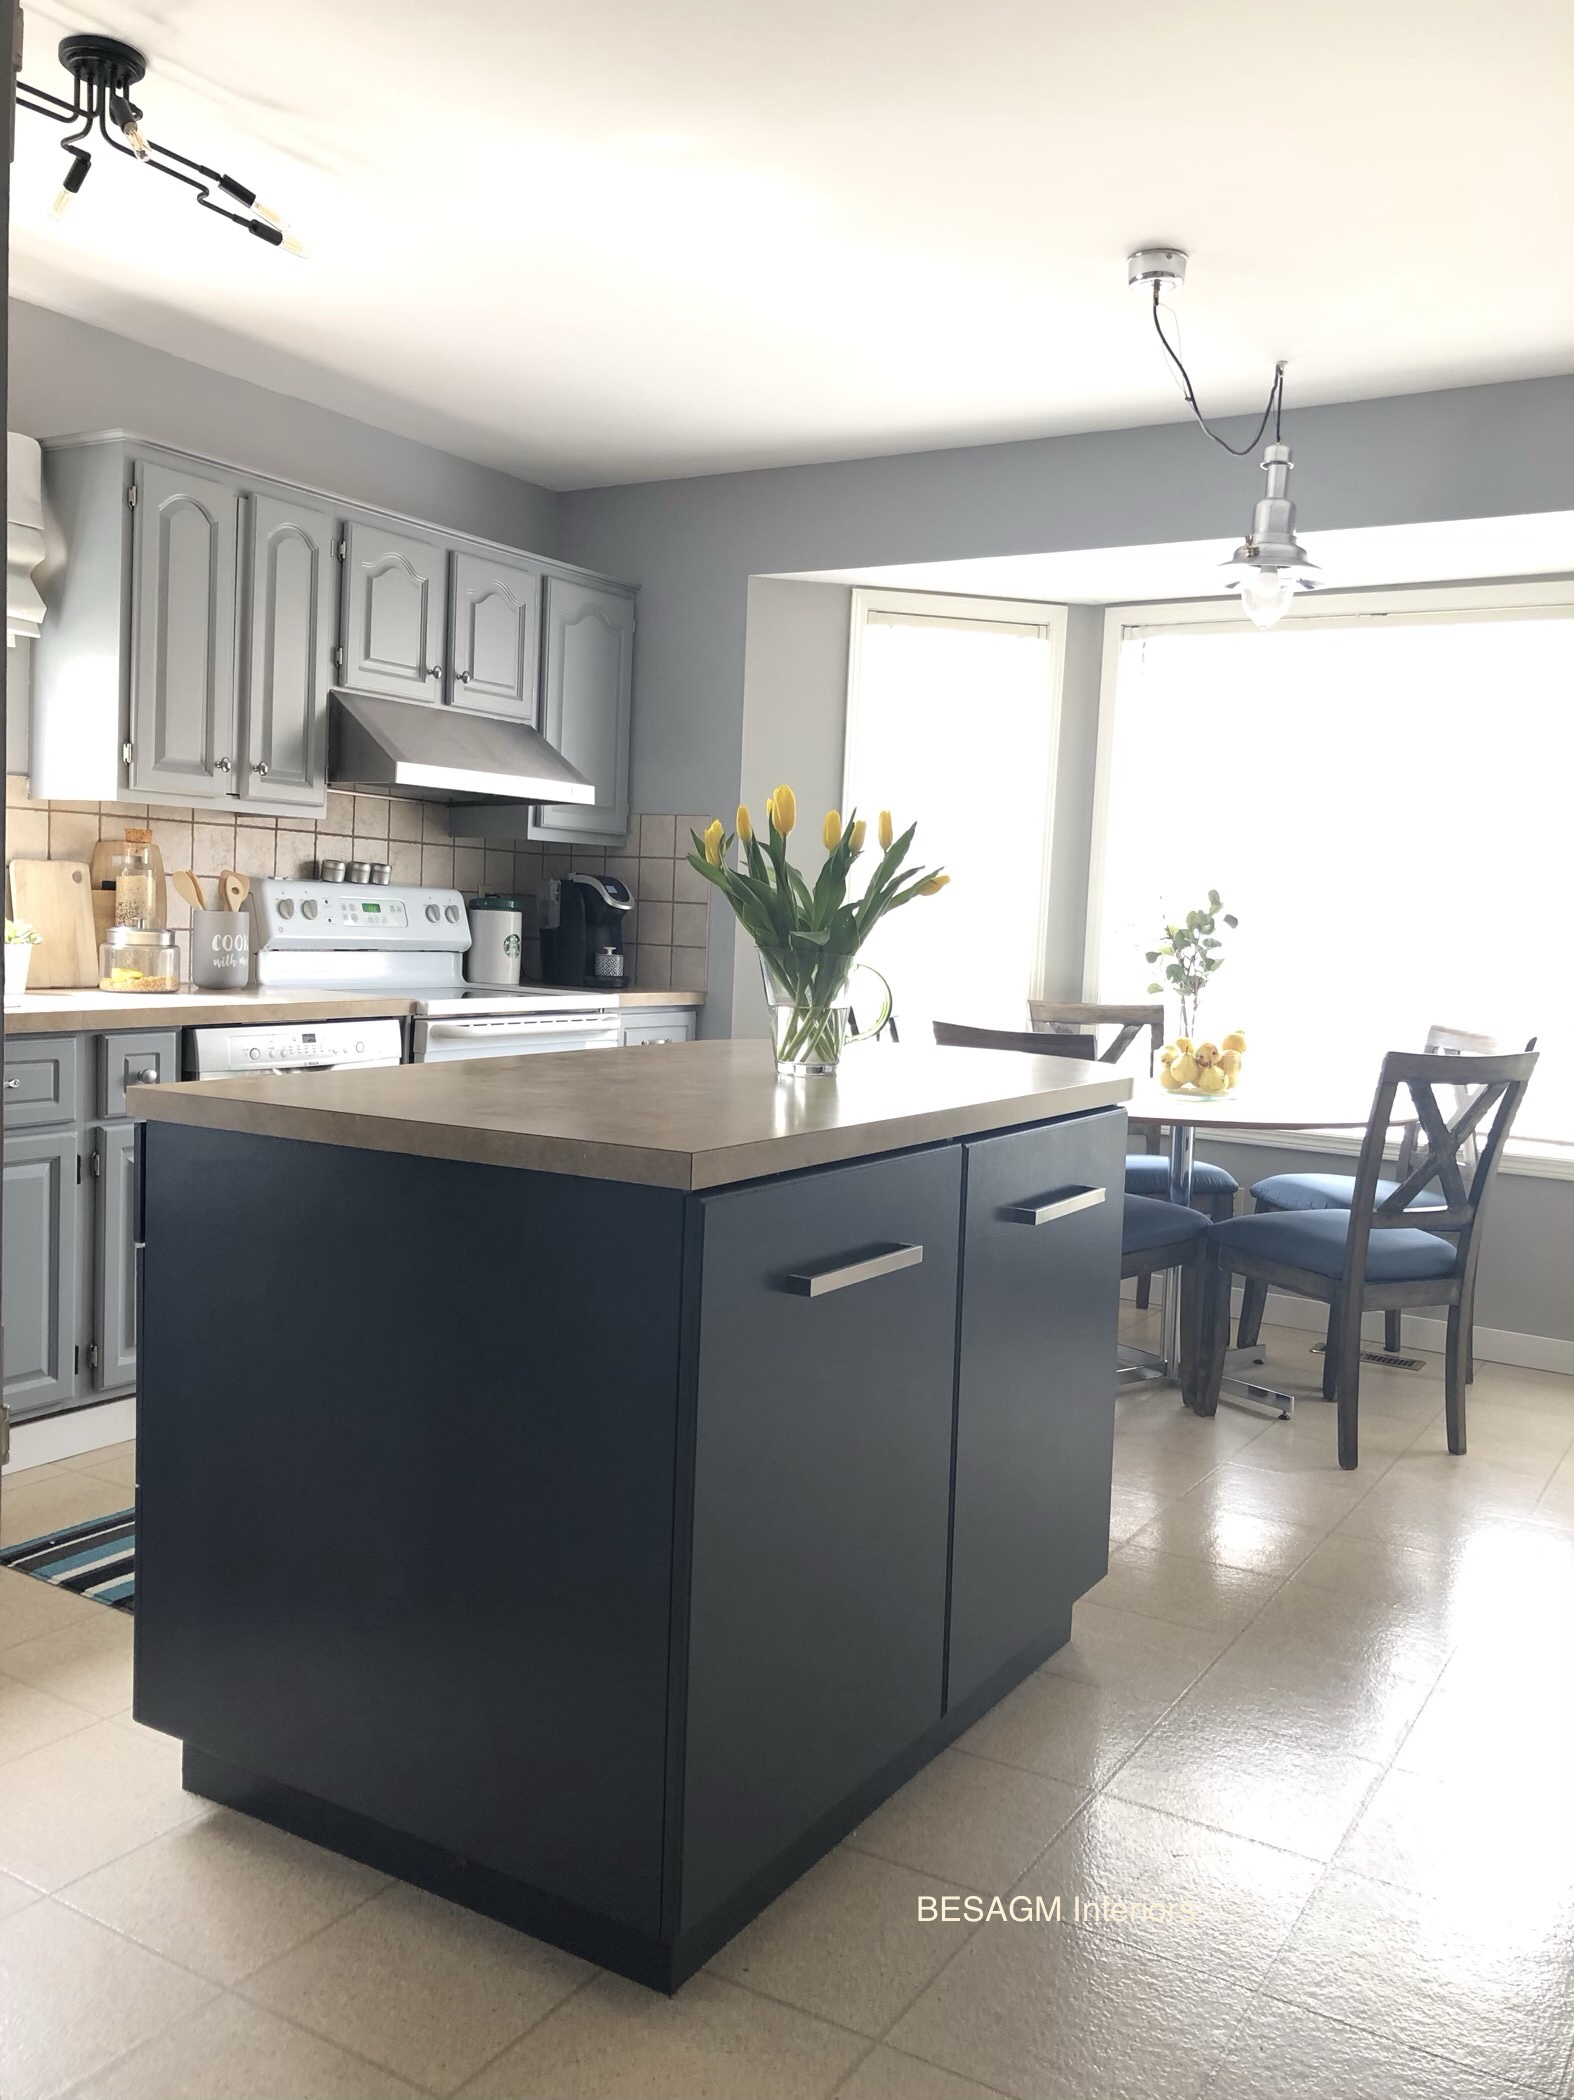
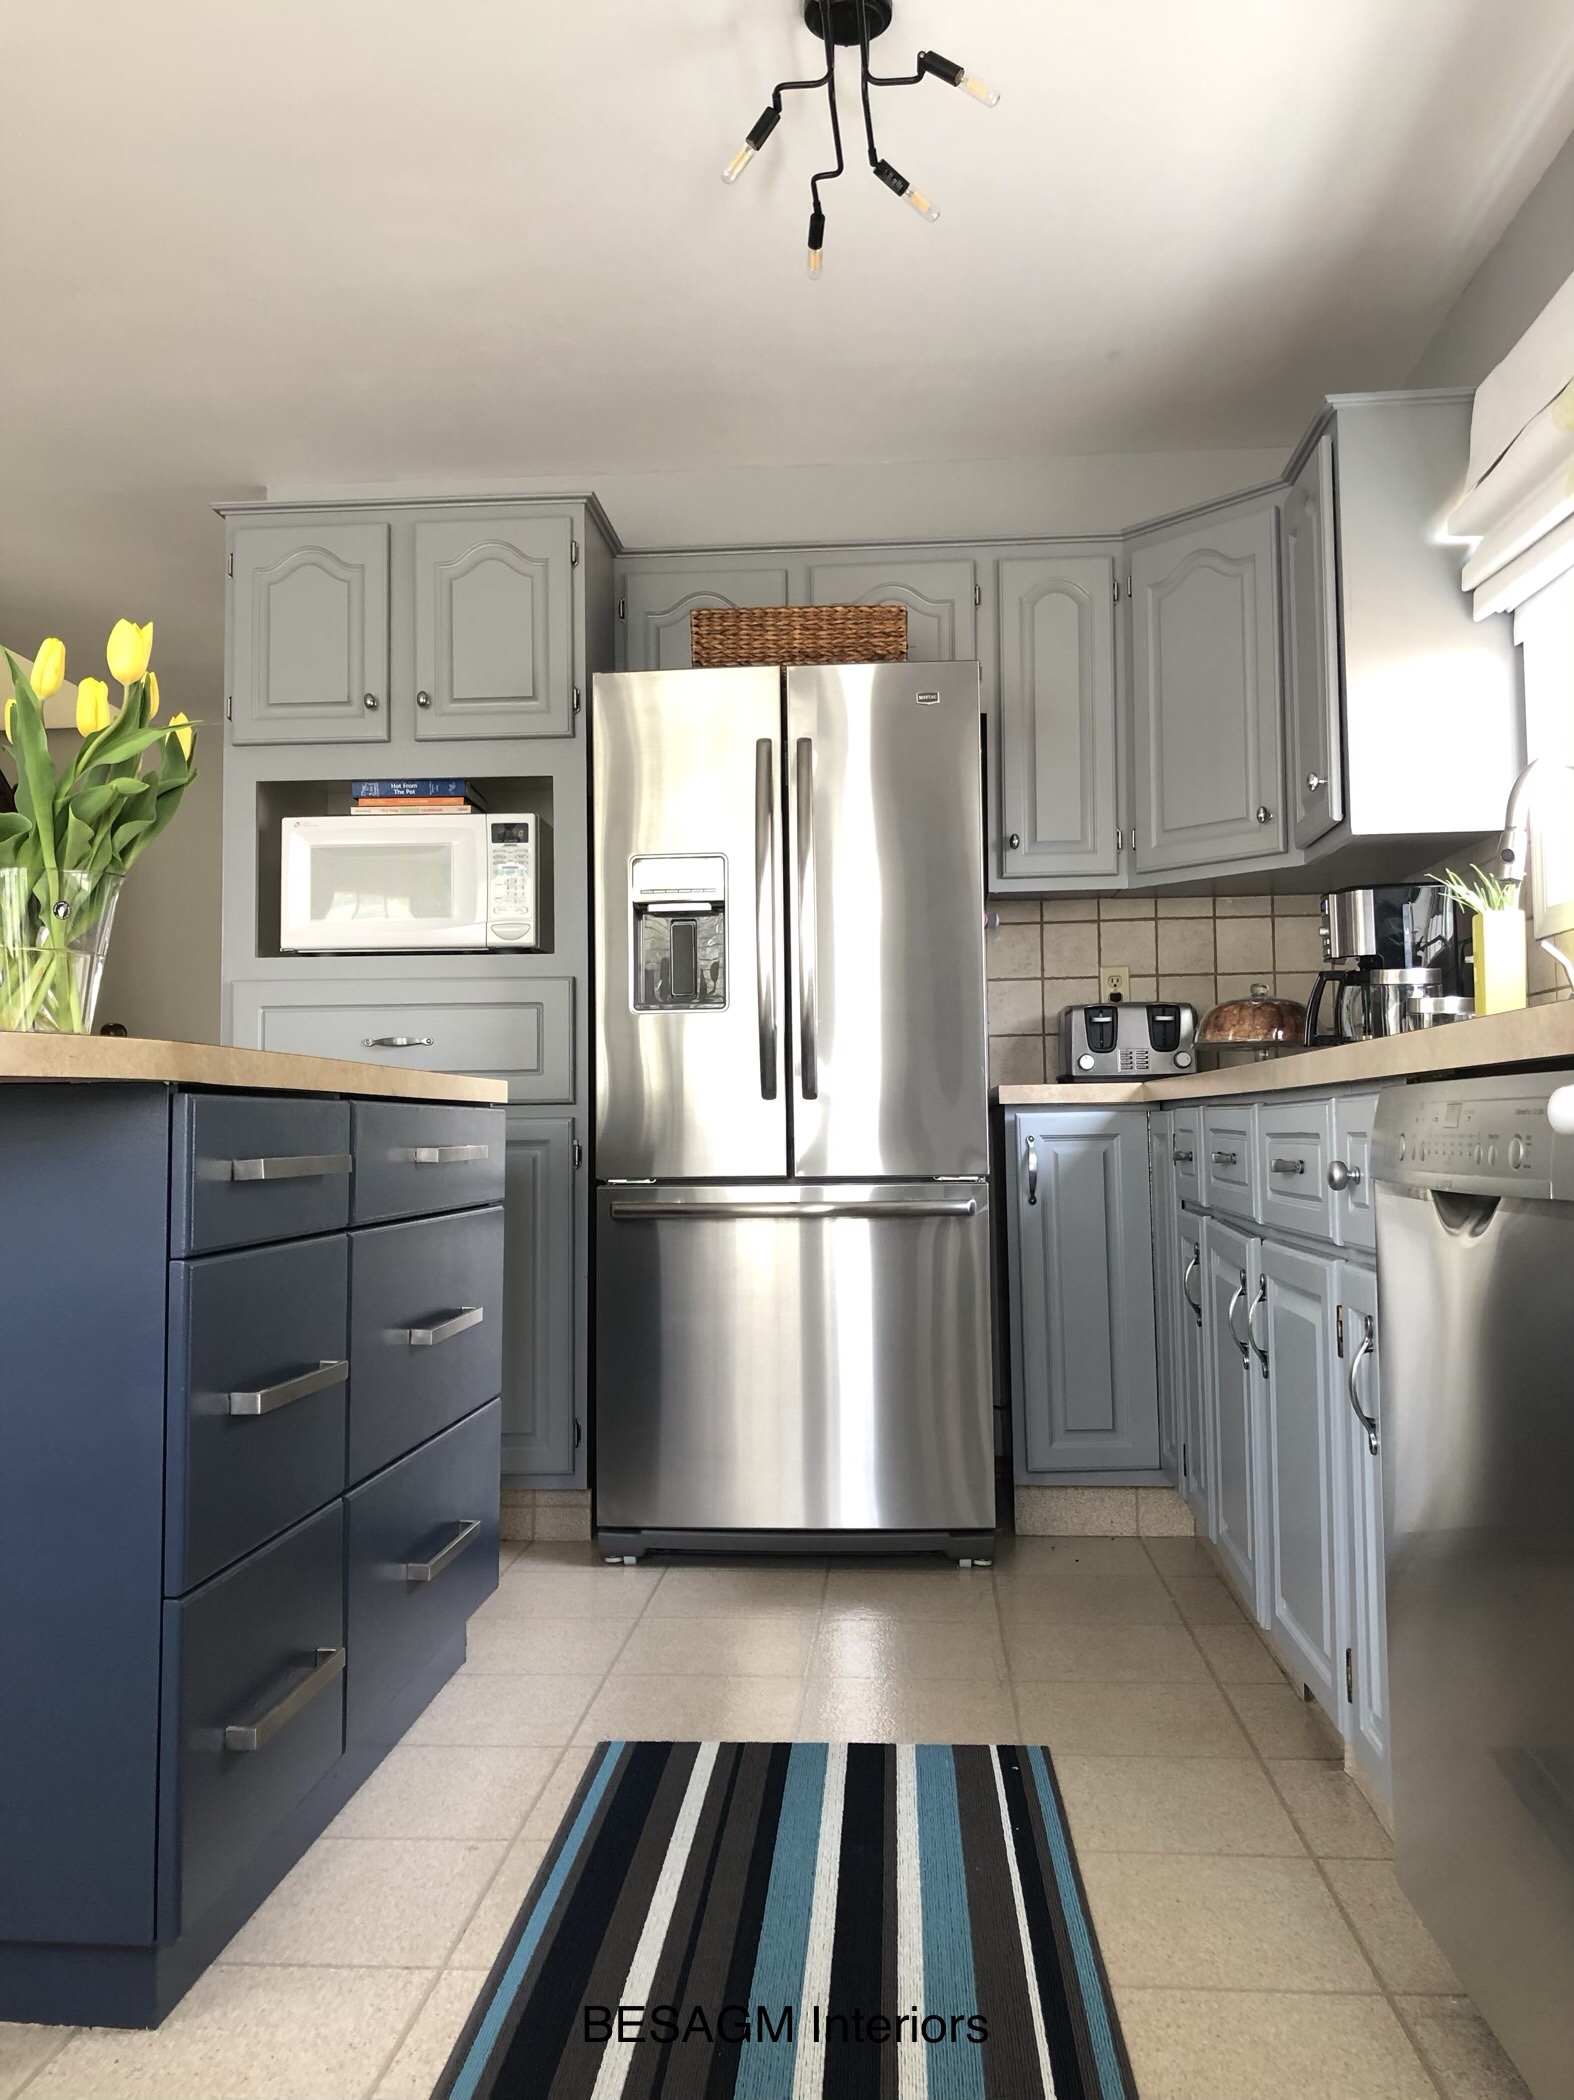
I applied one coat of primer and two coats of paint throughout the surfaces that needed to be painted, and the island was transformed completely and turned gorgeous after installing modern hardware which we scored at a price $2 each! The rich navy paint and modern brushed steel handles made this island the star of the kitchen.

My sister did the painting of the kitchen cabinets. My brother in law and nephew helped with unscrewing the hinges from the cabinet doors, and this step really helped for an even application of one coat of primer and two coats of paint. At the time we did the painting, the weather outside was most of the time cold so most of the paint job was done in the kitchen.
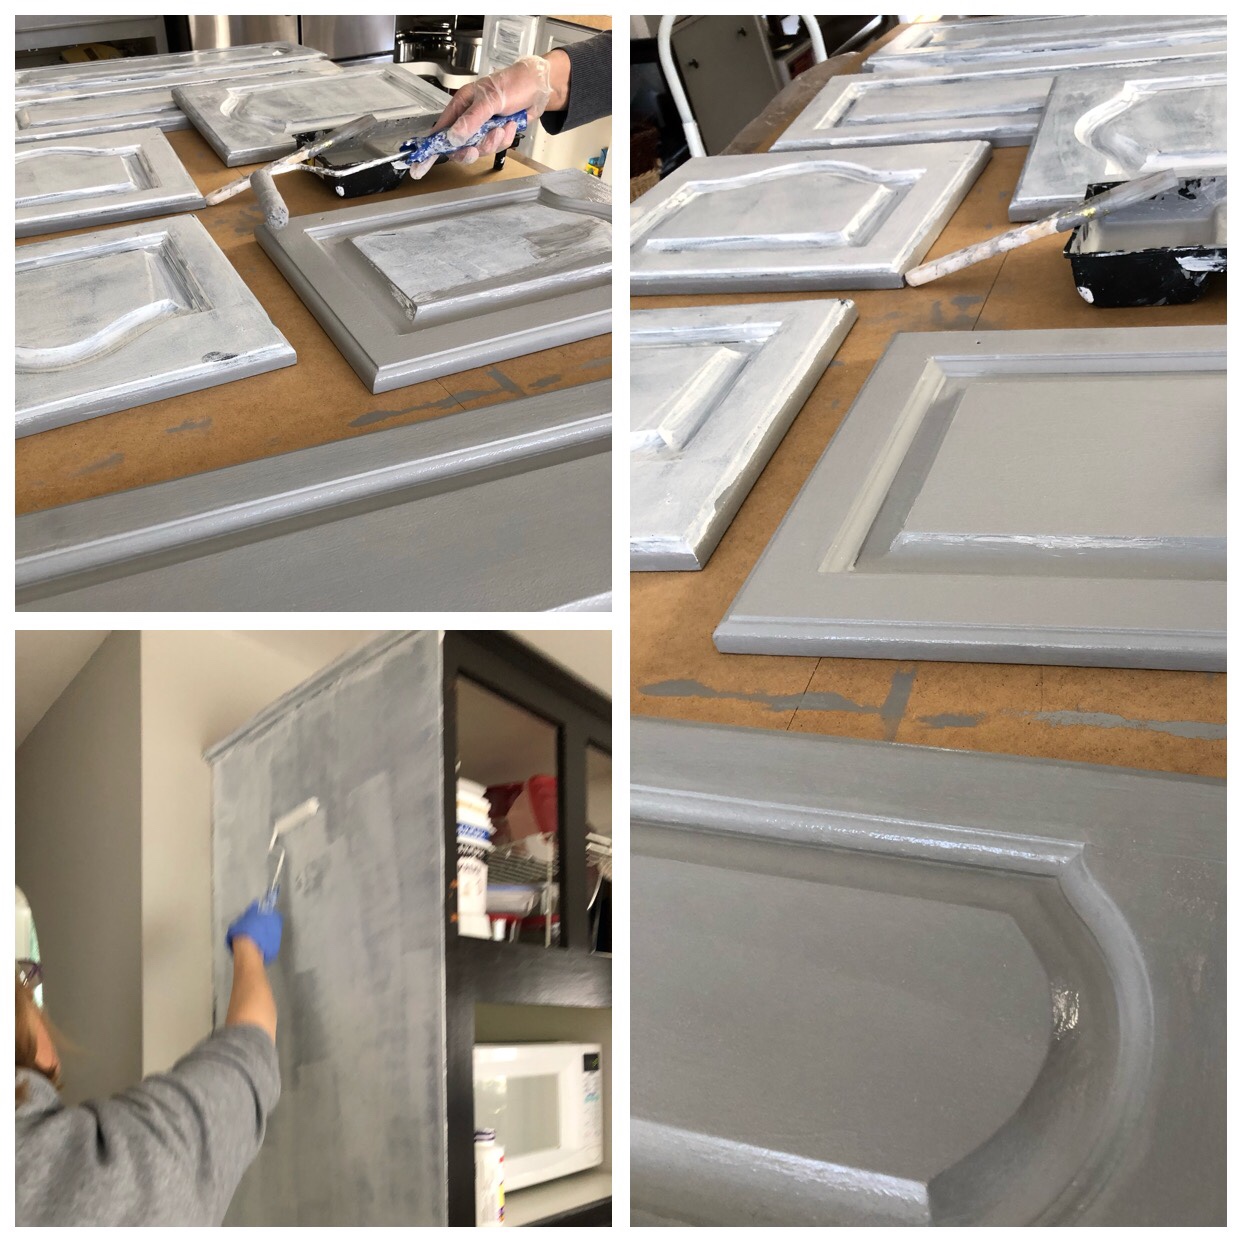
In addition to changing the colour of the kitchen cabinets to light grey with blu undertones, we also changed the handles on the upper parts of the cabinet doors, which were purchased at IKEA, and we sanded the existing ones to achieve the brushed steel effect.

So in this kitchen now there are mixed and matched handles throughout, and the end result is great; the kitchen doesn’t look boring and old, instead it feels fresh, clean and so much fun.

For the kitchen window I also designed and sewed a curtain panel which I attached it to the existing roman shade and it functions perfectly and looks so crisp and stylish. The white fabric used for this project is high quality cotton with black out backing. The middle yellow stripe is a fabric that is sewn on top of the white one and it really makes this roman shade so special and unique.
So here are some more pictures which are not high quality ones; they were taken with my I phone 8 Plus as I did not have my camera with me.


Does your kitchen looks outdated and you cannot afford a major kitchen renovation? Consider a kitchen facelift with paint and new hardware. They will do the trick and you will fall in love with your kitchen again! Consider also consultation with a designer or stylist regarding the colour scheme, hardware and other tricks that may be used to bring an outdated kitchen from drab to fab! BESA GM Interiors offers such consultation services so write to us at besagmblog@gmail.com and we would be happy to help!

Thank you for reading this post, and check again for new interesting postings!
Besa

Omg, what an amazing transformation. It looks elegant and so cozy. I just couldn’t get enough of these beautiful pictures.