
After a successful completion of the painting project of an upholstered wingback chair I was ready to undertake another DYI challenge; reupholstering a wingback chair.
I have never done a project involving upholstery/reupholstery so to me only the thought of undertaking such a project was kind of intimidating. However, the wingback chair for this project was for free so I would not have to lose that much in case the project did not go well.
I proceeded with the purchase of 5 meters of fabric in a local fabric store as I was impatient to buy online and wait up to a week for delivery. Online fabric selection is huge, and after I finished the project I kind of had regrets for not ordering online the striped fabric that I liked. Well, instead of the lovely striped fabric I now have an unique zig zag one.
Before starting this project I did a bit of research as to what is involved during the reupholstery process. Even though some of the tips and experiences found on the internet were helpful, I faced some challenges which I think were particular to the chair at hand. For example, the fabric and the piping on the wings of the chair required sewing, as oppose to some other chairs where the piping as well as the fabric on the wings are stapled on. I had difficulties fitting perfectly the wing pieces onto the chair after sewing, and I was quite annoyed with this.
I started with stripping off the fabric from the chair. Where to start? You start there where the staples are visible. In my chair the staples were visible at the bottom of the chair. I started at the bottom, and then I removed the back of the chair.

The back part was attached with a strip of 1 inch nails, which I carefully removed and reused later.
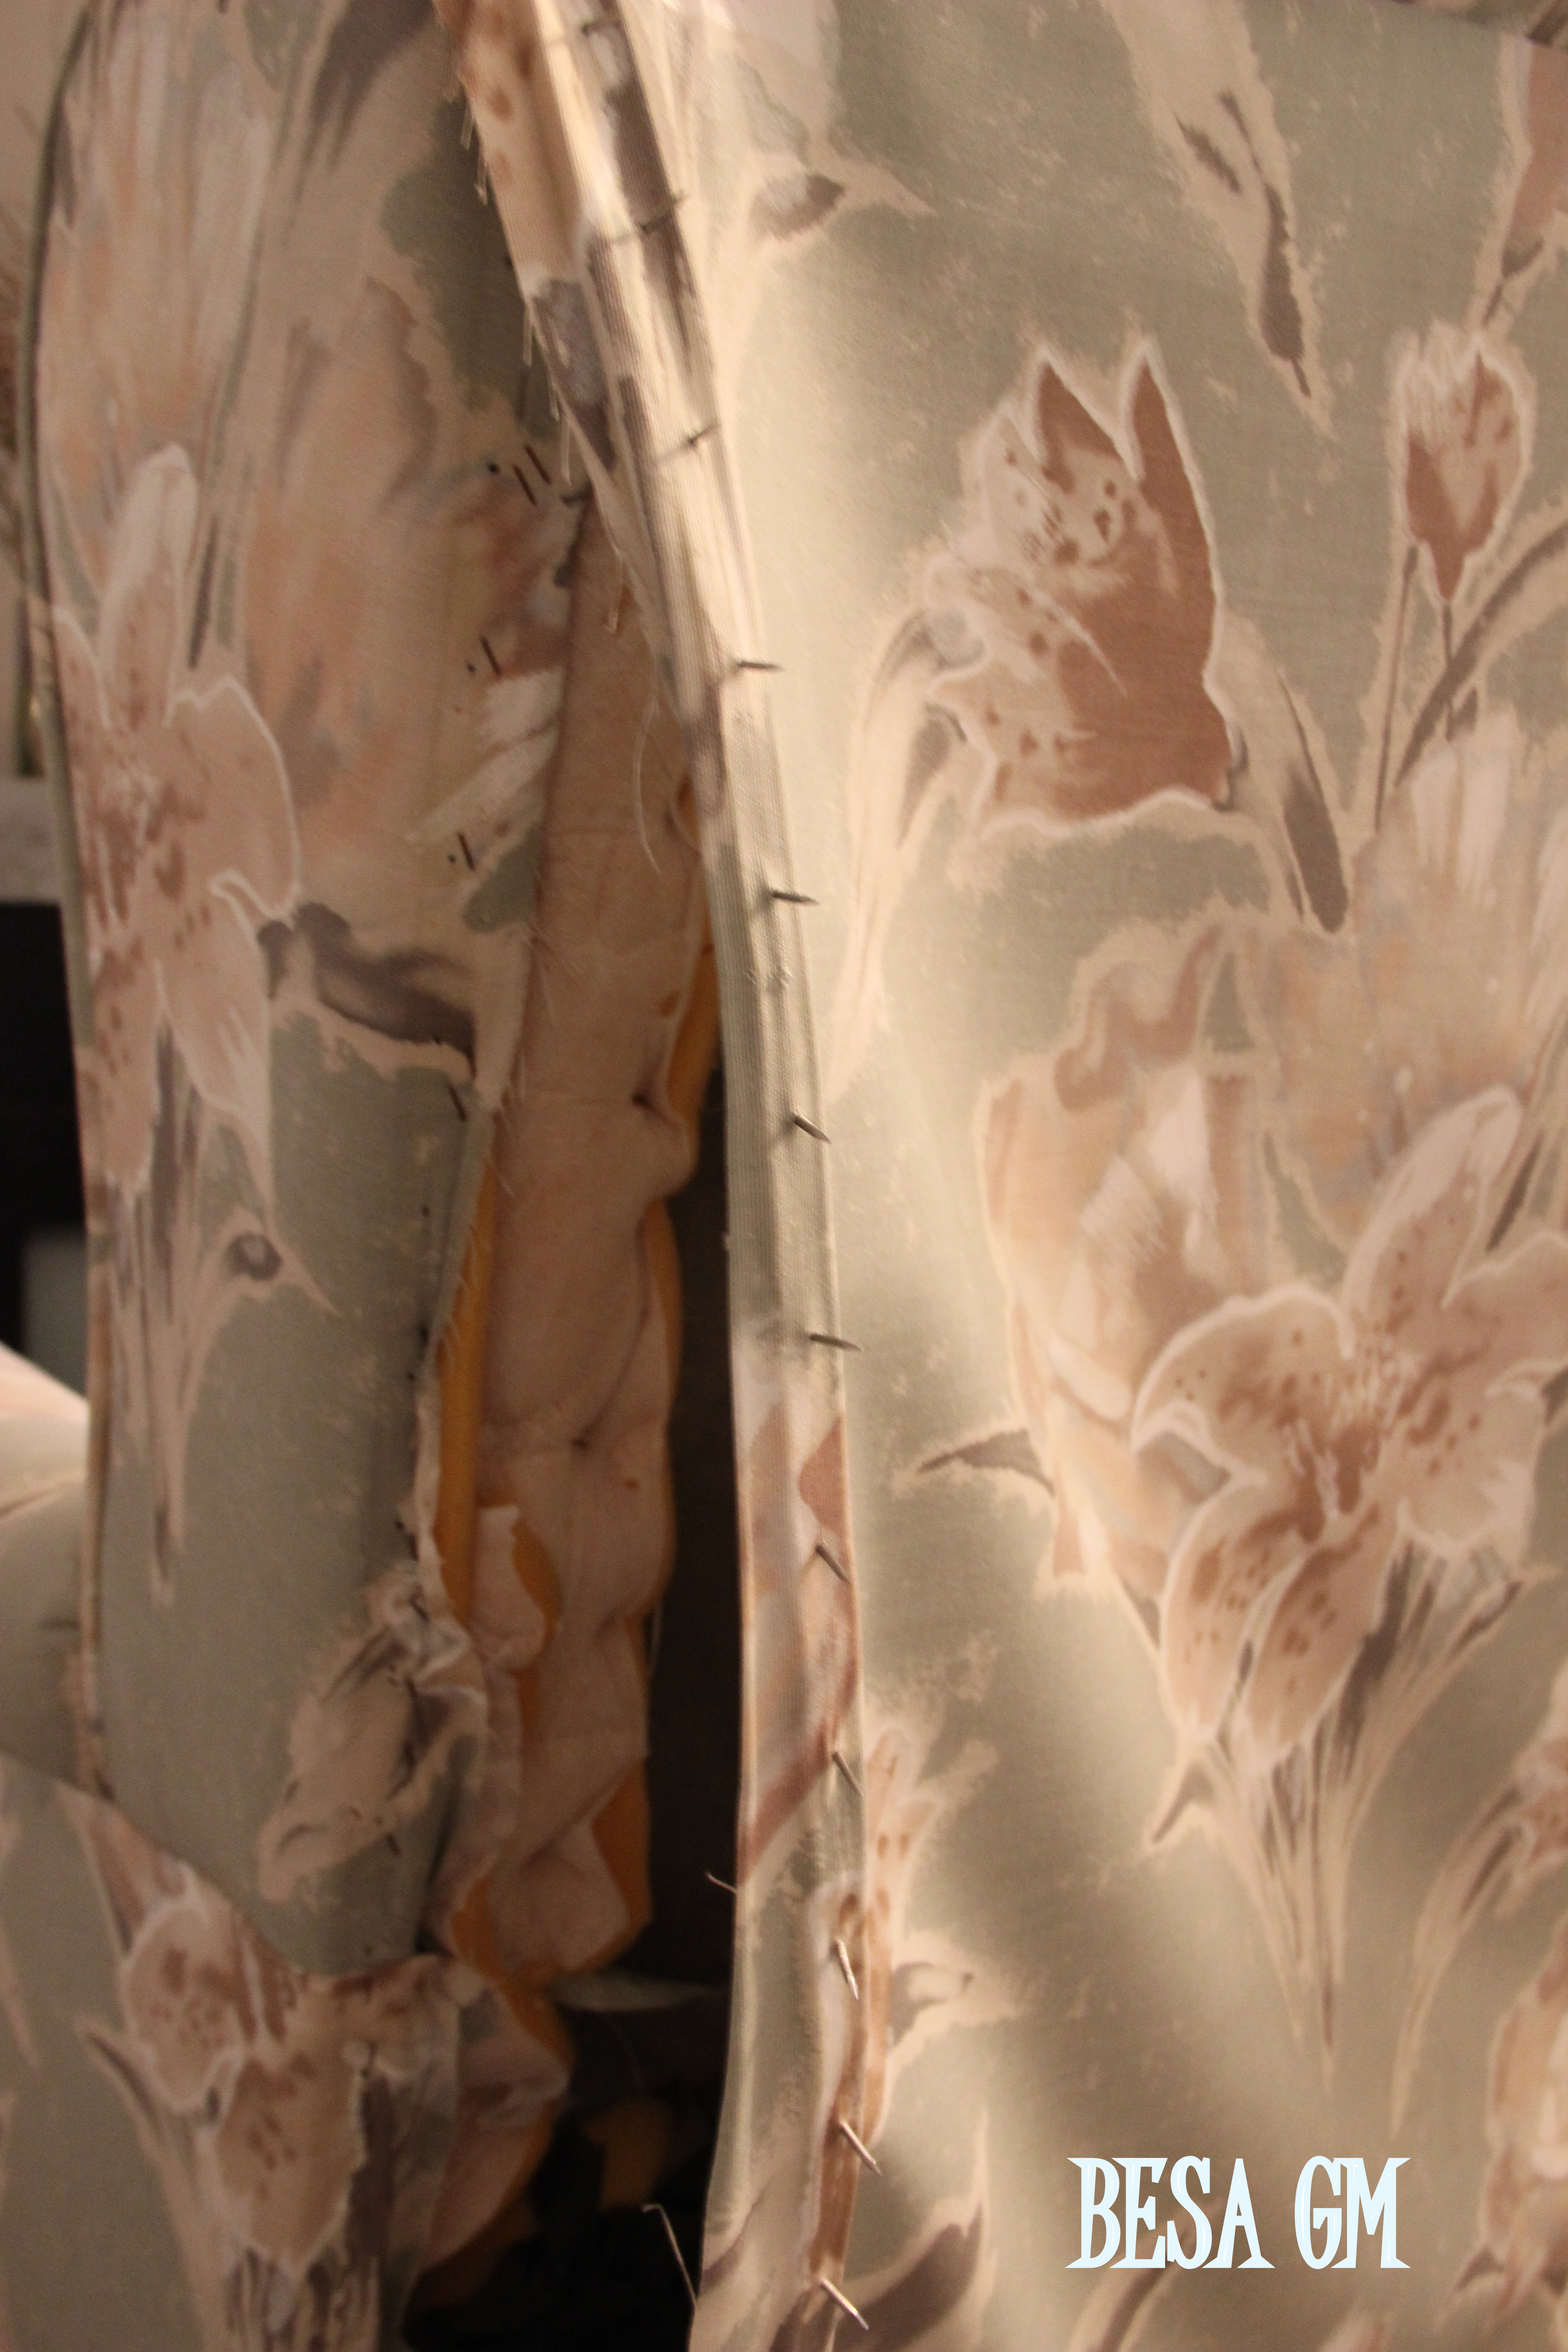
After removing the back, you will figure out which part is next for removing. Continue until you remove the last piece.

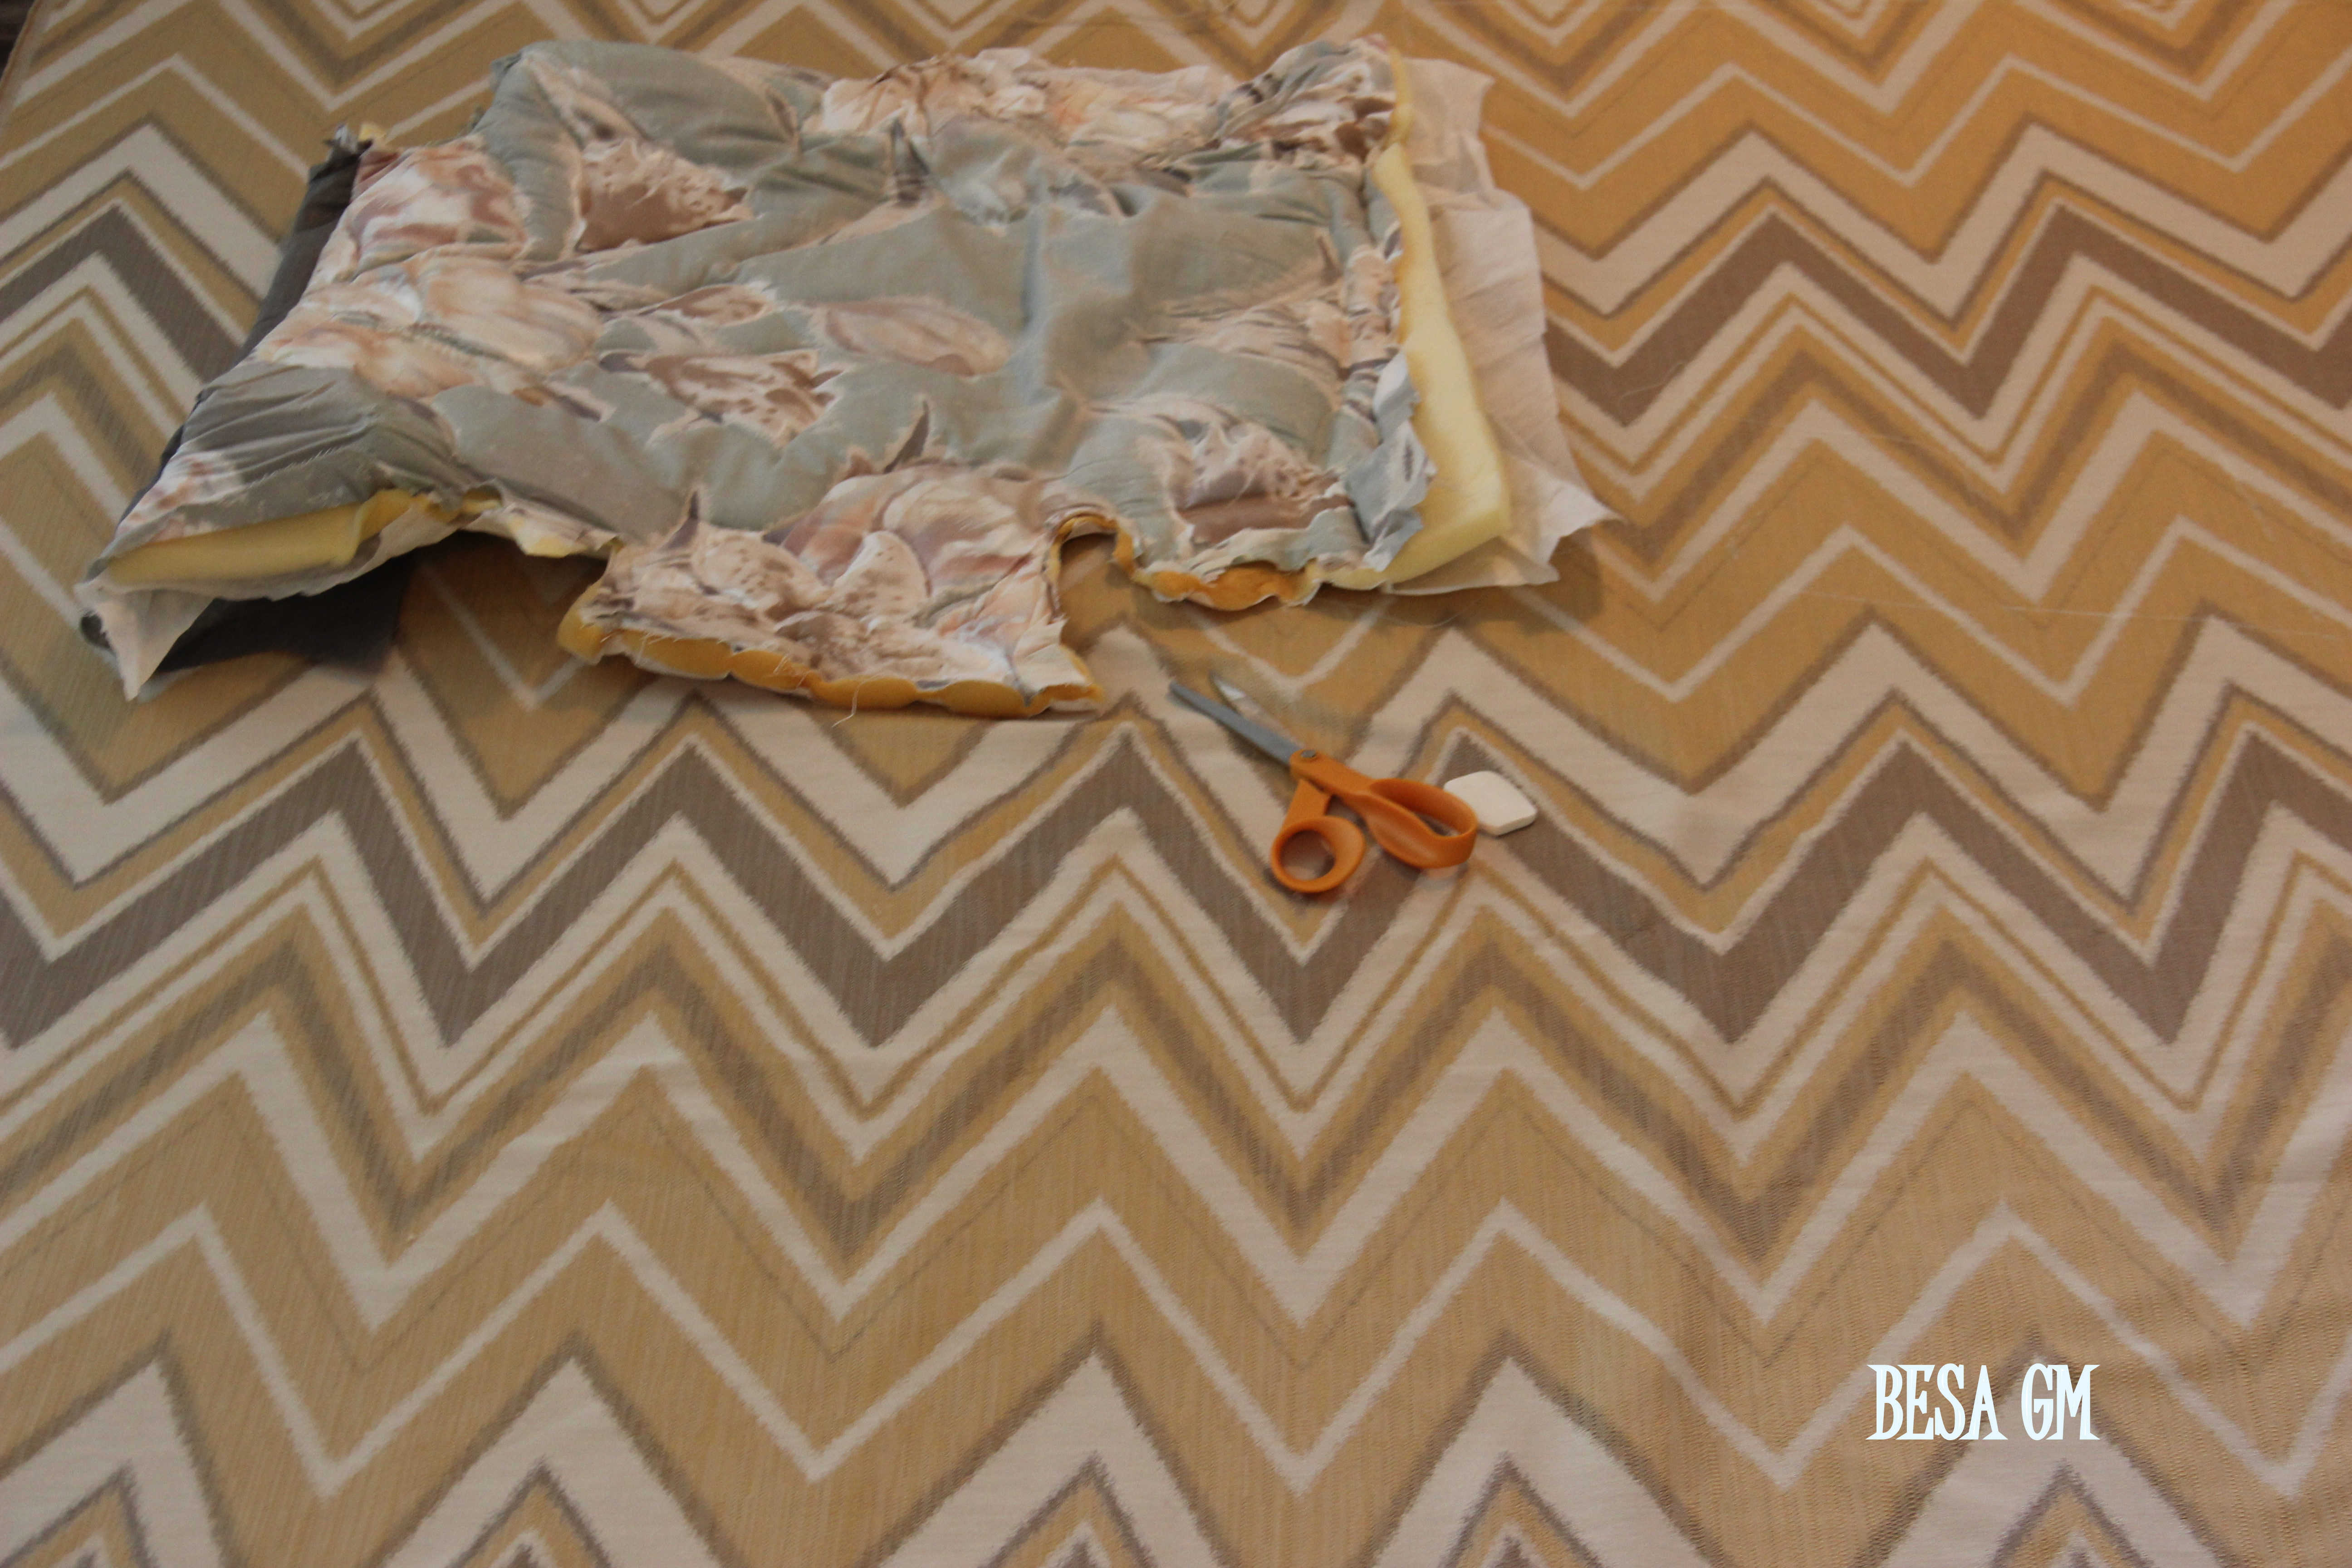
Take pictures of each step and also mark pieces by numbers and arrows for directions ( up/down/left/right) as this will help for a better placement of the old pattern piece onto the new fabric.

This step (numbering) is also helpful when putting back the new cut pieces as your will refer to numbers, starting to staple a piece with the last number first.
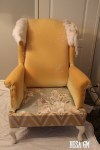
After stripping off the fabric and taking all those staples off, I spray painted the chair legs with Rustoleum-HeirloomWhite and proceeded with the preparation for reupholstering: using a seam ripper I took apart pieces that were sewn together; ironed the old pieces which served as a pattern and sewed the piping (reused the existing one). I did not change the batting since it was still in great condition.

I laid the fabric for cutting, and considering that I had to work around the fabric repeat pattern I had to cut one piece at a time. First I chose which part of the design I wanted to appear on the back of the chair, ( grey zig zag line) and then worked around that design.
I started to apply the new pieces in the opposite order that they were removed, and as I mentioned above if you mark the old pieces with numbers then this process will go smoothly.


Pulling the fabric while stapling is very important, as you will get a tight and nice professional finish. My fabric was not a thicker one so I found the pulling part quite challenging in a way. Another challenge was the fabric repeat pattern. The repeat was every meeter, so considering that I only had five meters (very small amount considering the wide repeat) I had to be extra careful with the pattern placement without jeopardizing the overall design.
I used an electric stapler, and I must say that I was not satisfied with its performance as most of the staples had to be hammered down.
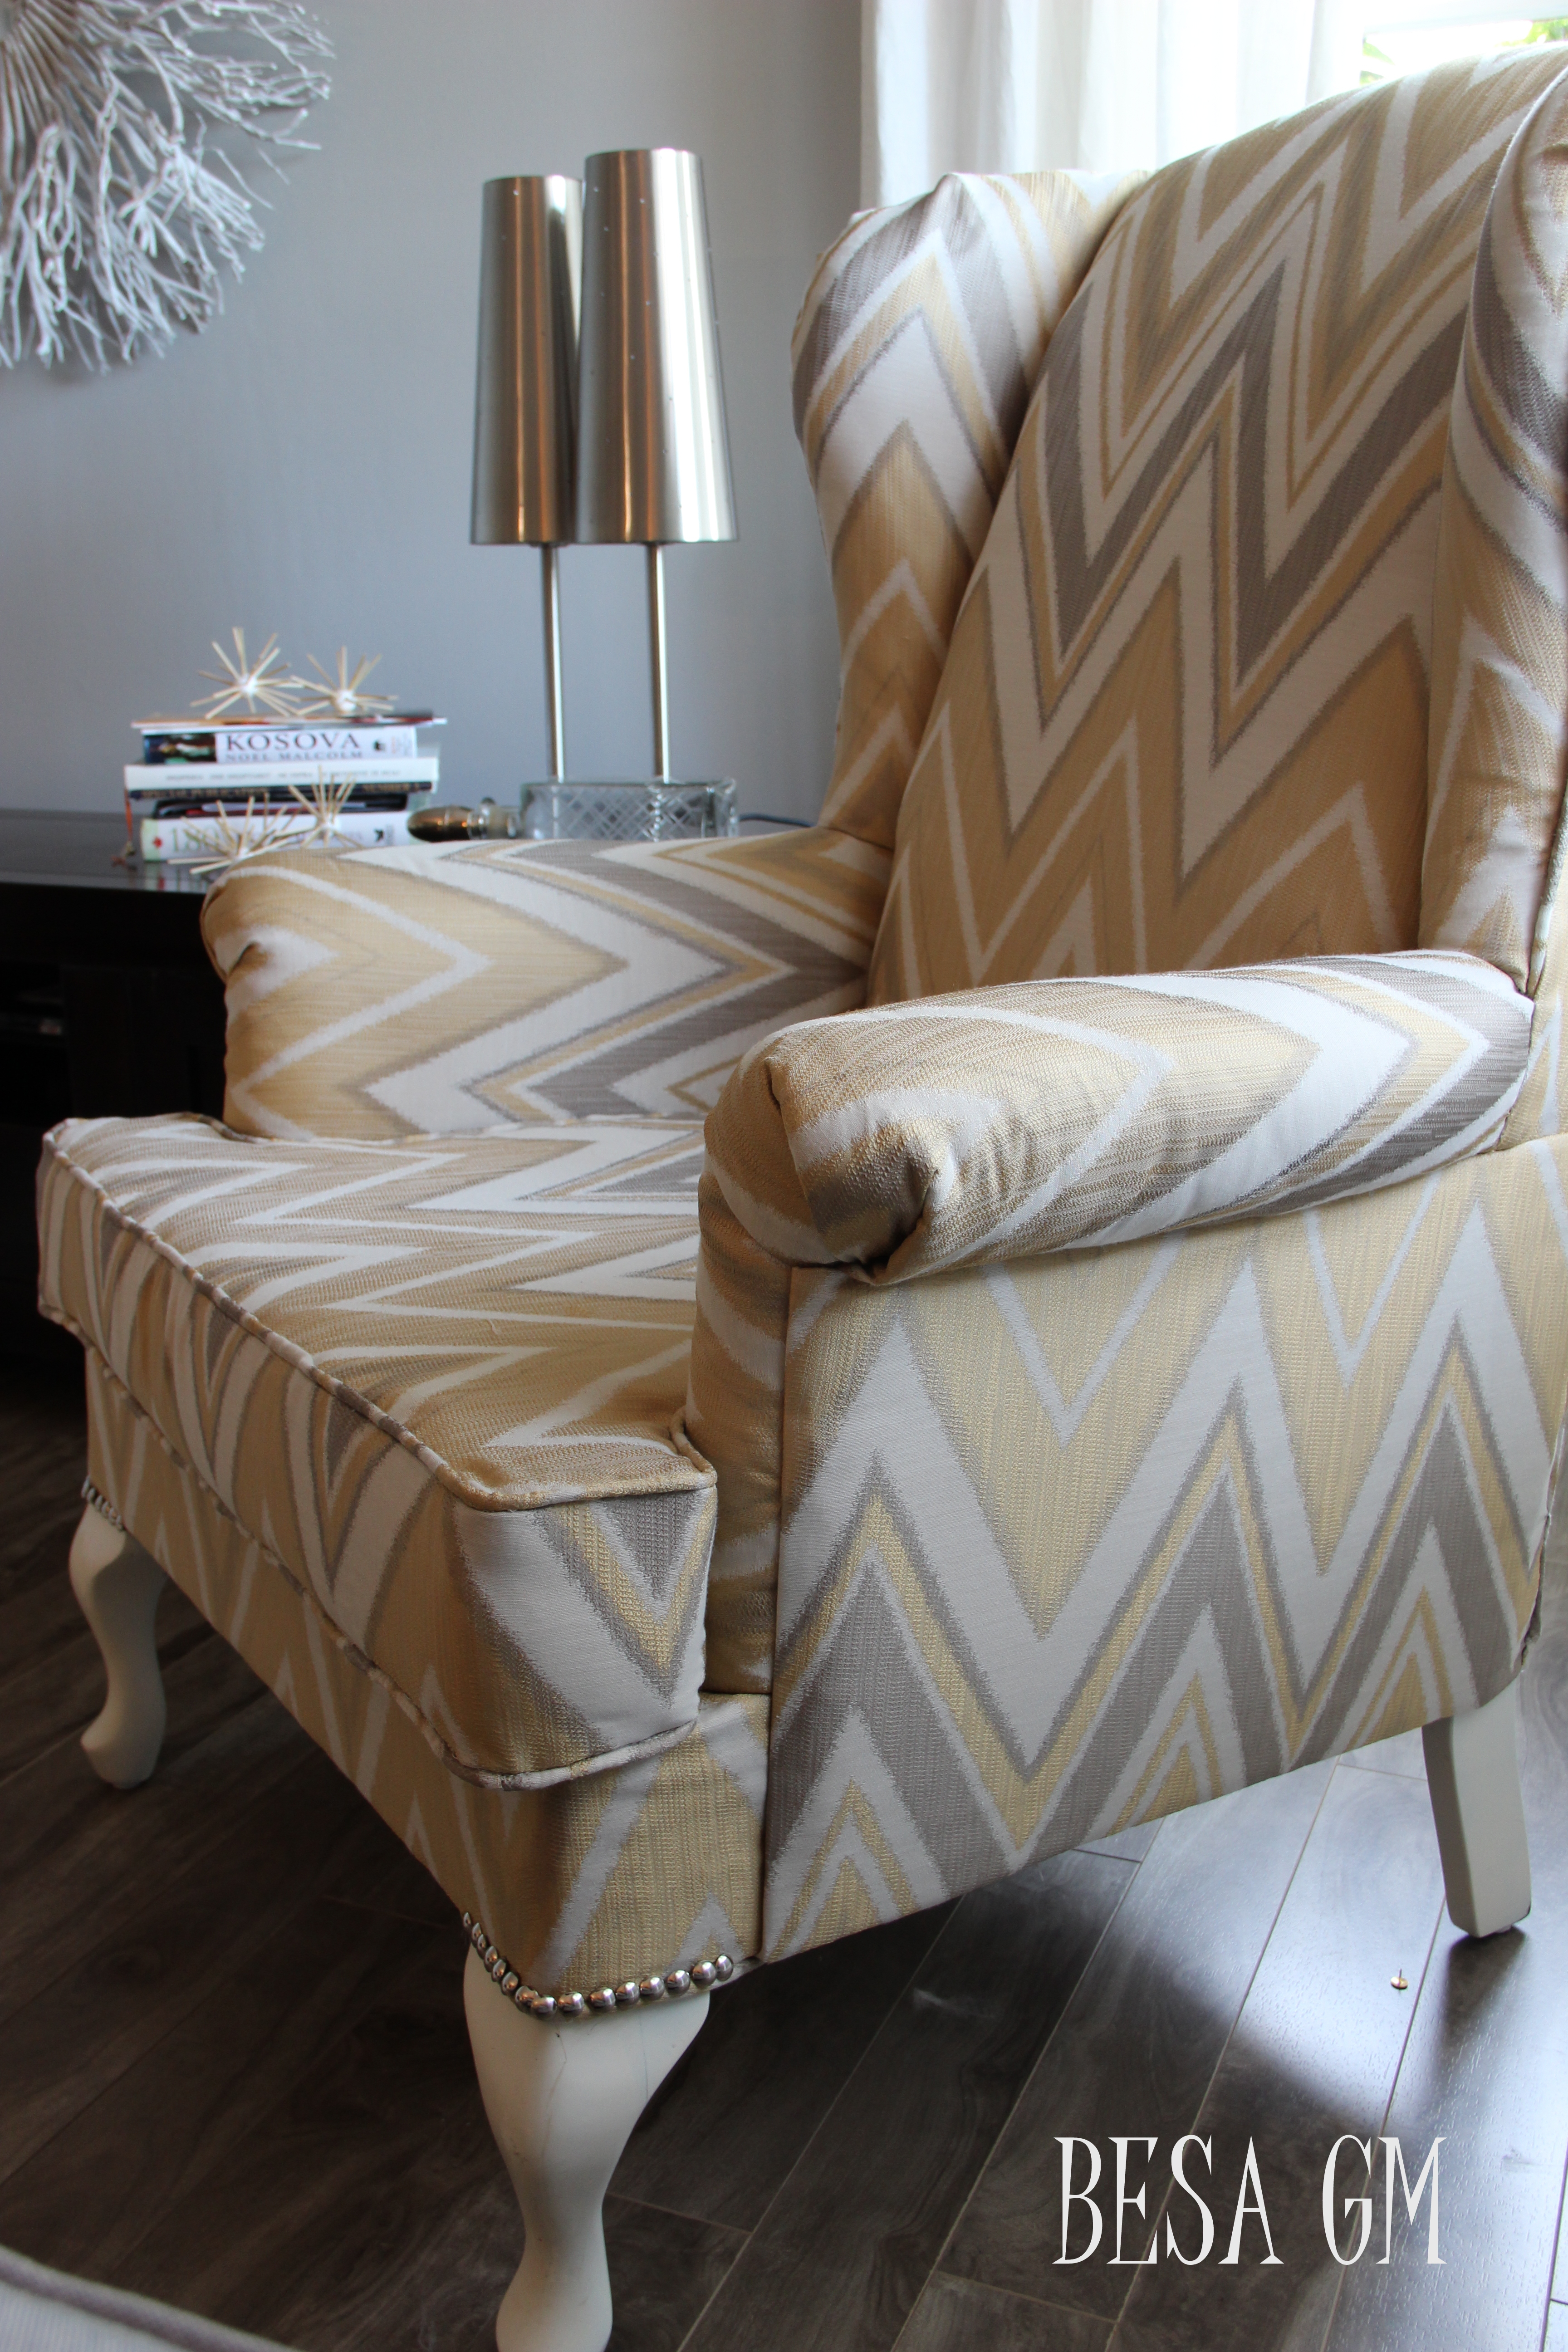
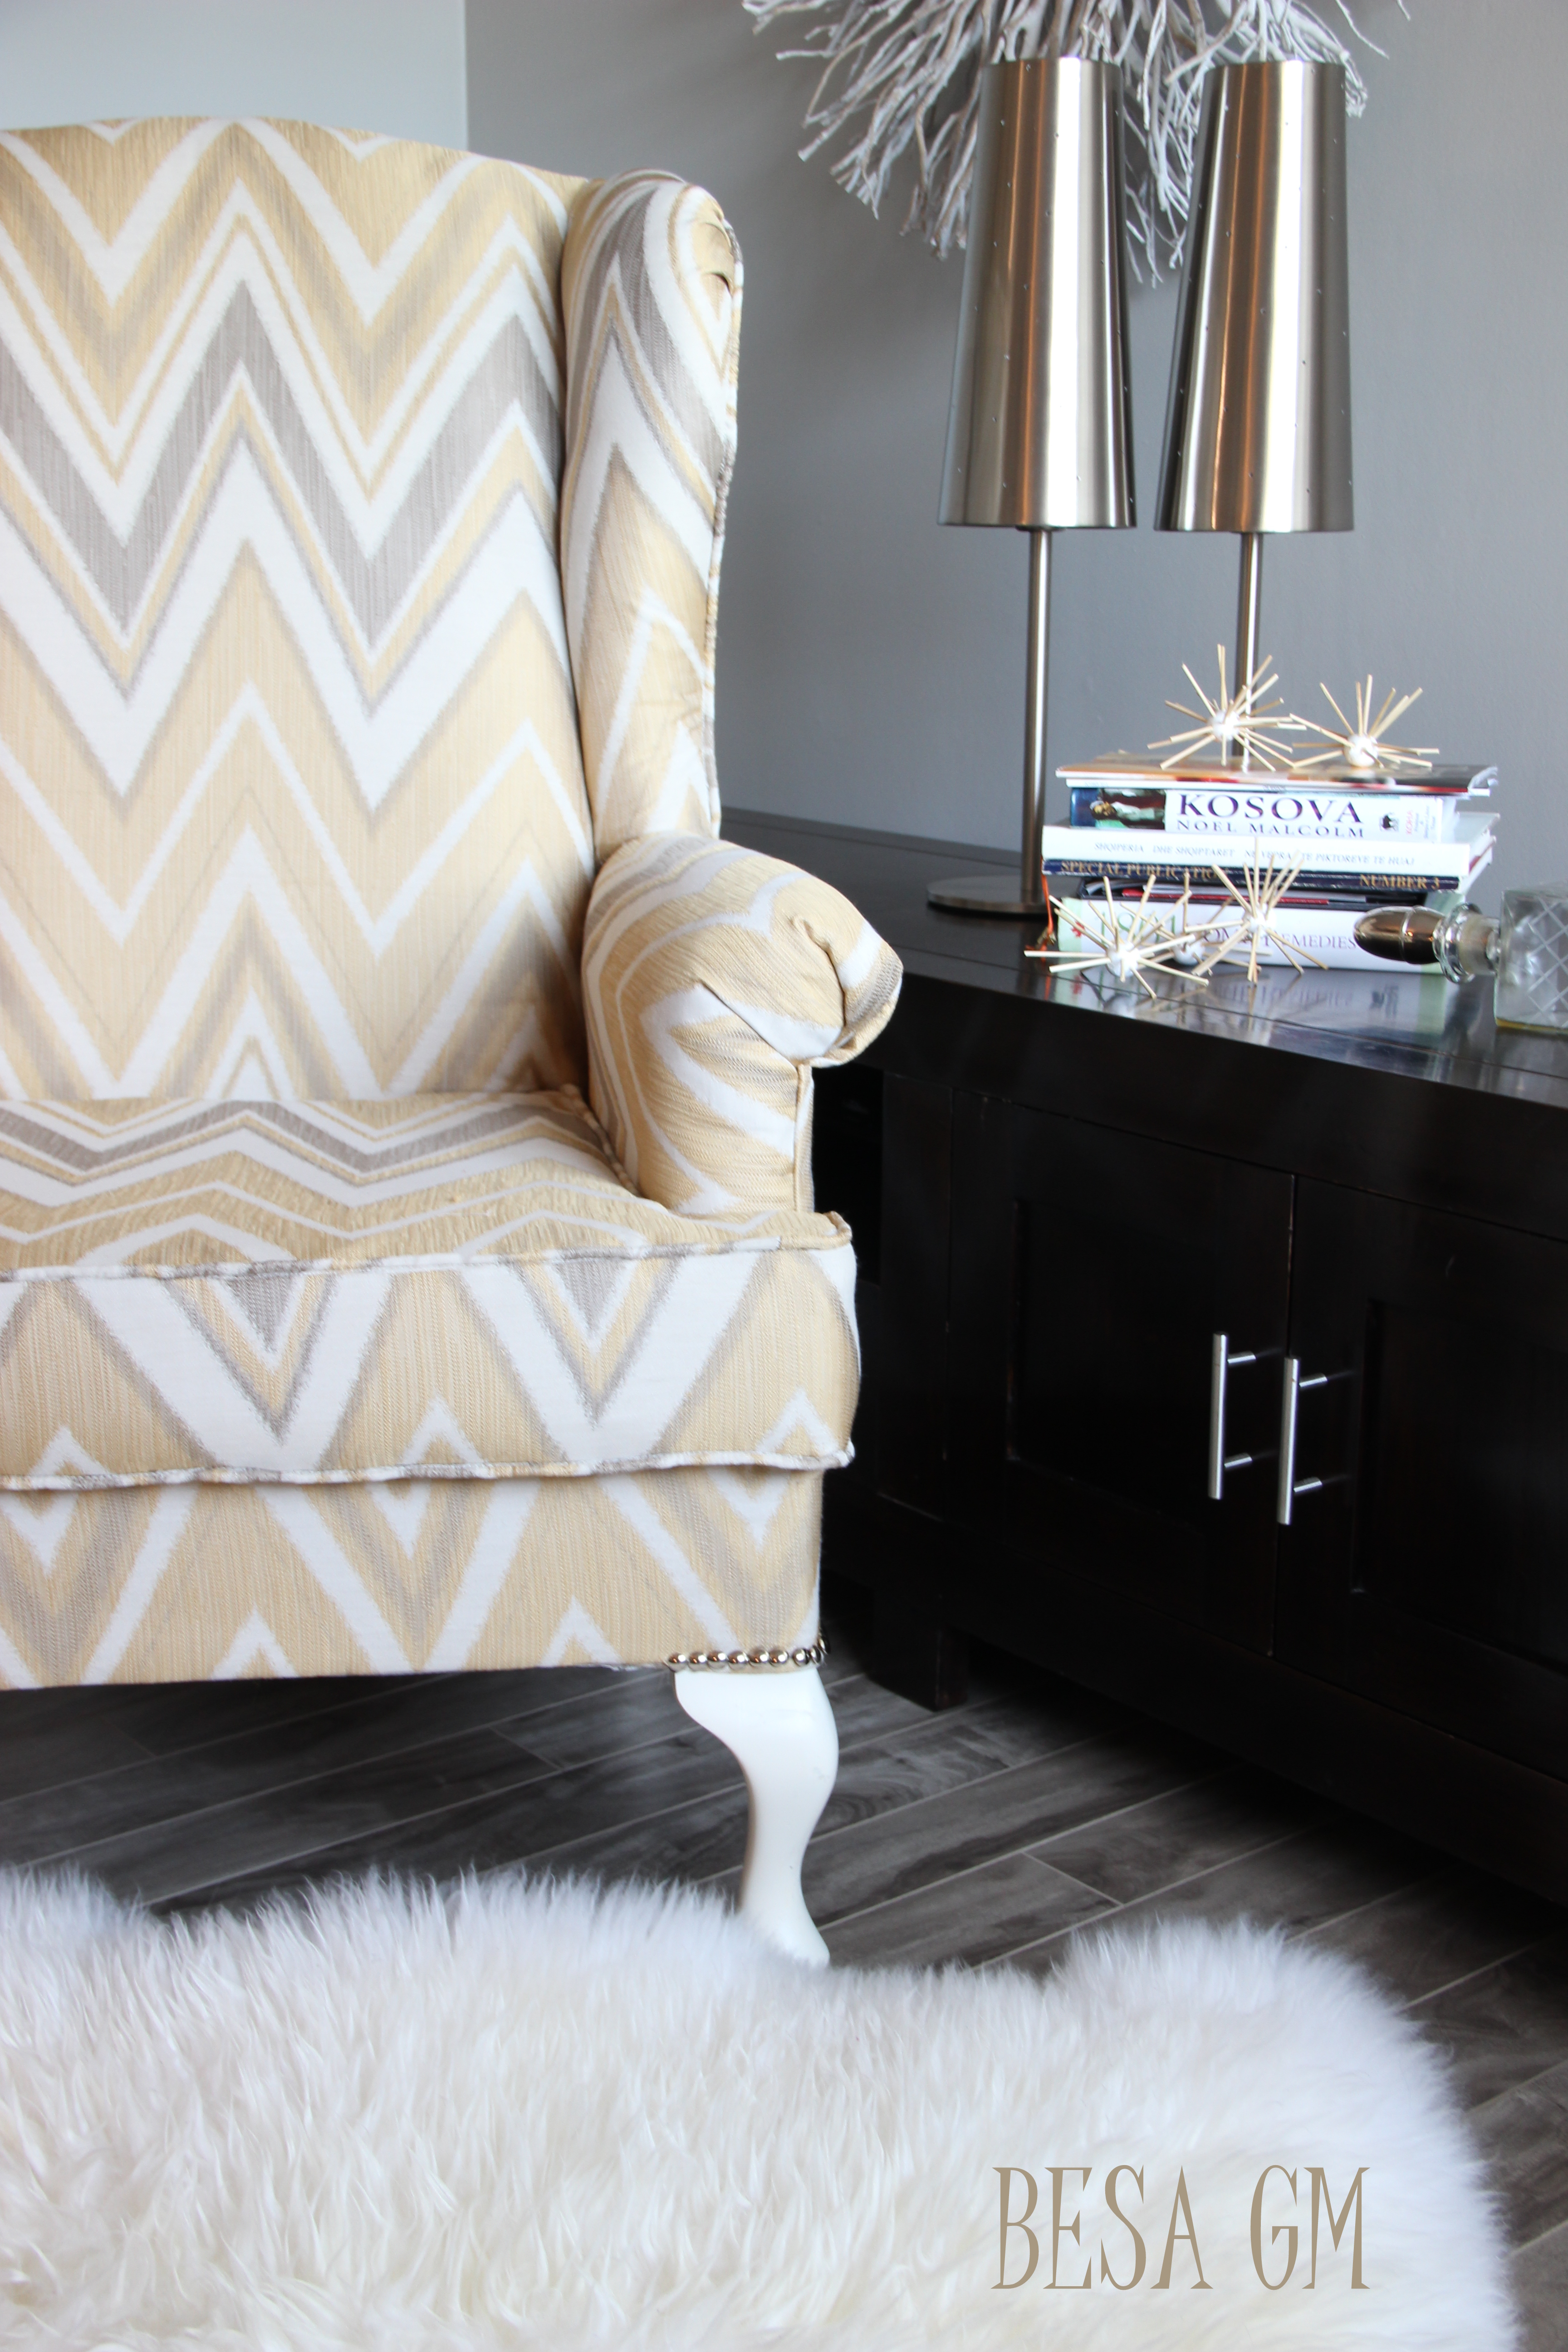
After completing the upholstery process I sewed the cushion, and the chair was done.To add a finishing touch I decorated the upper leg part with nailhead finish.
I used 5 meters of fabric for $8/meter and, considering that I reused all other materials, this project cost me only $40.00 plus tax, which is not too bad for almost a new chair.
While the process was not too difficult, I found it quite time consuming; however, I would do it again as it is very interesting to see how the chair shapes up during the process.

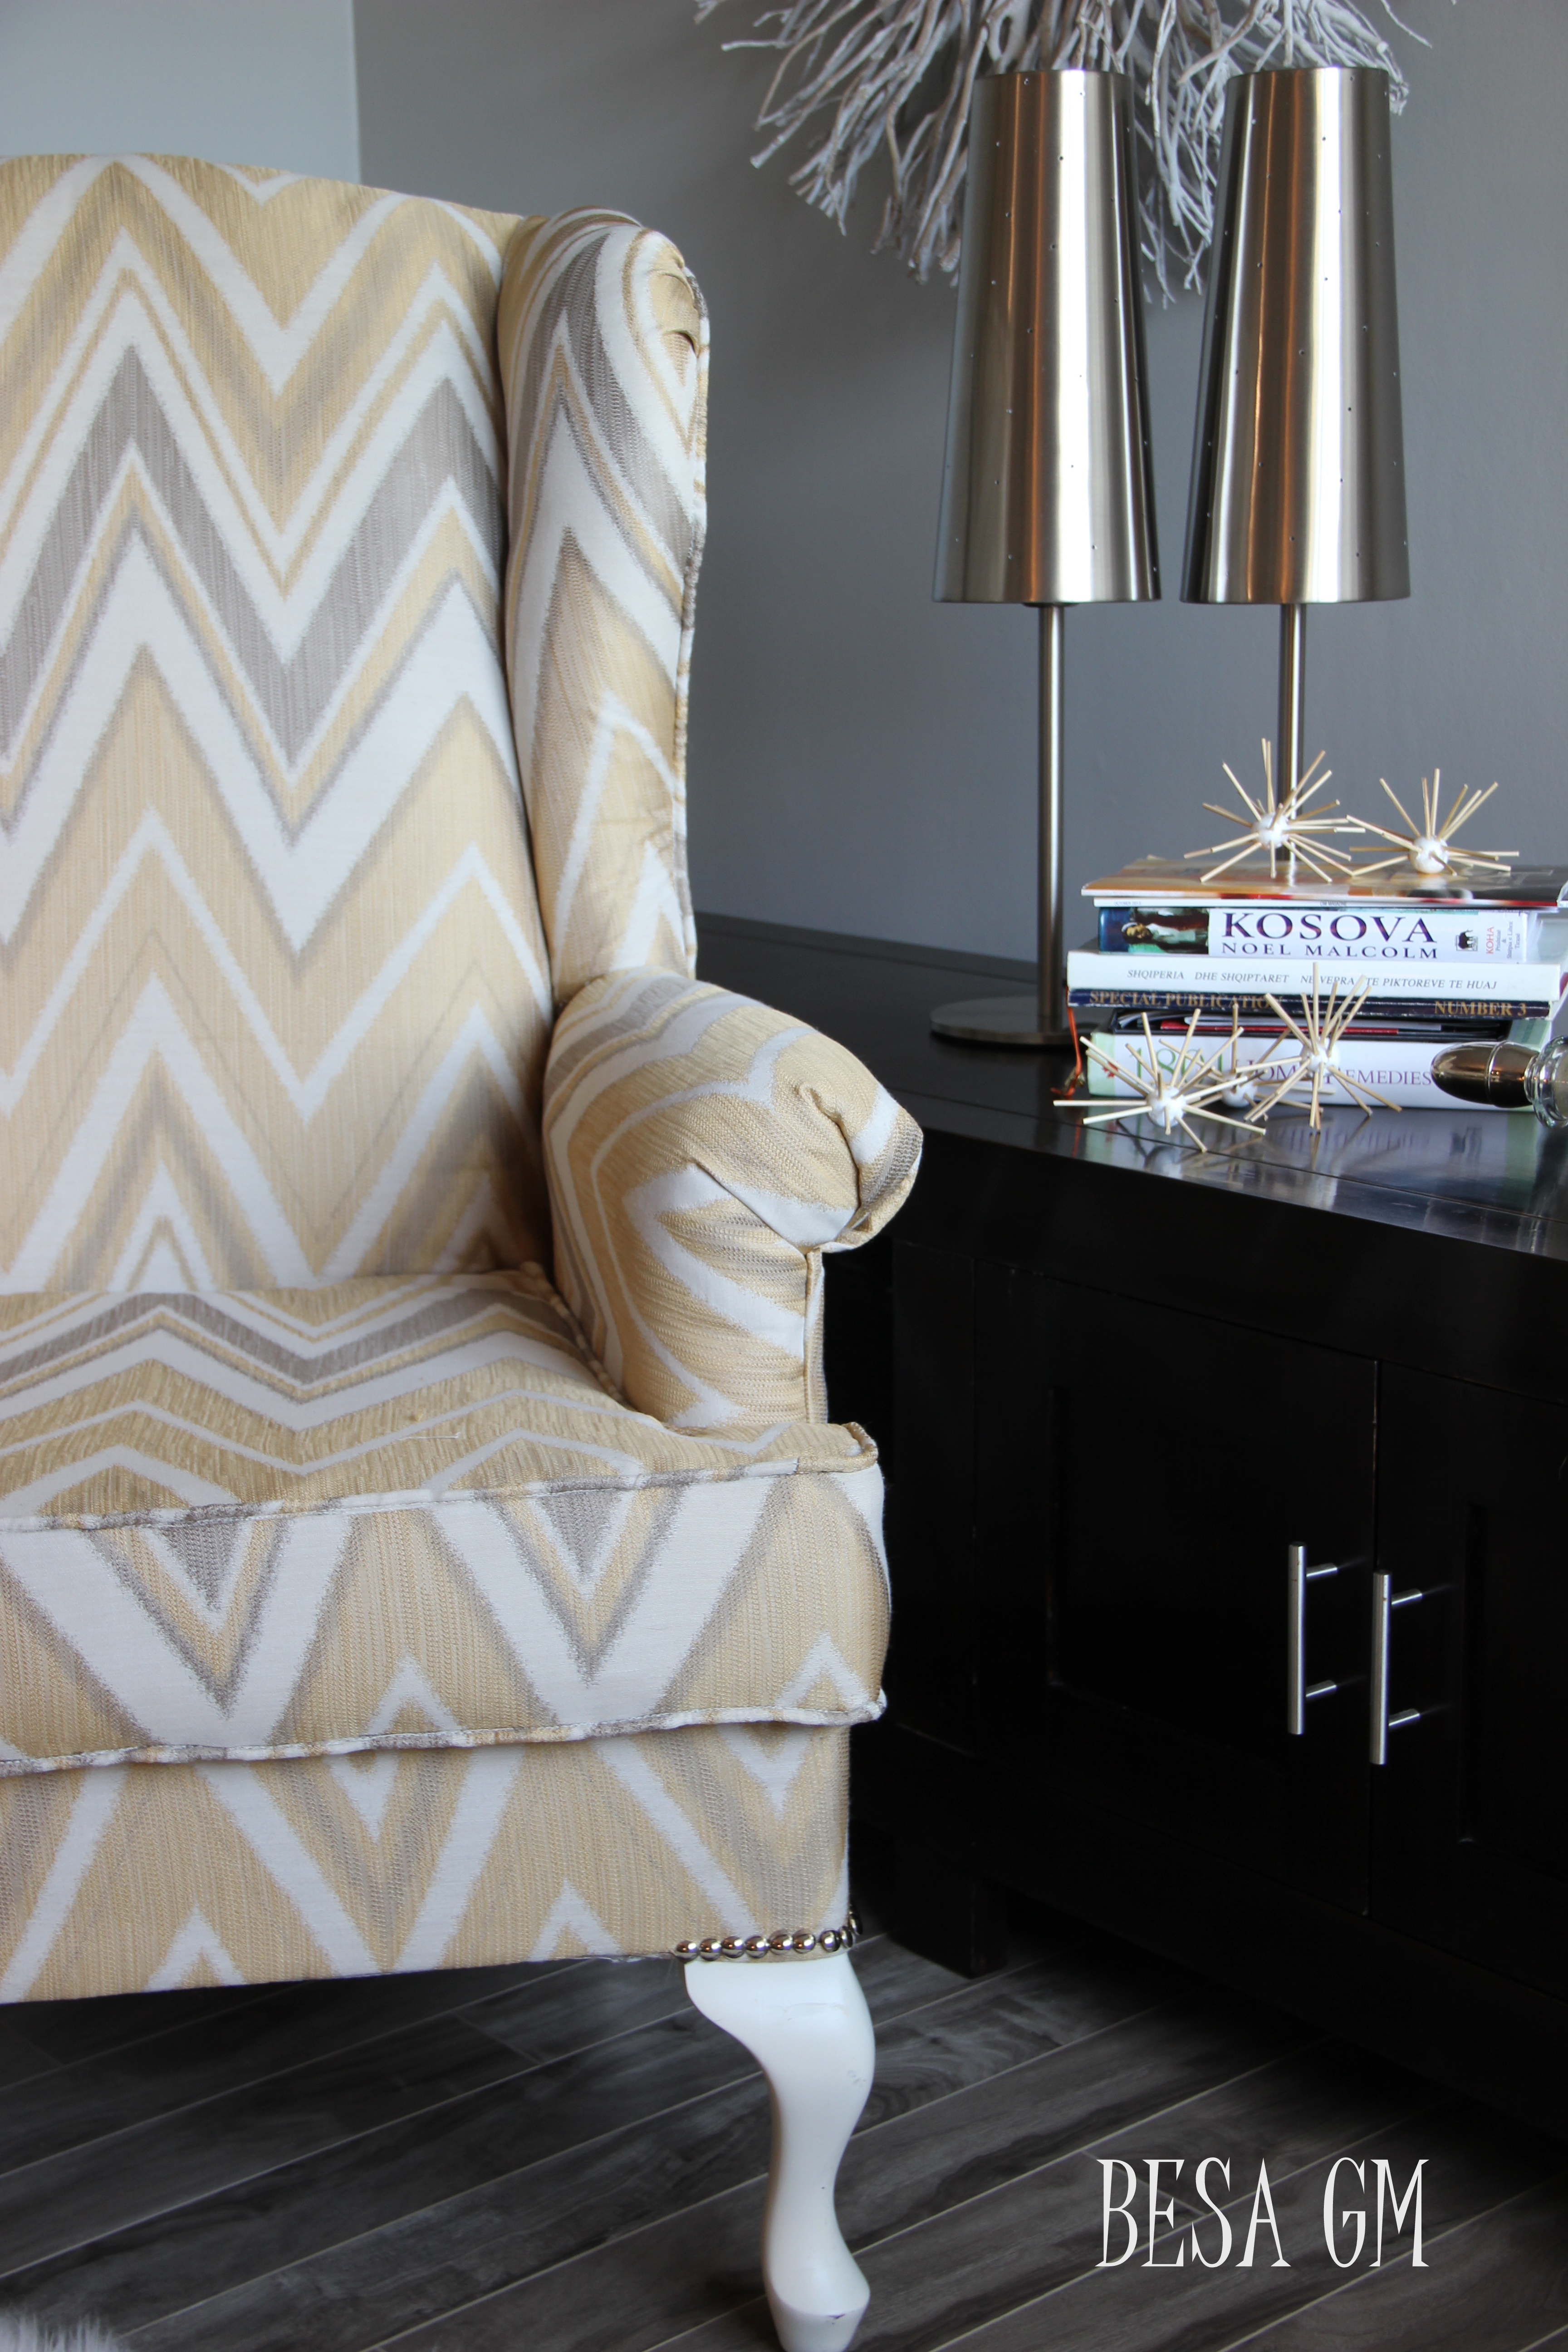
Finally, all things considered, I am happy with the final reupholstered project, and I am hoping that you too will like this transformation.
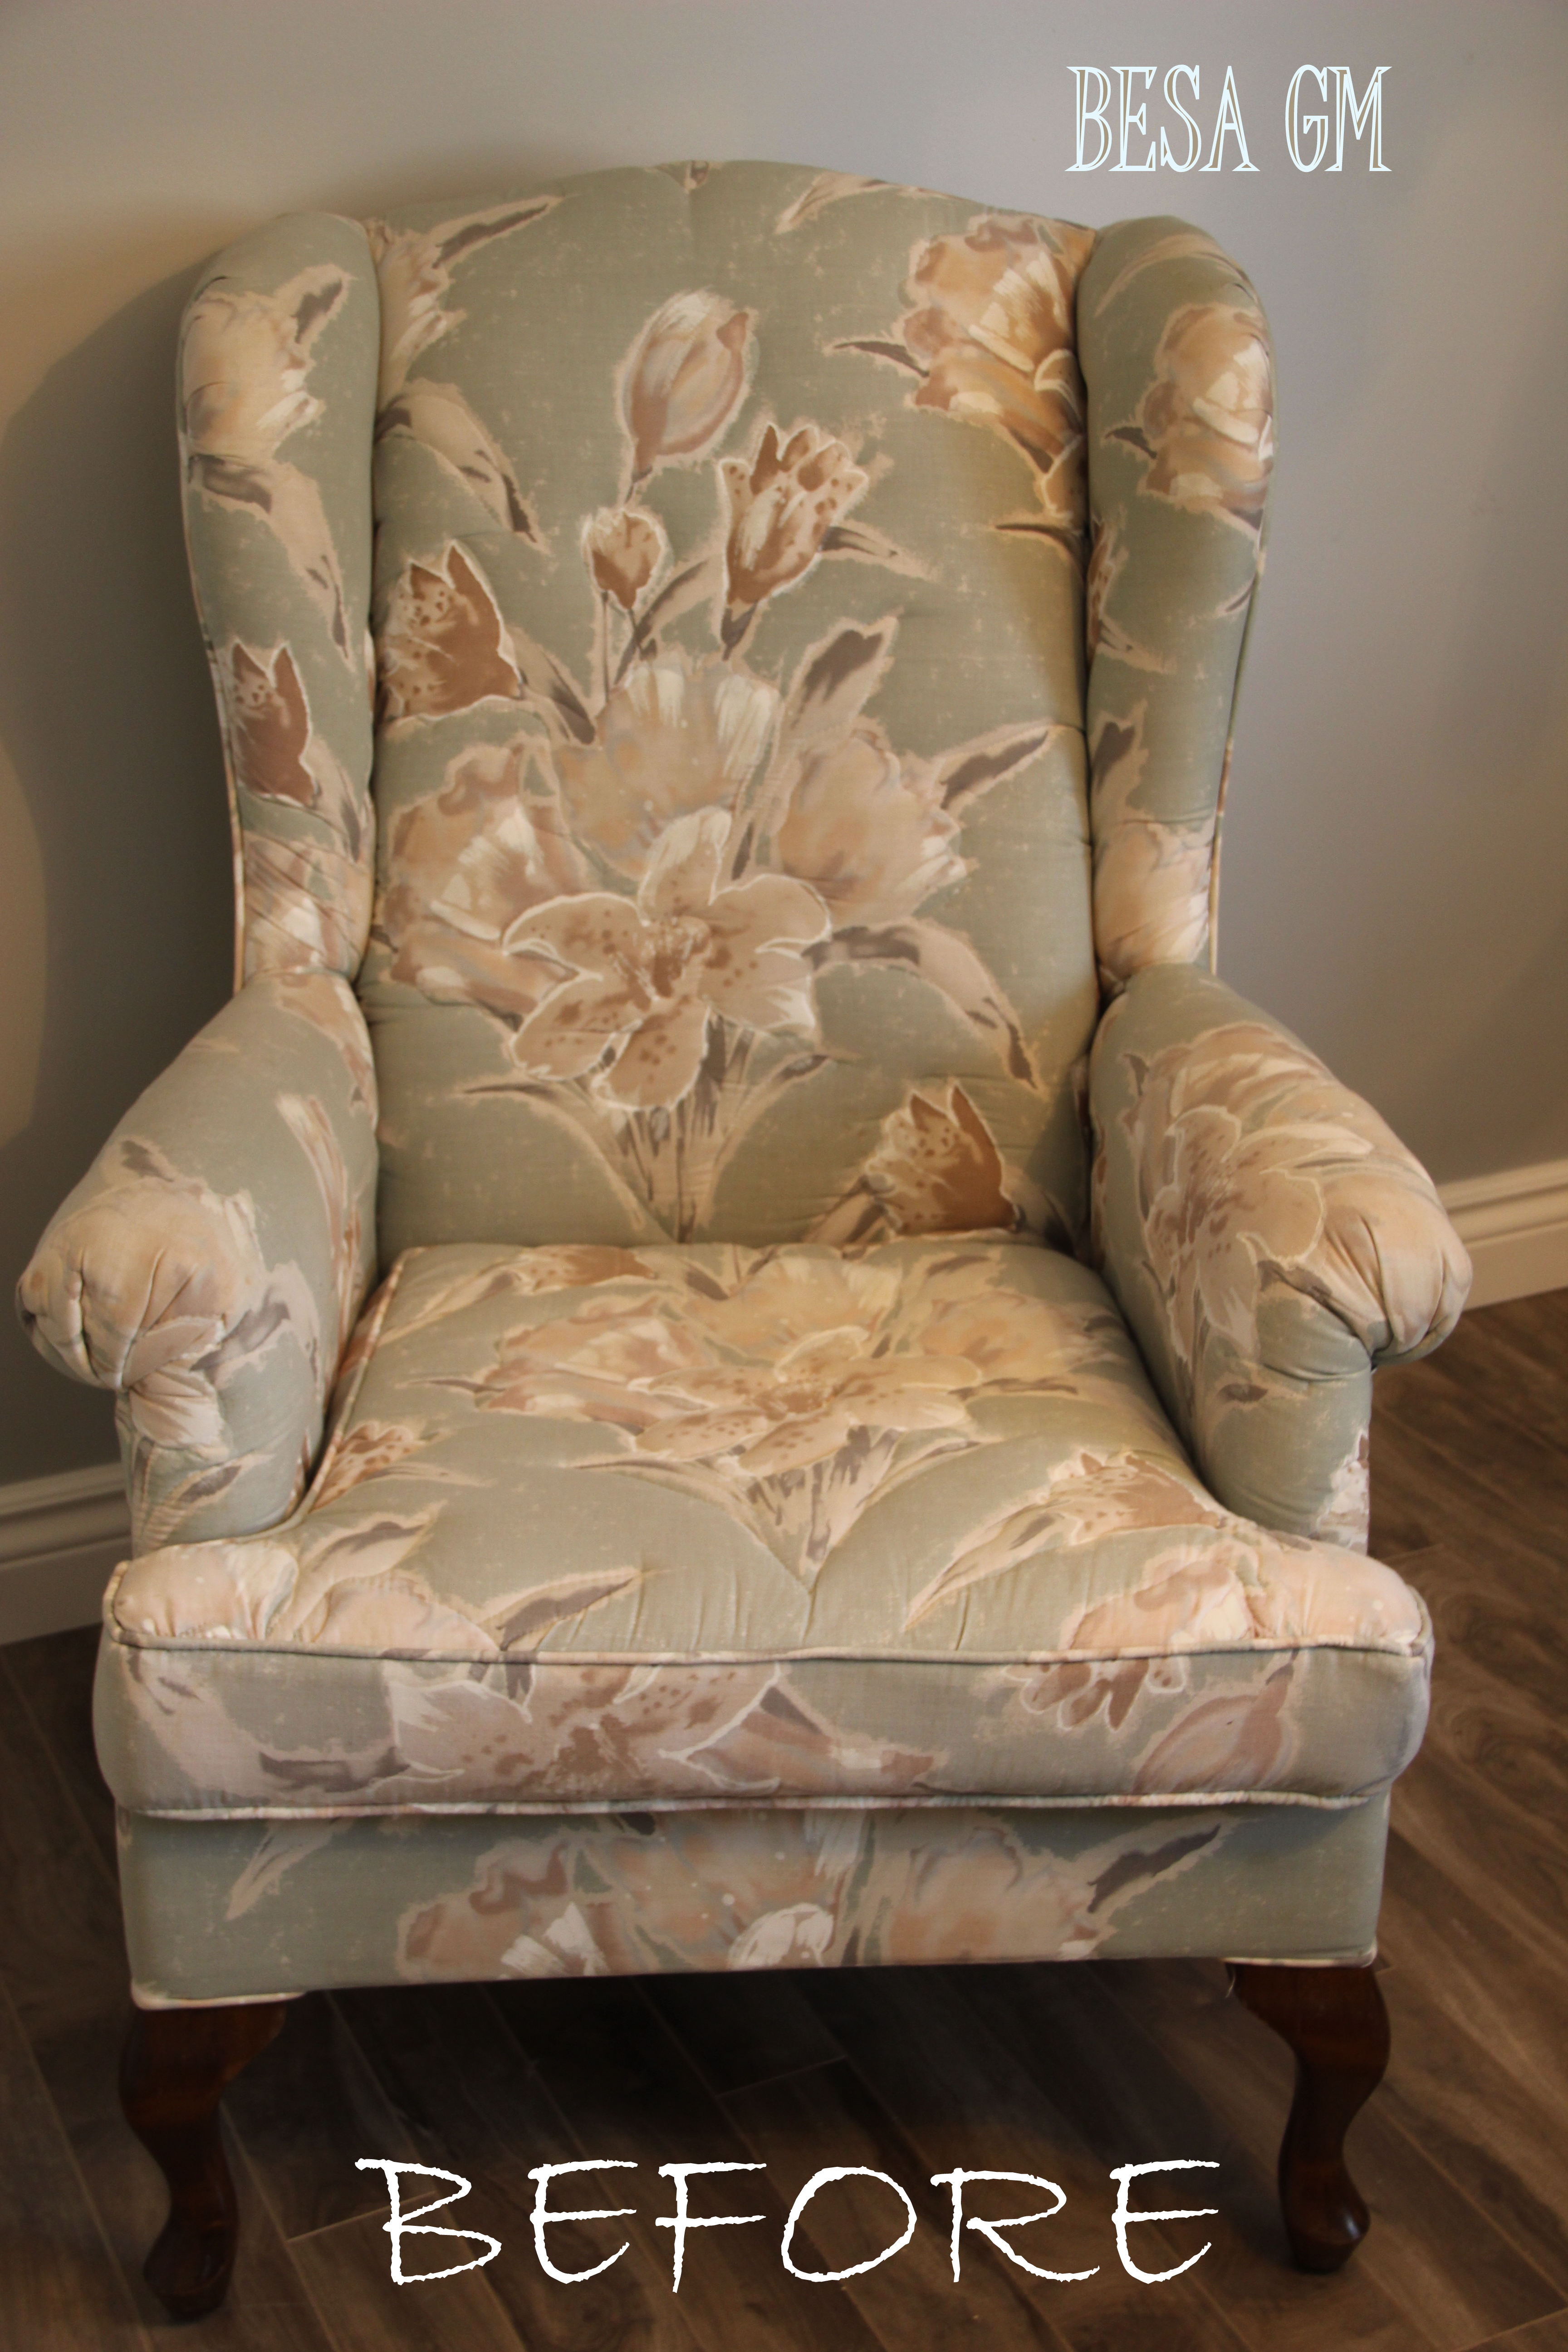
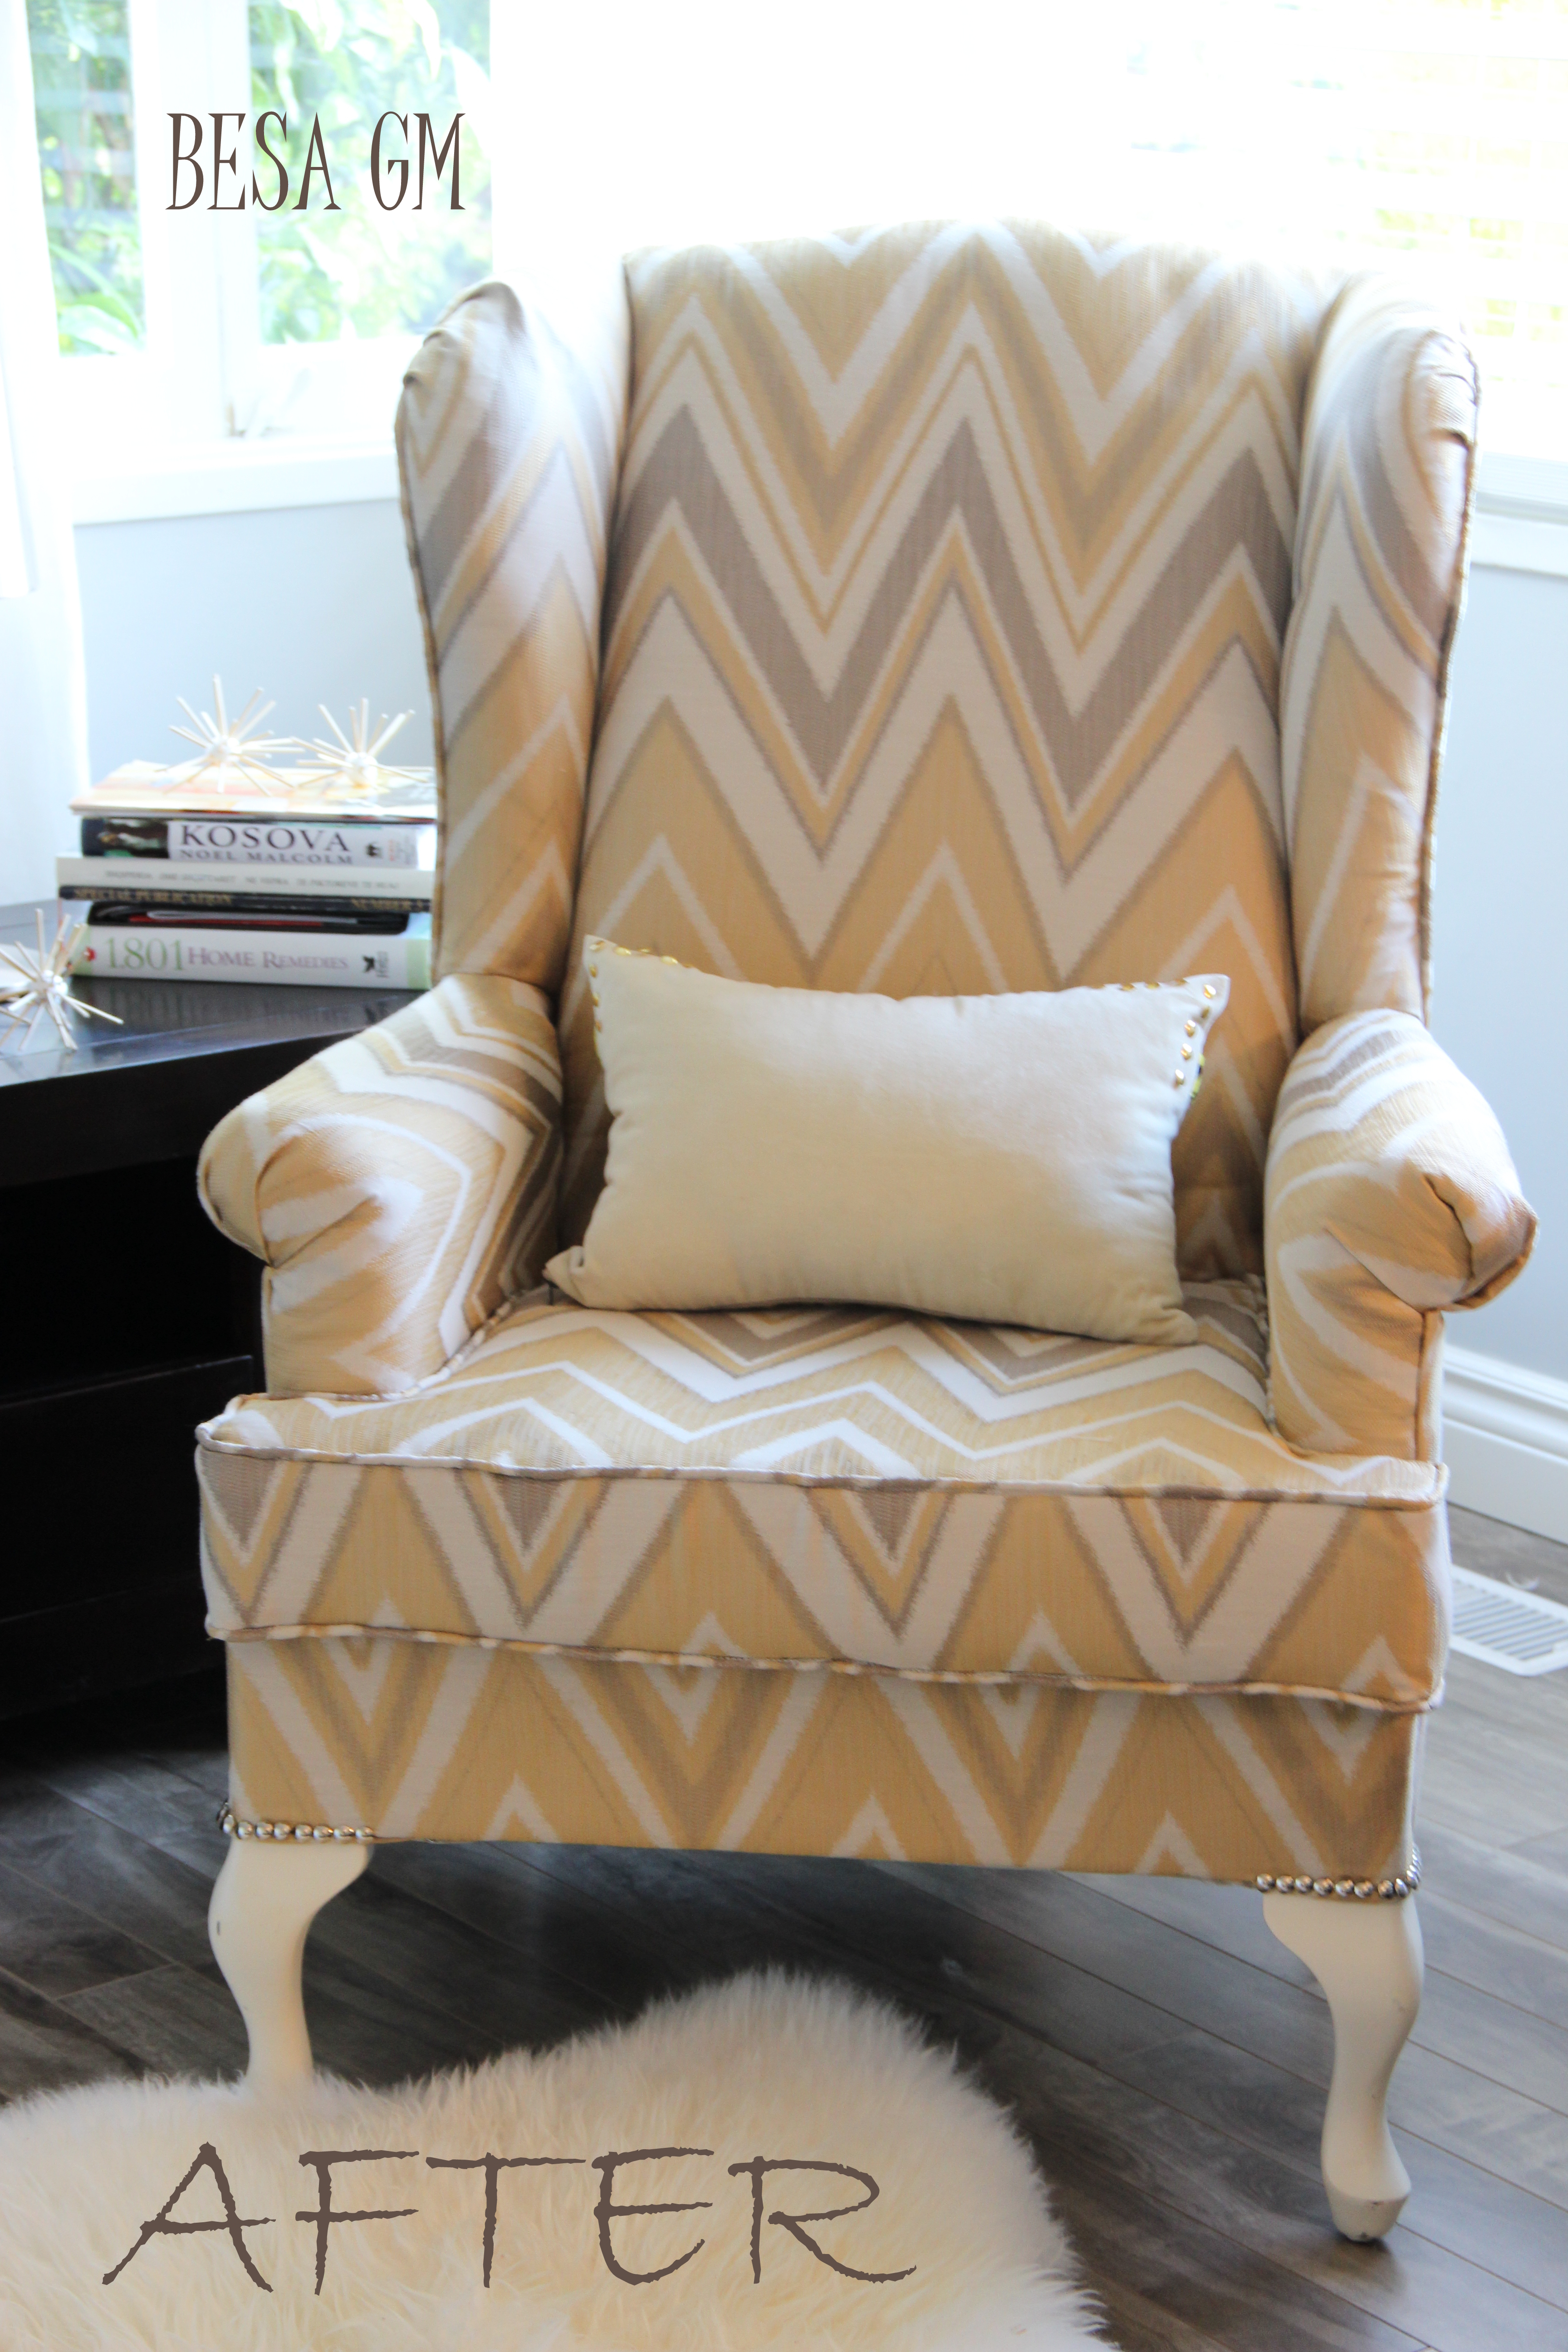
So here it is:
the ugly BEFORE,
and much much nicer AFTER
Linking to: Coastal Charm; Our Delightful Home; Give me the Goods Monday; The Scoop; DIY By Design; From My Porch To Yours; The Turqouise Home; No Mininalist Here; Share Your Cup Thursday; The Shabby Nest; Made In A Day; Liz Marie Blog; A Pretty Life In The Suburbs; Creating With the Stars
Great thanks to the following blog for featuring this post: Be Betsy
Thank you for reading.
Besa

Wow! Very impressive! I’ve been wanting a wingback chair for some time but never seem to find one in my color scheme/price range. Maybe I’ll try re-covering one! Thank you for the detailed tutorial!
Thank you for stopping by and your comment.
This looks amazing. I can’t believe you haven’t reupholstered before. I’ve been wanting to try for awhile, and now I’m definitely going to give it a try. Thanks for sharing.
Visiting from Brag About It Linky Party
Thank you so much for stopping by and taking time to comment. At first, it seemed an intimidating project to undertake, but it turned out to be not soo difficult, and the chair turned pretty.
oh my gosh, that’s gorgeous. I love the updated chevron, and especially the colors of the mixed metals. amazing!
Thank you for your sweet comment and for stopping by.
Looks AMAZING! You did a wonderful job!
Thank you.
I love the fabric! Great job for taking on the reupholstering projecting yourself!
I’m stopping by from Katherine’s Blog Hop.
Thank you so much for stopping by and your comment.
Wow! That’s impressive. Love the fabric choice. 🙂
Thanks for stopping by and taking time to comment.
Amazing job! I’m not sure I’m up to that much work, but you inspire me~
Thanks for stopping by and taking time to comment.
This is a fabulous make over! Love what a great job you did. Thanks for sharing the details with us at TTF!
You did a wonderful job, I love the fabric. Thank you for sharing at the Thursday Favorite Things blog hop. ♥
It turned out great! This was a challenging project. You did a great job! Rhonda
Thanks Rhonda for stopping by and for your comment.
You did a great job, you should be very proud of yourself! The chair is beautiful now in it’s new fabric!
Thank you for stopping by mu blog and taking time to comment.Greately appreciated.
Gorgeous! I love the gold and silver! You are incredibly talented. Happy holidays!
I have two wing-back chairs and would love to recover them – thanks for the tips. The chair turned out wonderful and love the fabric choice!
We’ve FEATURED your post on BeBetsy Brag About It No. 33 – so check it out – and link up again today on the new party. Thanks for sharing and have a happy holiday season.
Sharon and Denise
BeBetsy
PS. latest follower on your social networks too!
I really appreciate you featuring my reupholstery project.
Great job! I would not have dared tackle that task. I have actually been looking to see if there is an upholstery class offered through our Adult education. Have not been able to find one. I would love to learn! Thanks for sharing with SYC.
hugs,
Jann
Thanks for the compliment Jann. Yes, I admit it was quite a daring task to tackle, but I am so glad that I was able to finish the chair, otherwise it would be embarassing to send a naked chair to a charity shop.Thanks as always for being such a wonderful host.
Besa
Such Gorgeous Ideas.. thank you