The poufs a.k.a floor pillows are the most versatile accessory ever. You can use them as extra seating, as a footstool, a side table, an accent piece and even a storage. They are small and don’t take up a lot of room and may add a lot of fun, and personality to a space. In addition, like in my case, they can add a splash of color and cheer up a space.
Most of you may probably know that Pantone, a global leader in color calibration technology and the global authority, has announced PANTONE® 18-3224 Radiant Orchid, a captivating and enigmatic purple, as the color of the year for 2014.
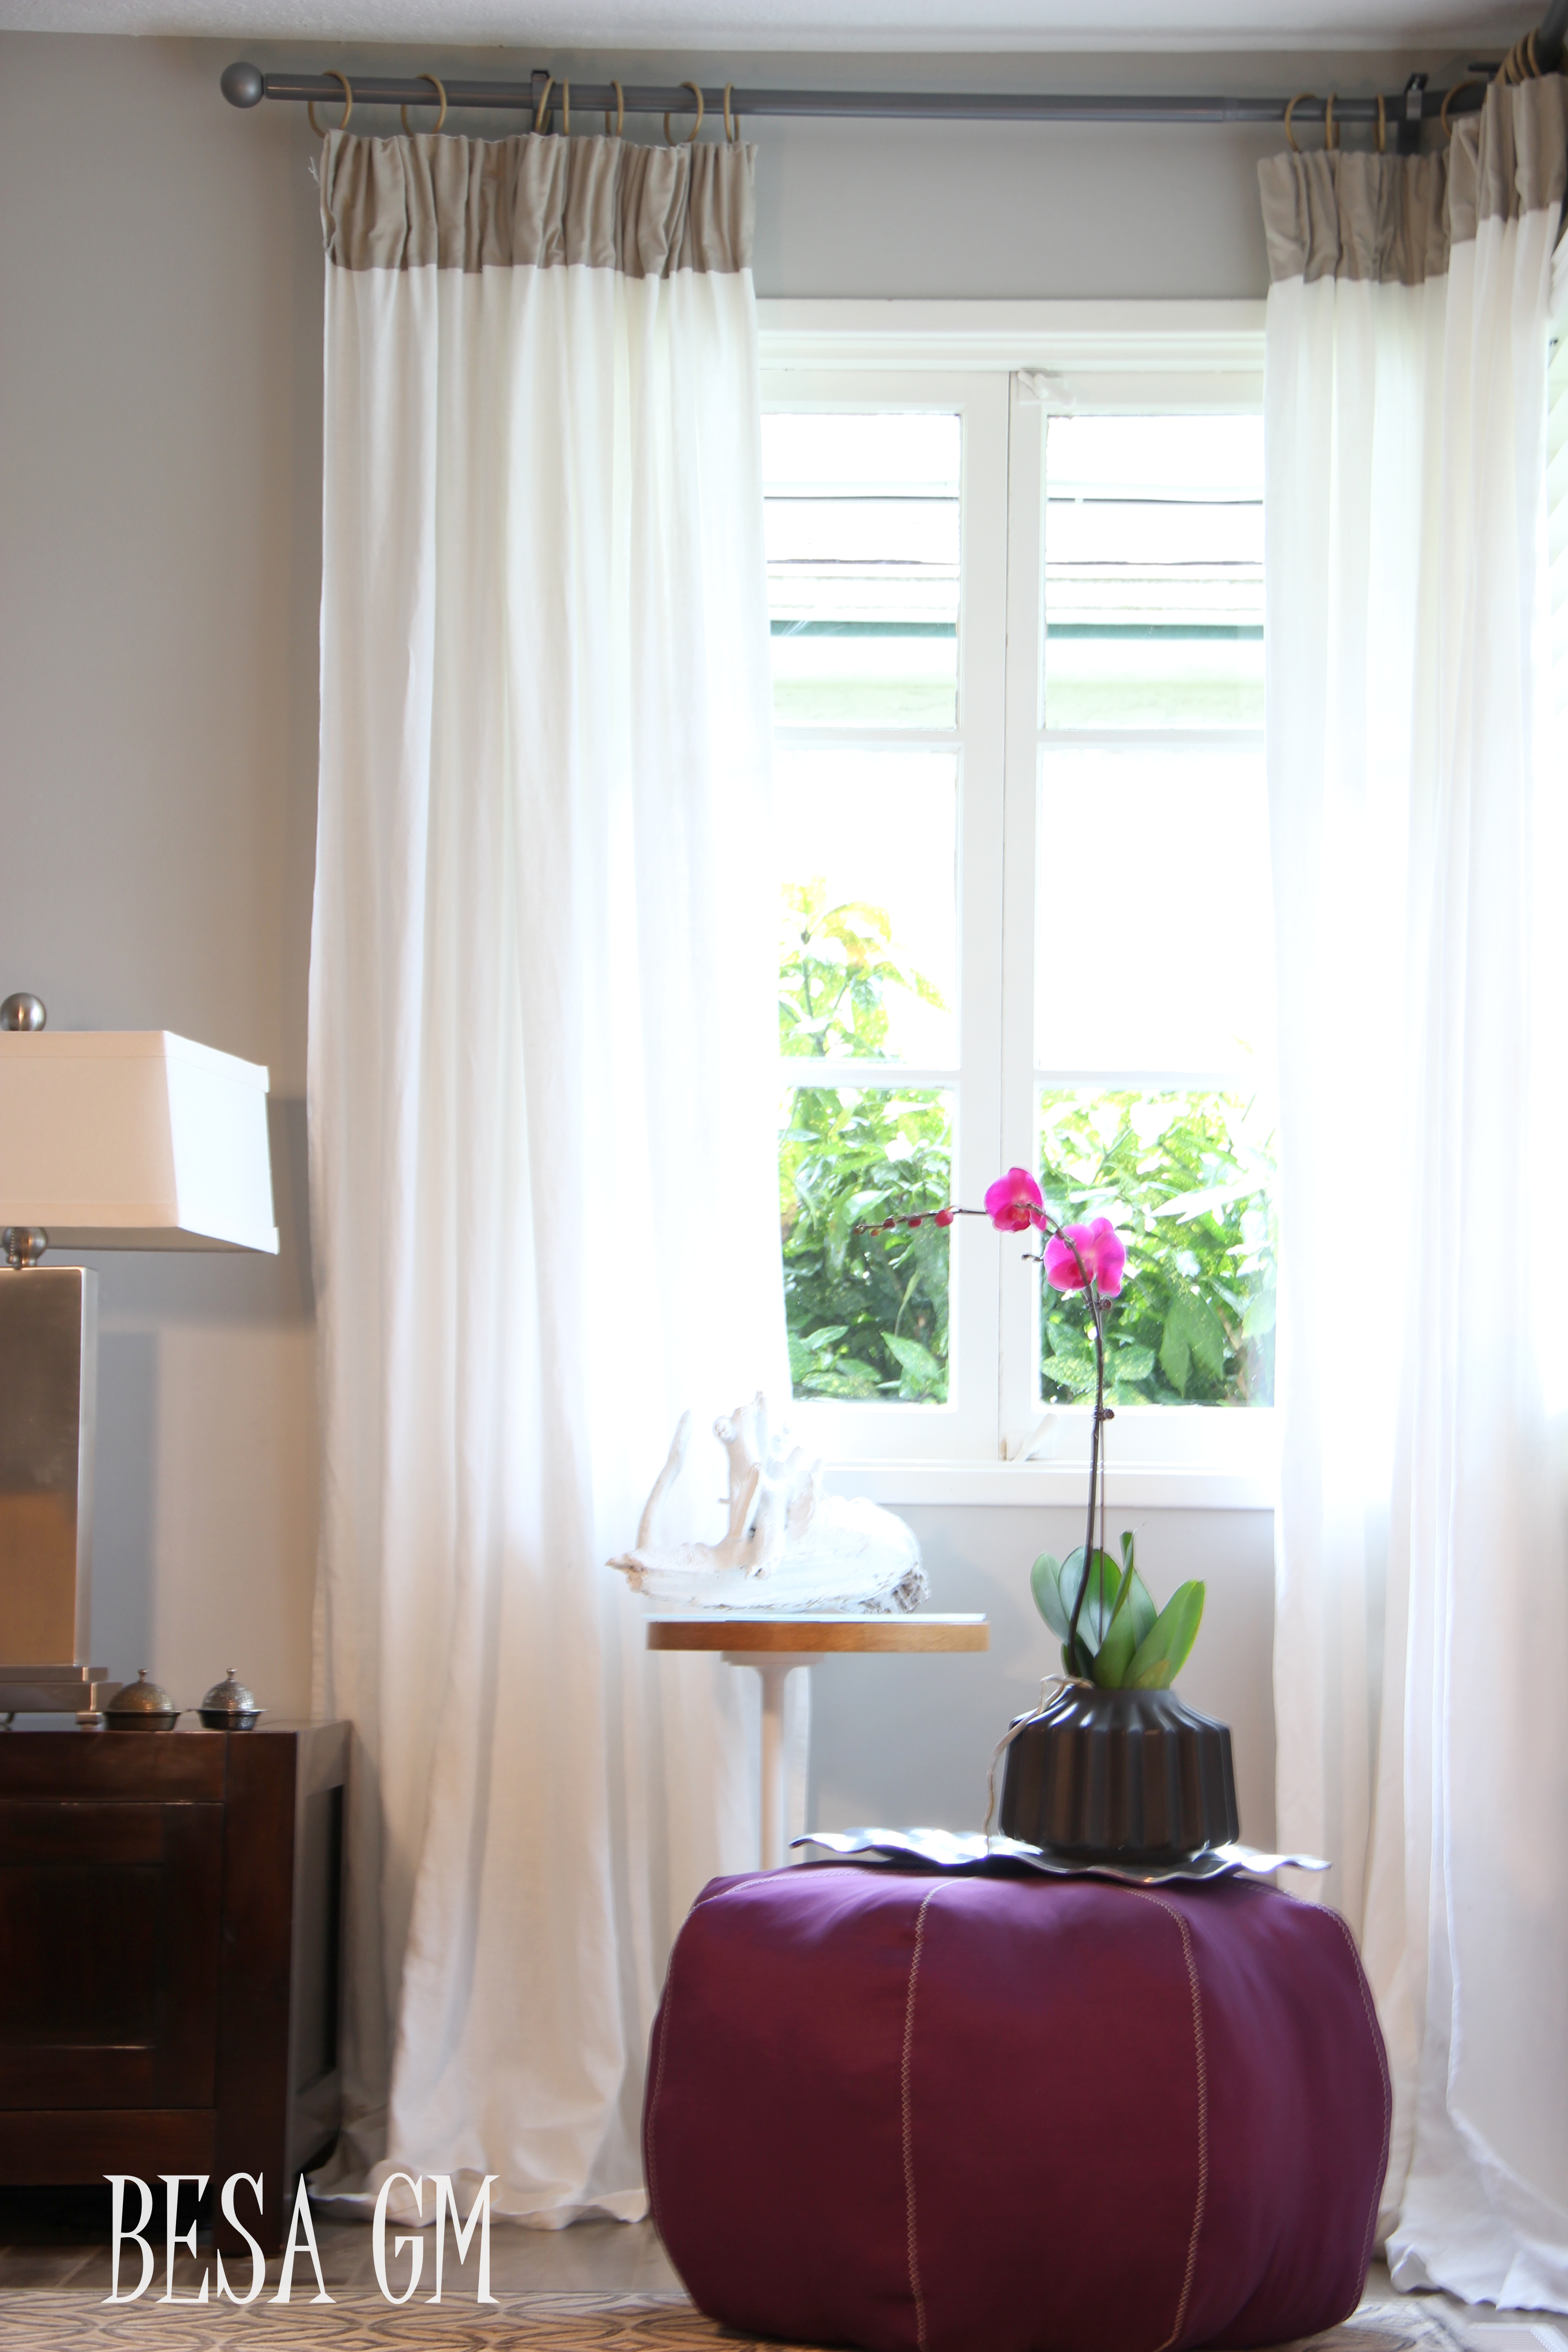
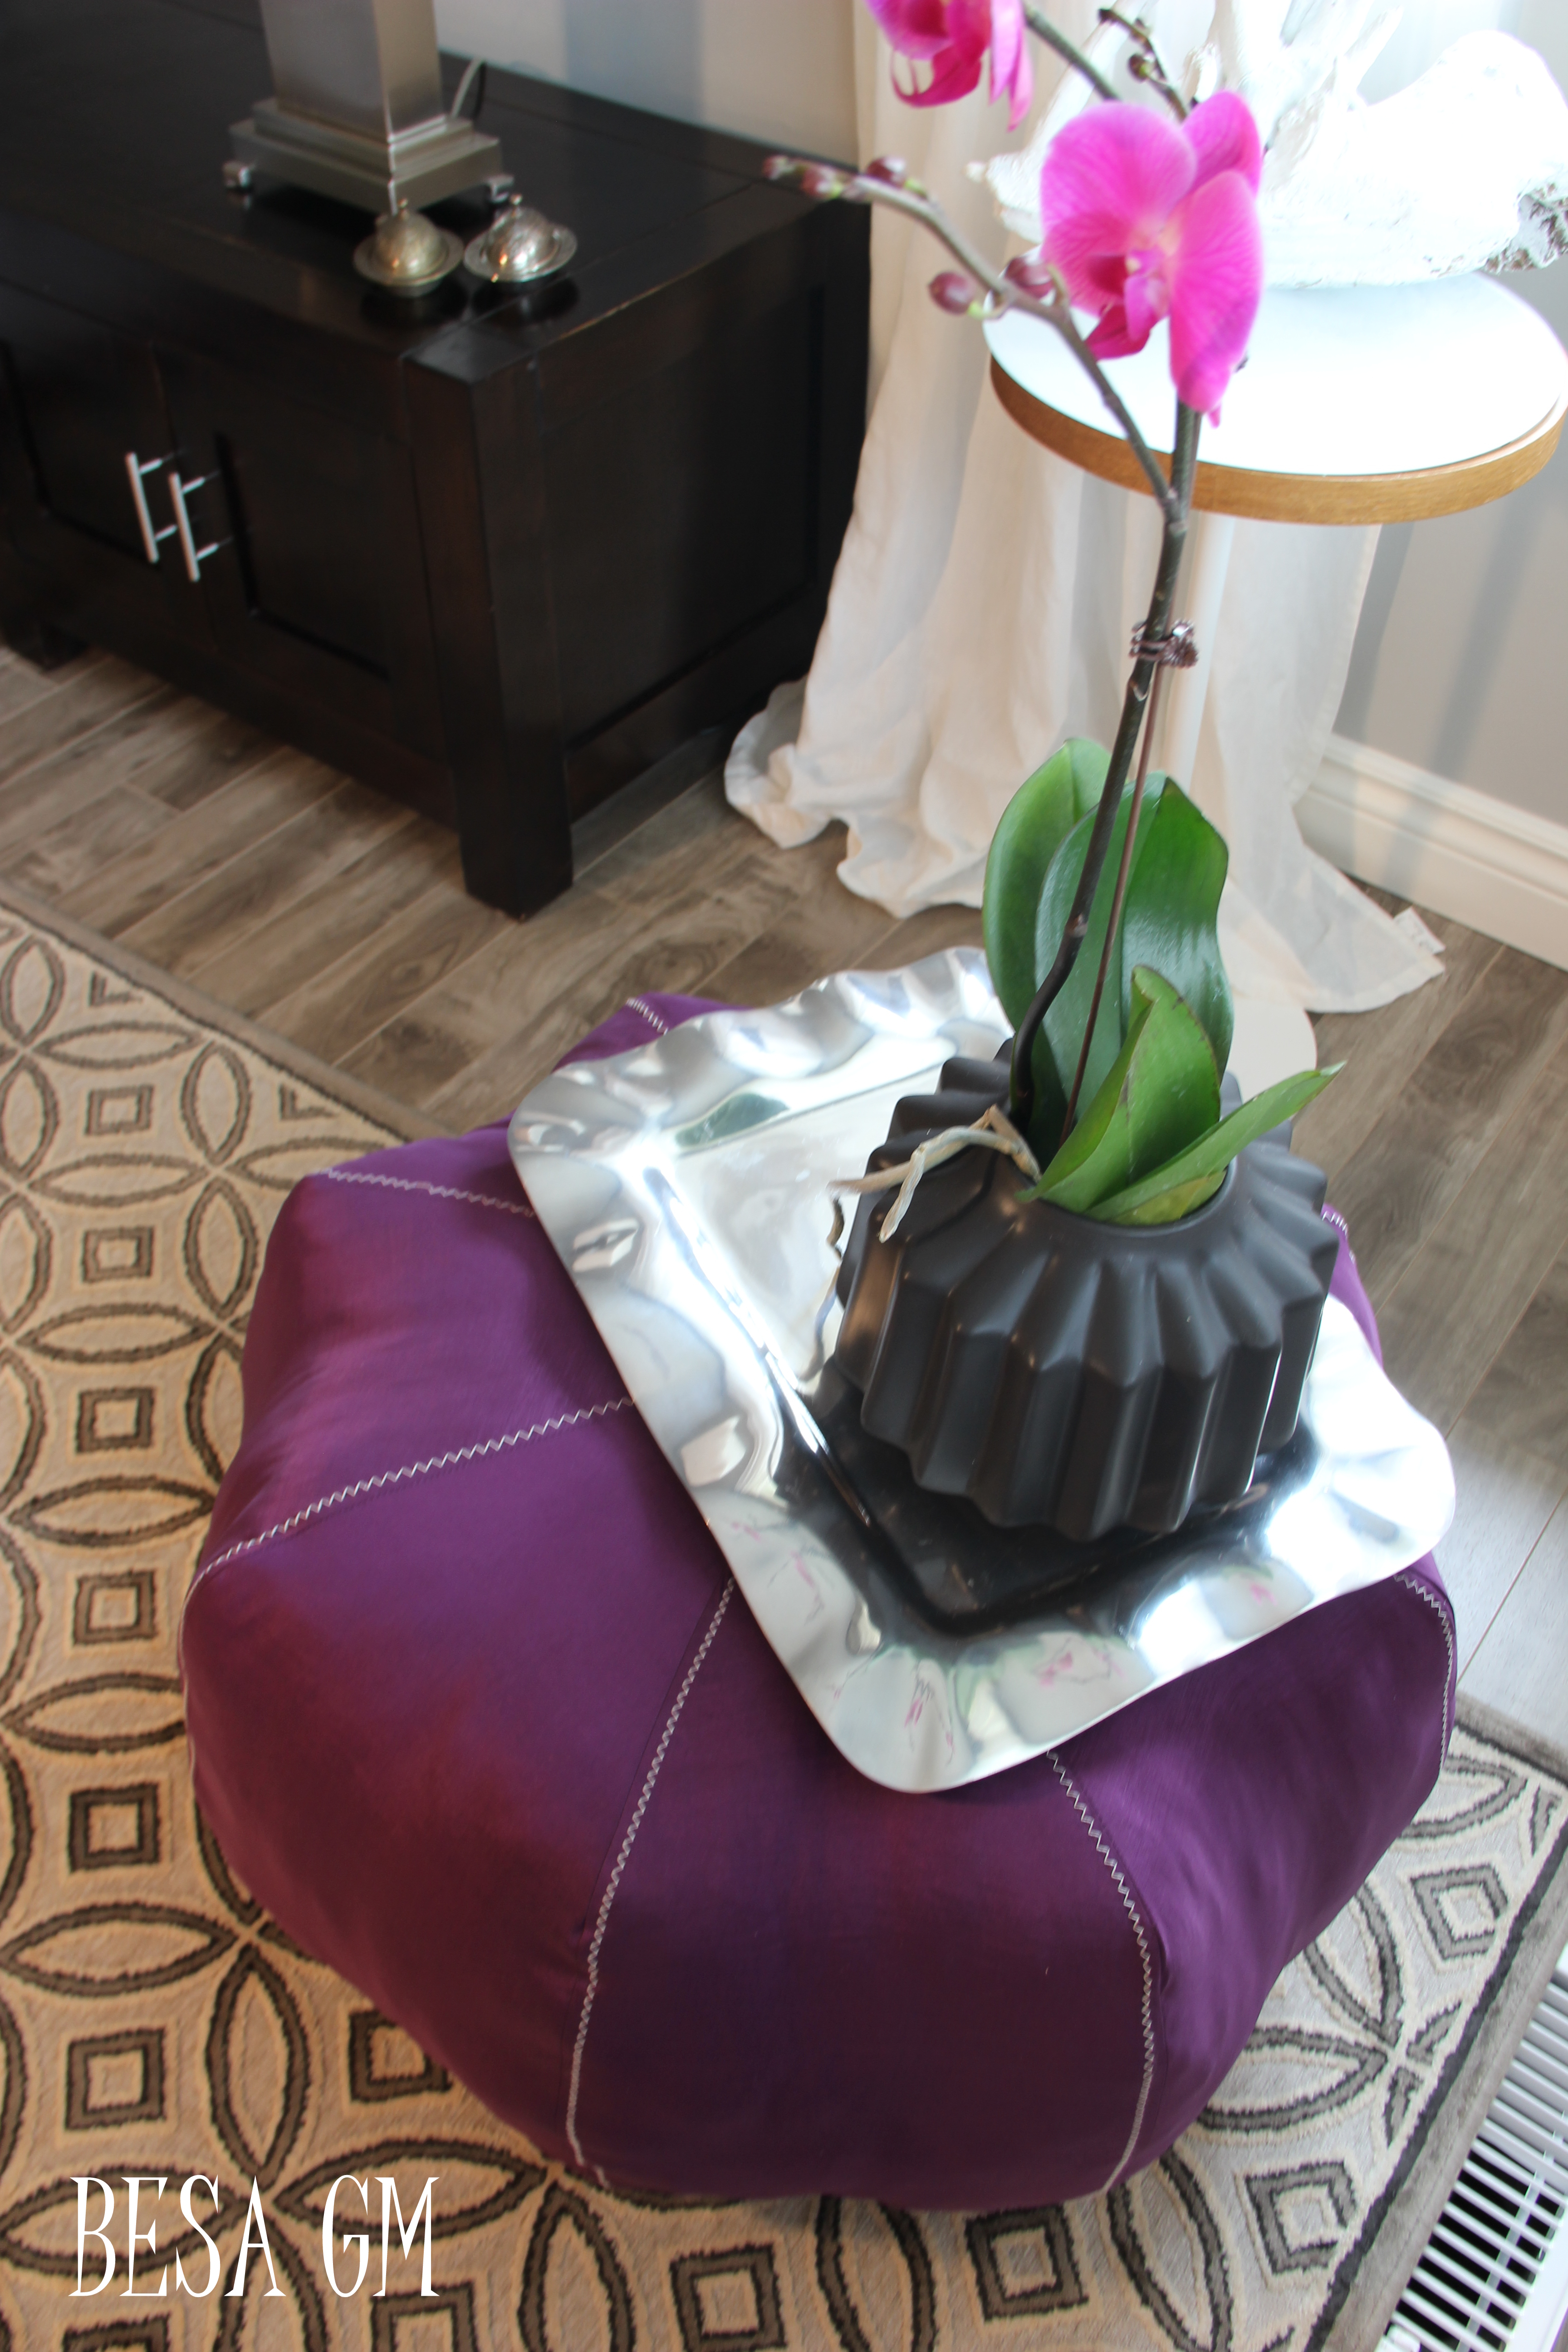
In order to incorporate the mentioned color of the year in my home decor I decided to make a moroccan pouf which I can use as an additional seating and as a side table.

I had purchased this purple stretchy fabric last year with an intention to surprise my niece by making her a prom dress, but a few days after this purchase she surprised me even more when she phoned saying that she is ordering her prom dress online in a color pretty close to the color of the fabric I purchased for her. To this day, I have never revealed the surprise to my niece and she is about to find out after she reads this post.
Luckily the color of the mentioned fabric pretty much looks alike the color of the Pantone’s Radiant Orchid, so I decided to make the pouf using this fabric. I also had a lot of stuffing salvaged from the back pillows of my old sofa and a zipper (odd color I know but it was free), so this was another project for which I did not have to spend a dime.
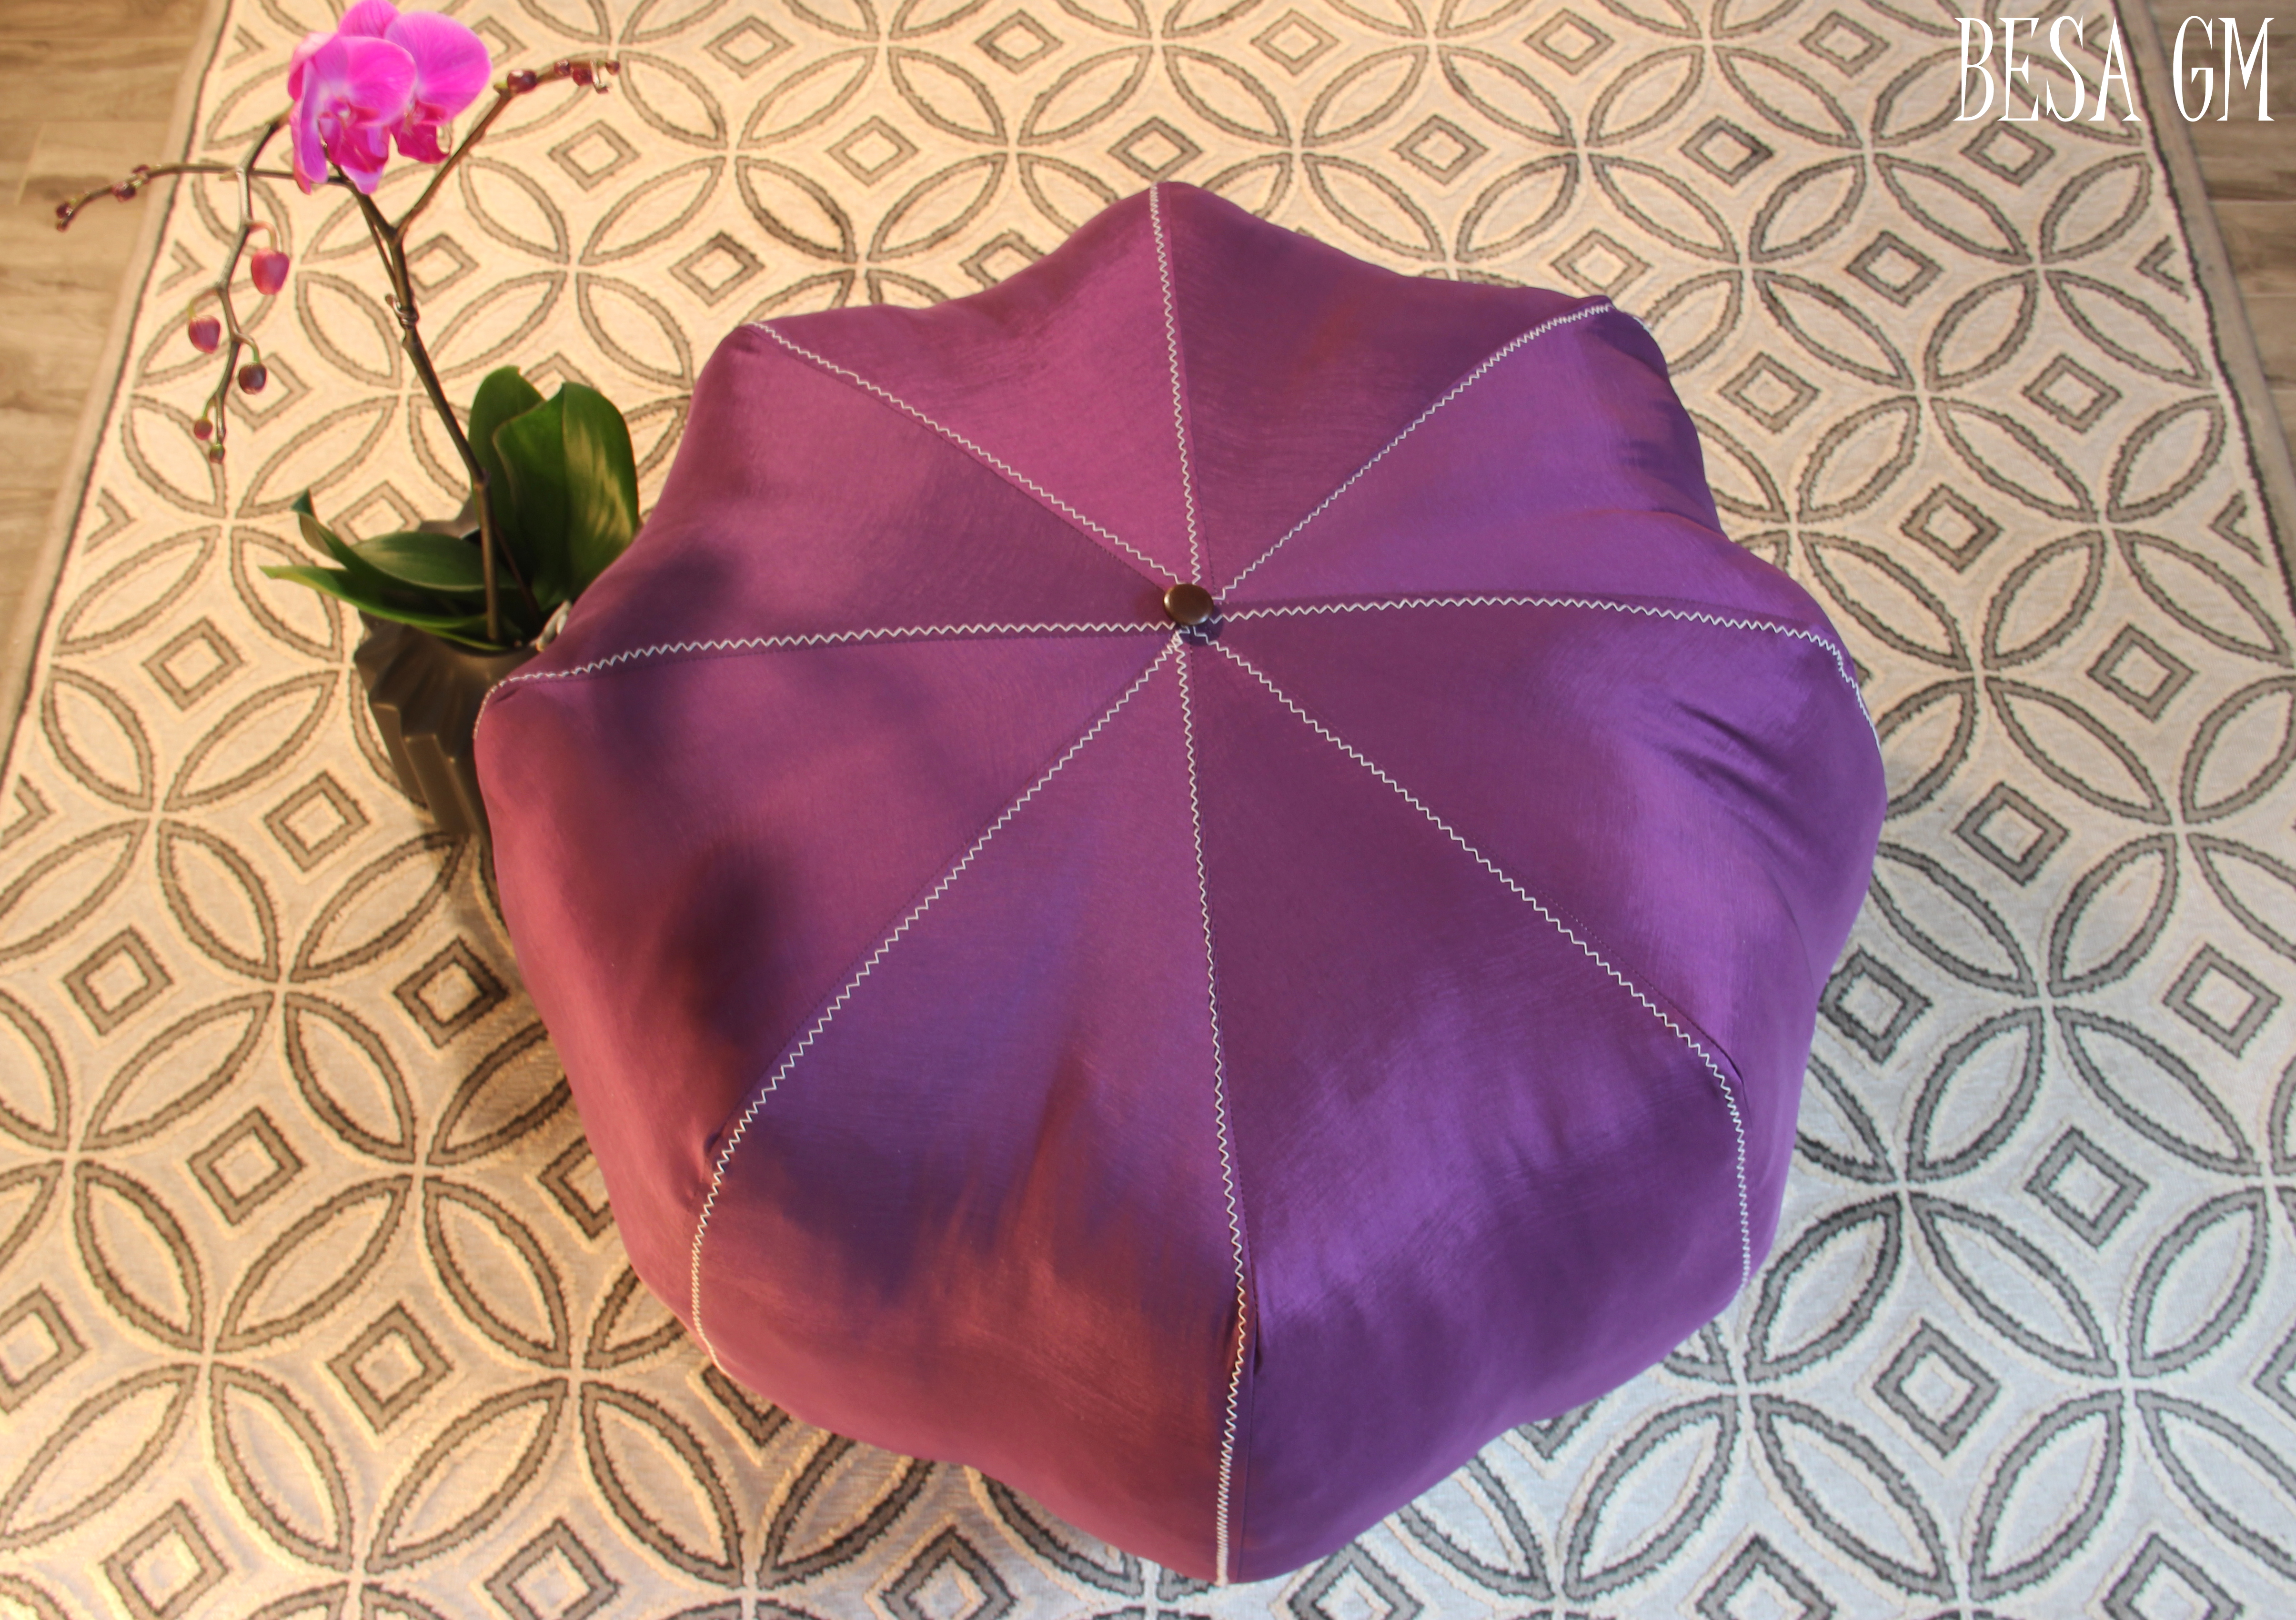
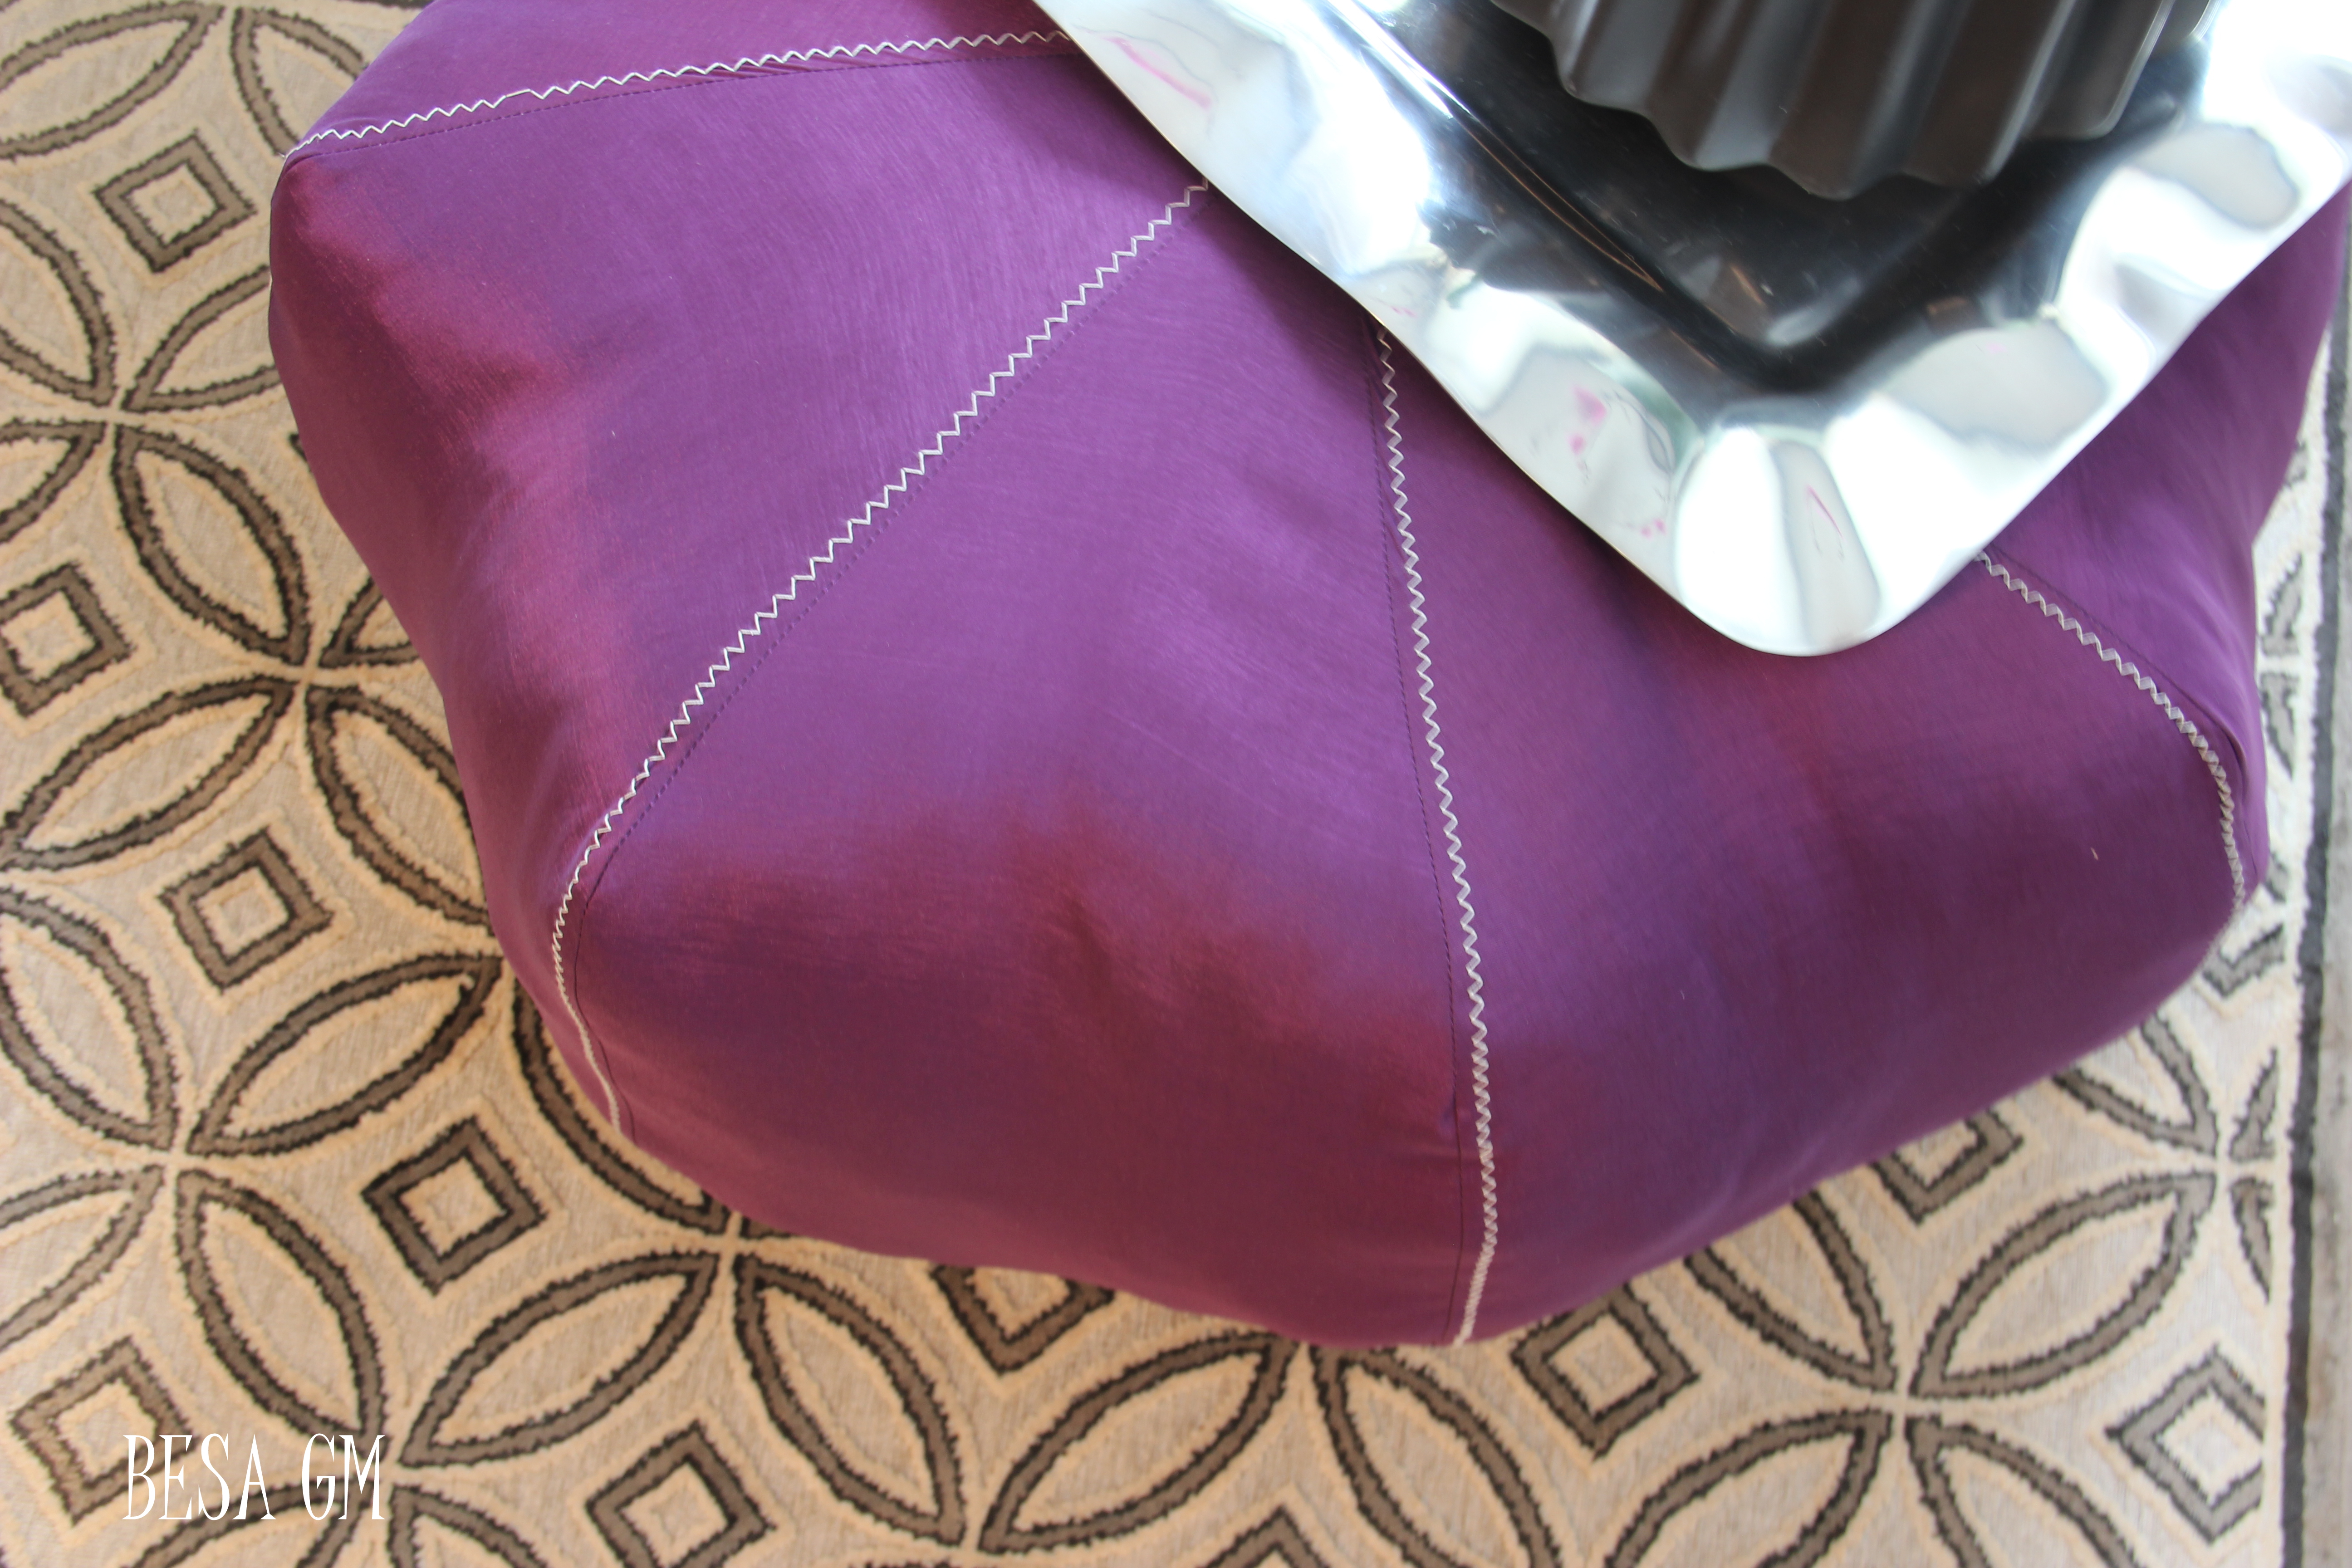
The stretchy fabric made the pouf receive a wavy shape which makes it even more beautiful and fun, so if you fancy this shape get a stretch fabric and do not use the lining.
To make the pouf you will need 2 yards of fabric, plenty of stuffing (you can also use clothing, bed sheets, comforters, paper etc) and of course you will need a sewing machine, measuring tape, scissors,upholstery thread, 36 inch long paper to make a pattern, zipper and a button to finish off the pouf.
To make your pattern, cut a rectangle of paper about 36 inches long and about a foot wide. Fold the paper in half along the short edge and in half again the long edge, then trim to the dimensions indicated in the pic below:
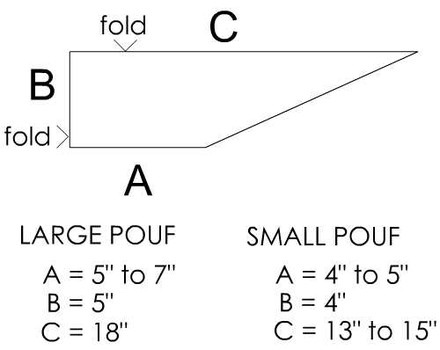
As per the instruction from the pattern above, I unfolded the paper pattern and pined it to the fabric.
I first cut out one section and used this section as a template placing it in a position that allowed me to efficiently use up the fabric.
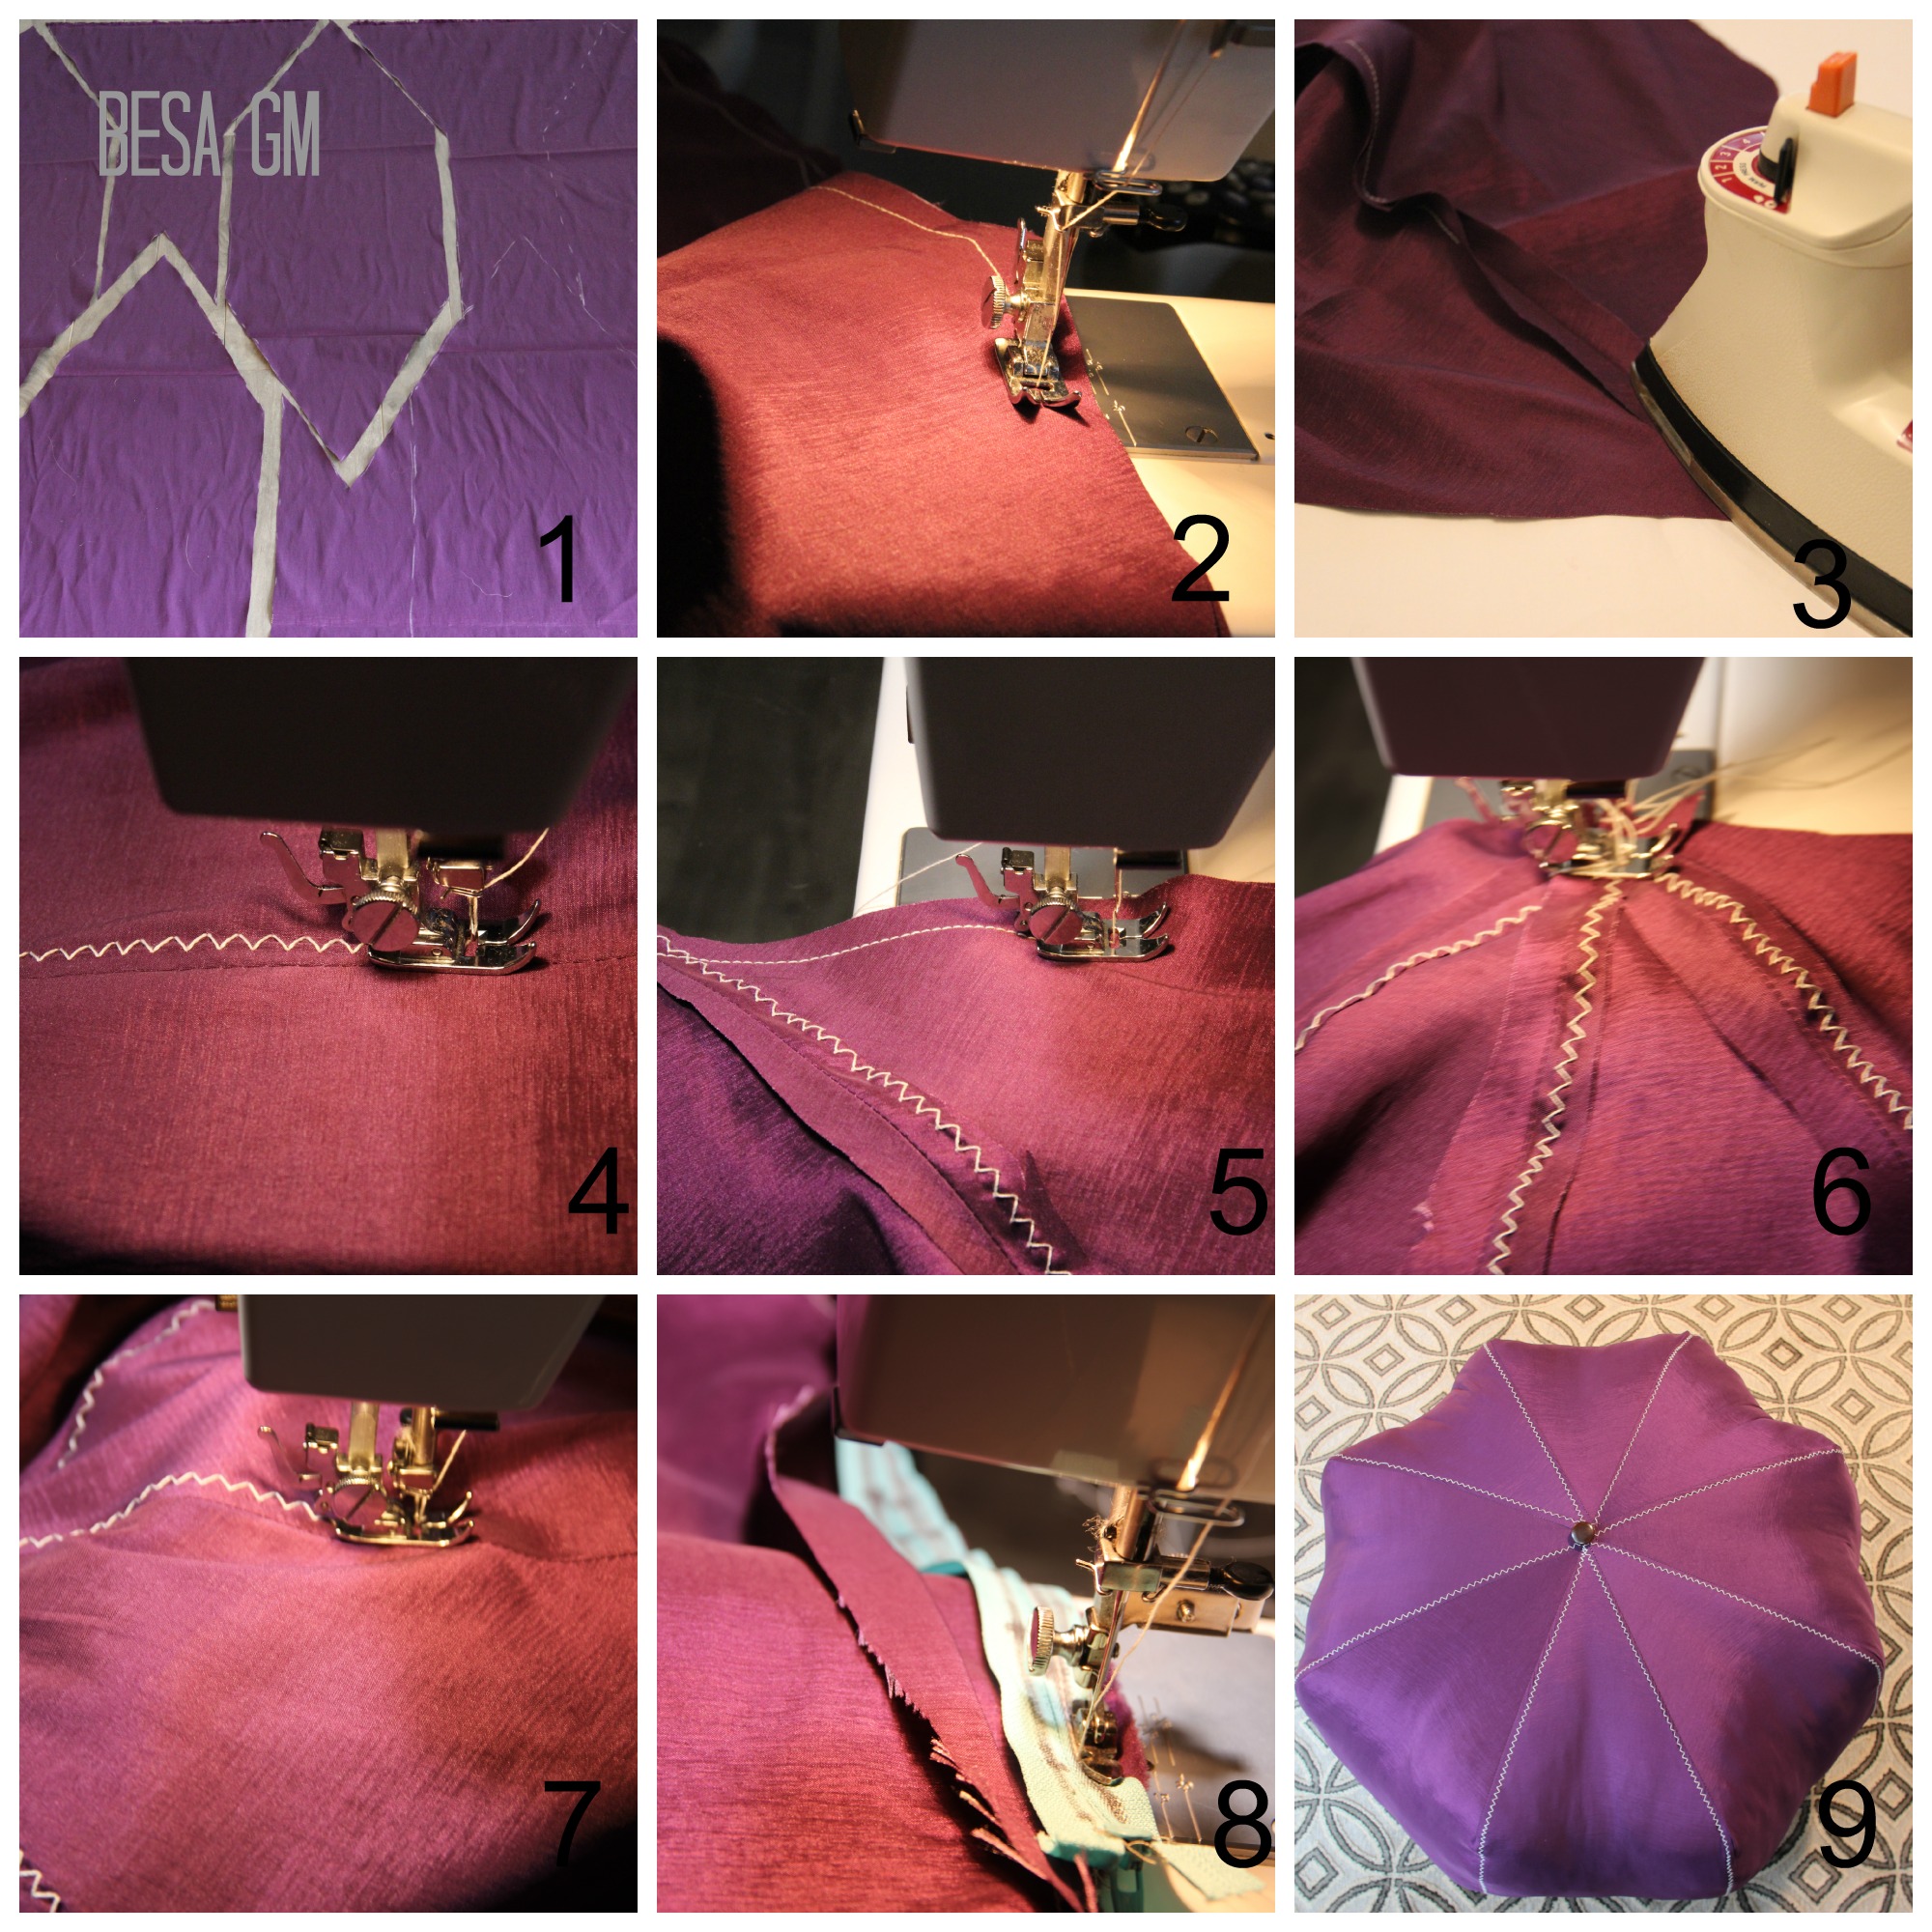
I placed the pattern as seen in the picture 1 (from the collage below), as this is how it worked for me best, and I cut out eight sections.
Sewing:
I pinned two sections together , wrong side out, and sewed them together (pic. 2) along one edge using a 1/2 inch seam allowance. I continued sewing the remaining sections together along one edge in sets of two.
At this point I ironed open the seam allowances of all four sets (pic.3) , and added a top zig zag stitch to each set (pic. 4).
I continued sewing each set of two along one edge into sets of four (pic. 5), and proceeded with the ironing the seam allowances and added zig zag top stitching.
Finally I sewed two sets of four together along both edges (pic. 6) leaving an opening at one side for a zipper.
I sewed on the zipper (pic. 8) and pulled the fabric through the zipper opening to turn it right side out, and added the last top zig zag stitch (pic. 7) starting at the tip of the zipper and continuing all the way around. I finnished it off by adding a large leather button at the top (pic 9).
I stuffed the pouf with the repurposed stuffing taken from two oversized sofa pillows. Two huge back pillows are stuffed in this not so big pouf, and i think that it could take even more.

Some of you may be intimidated with the work involved in this project and about the level of sewing skills. Even though I have advanced sewing skills, I am sure that this project can be easily tackled by anyone who has beginner level sewing skills, provided that they can easily sew a strait stitch.
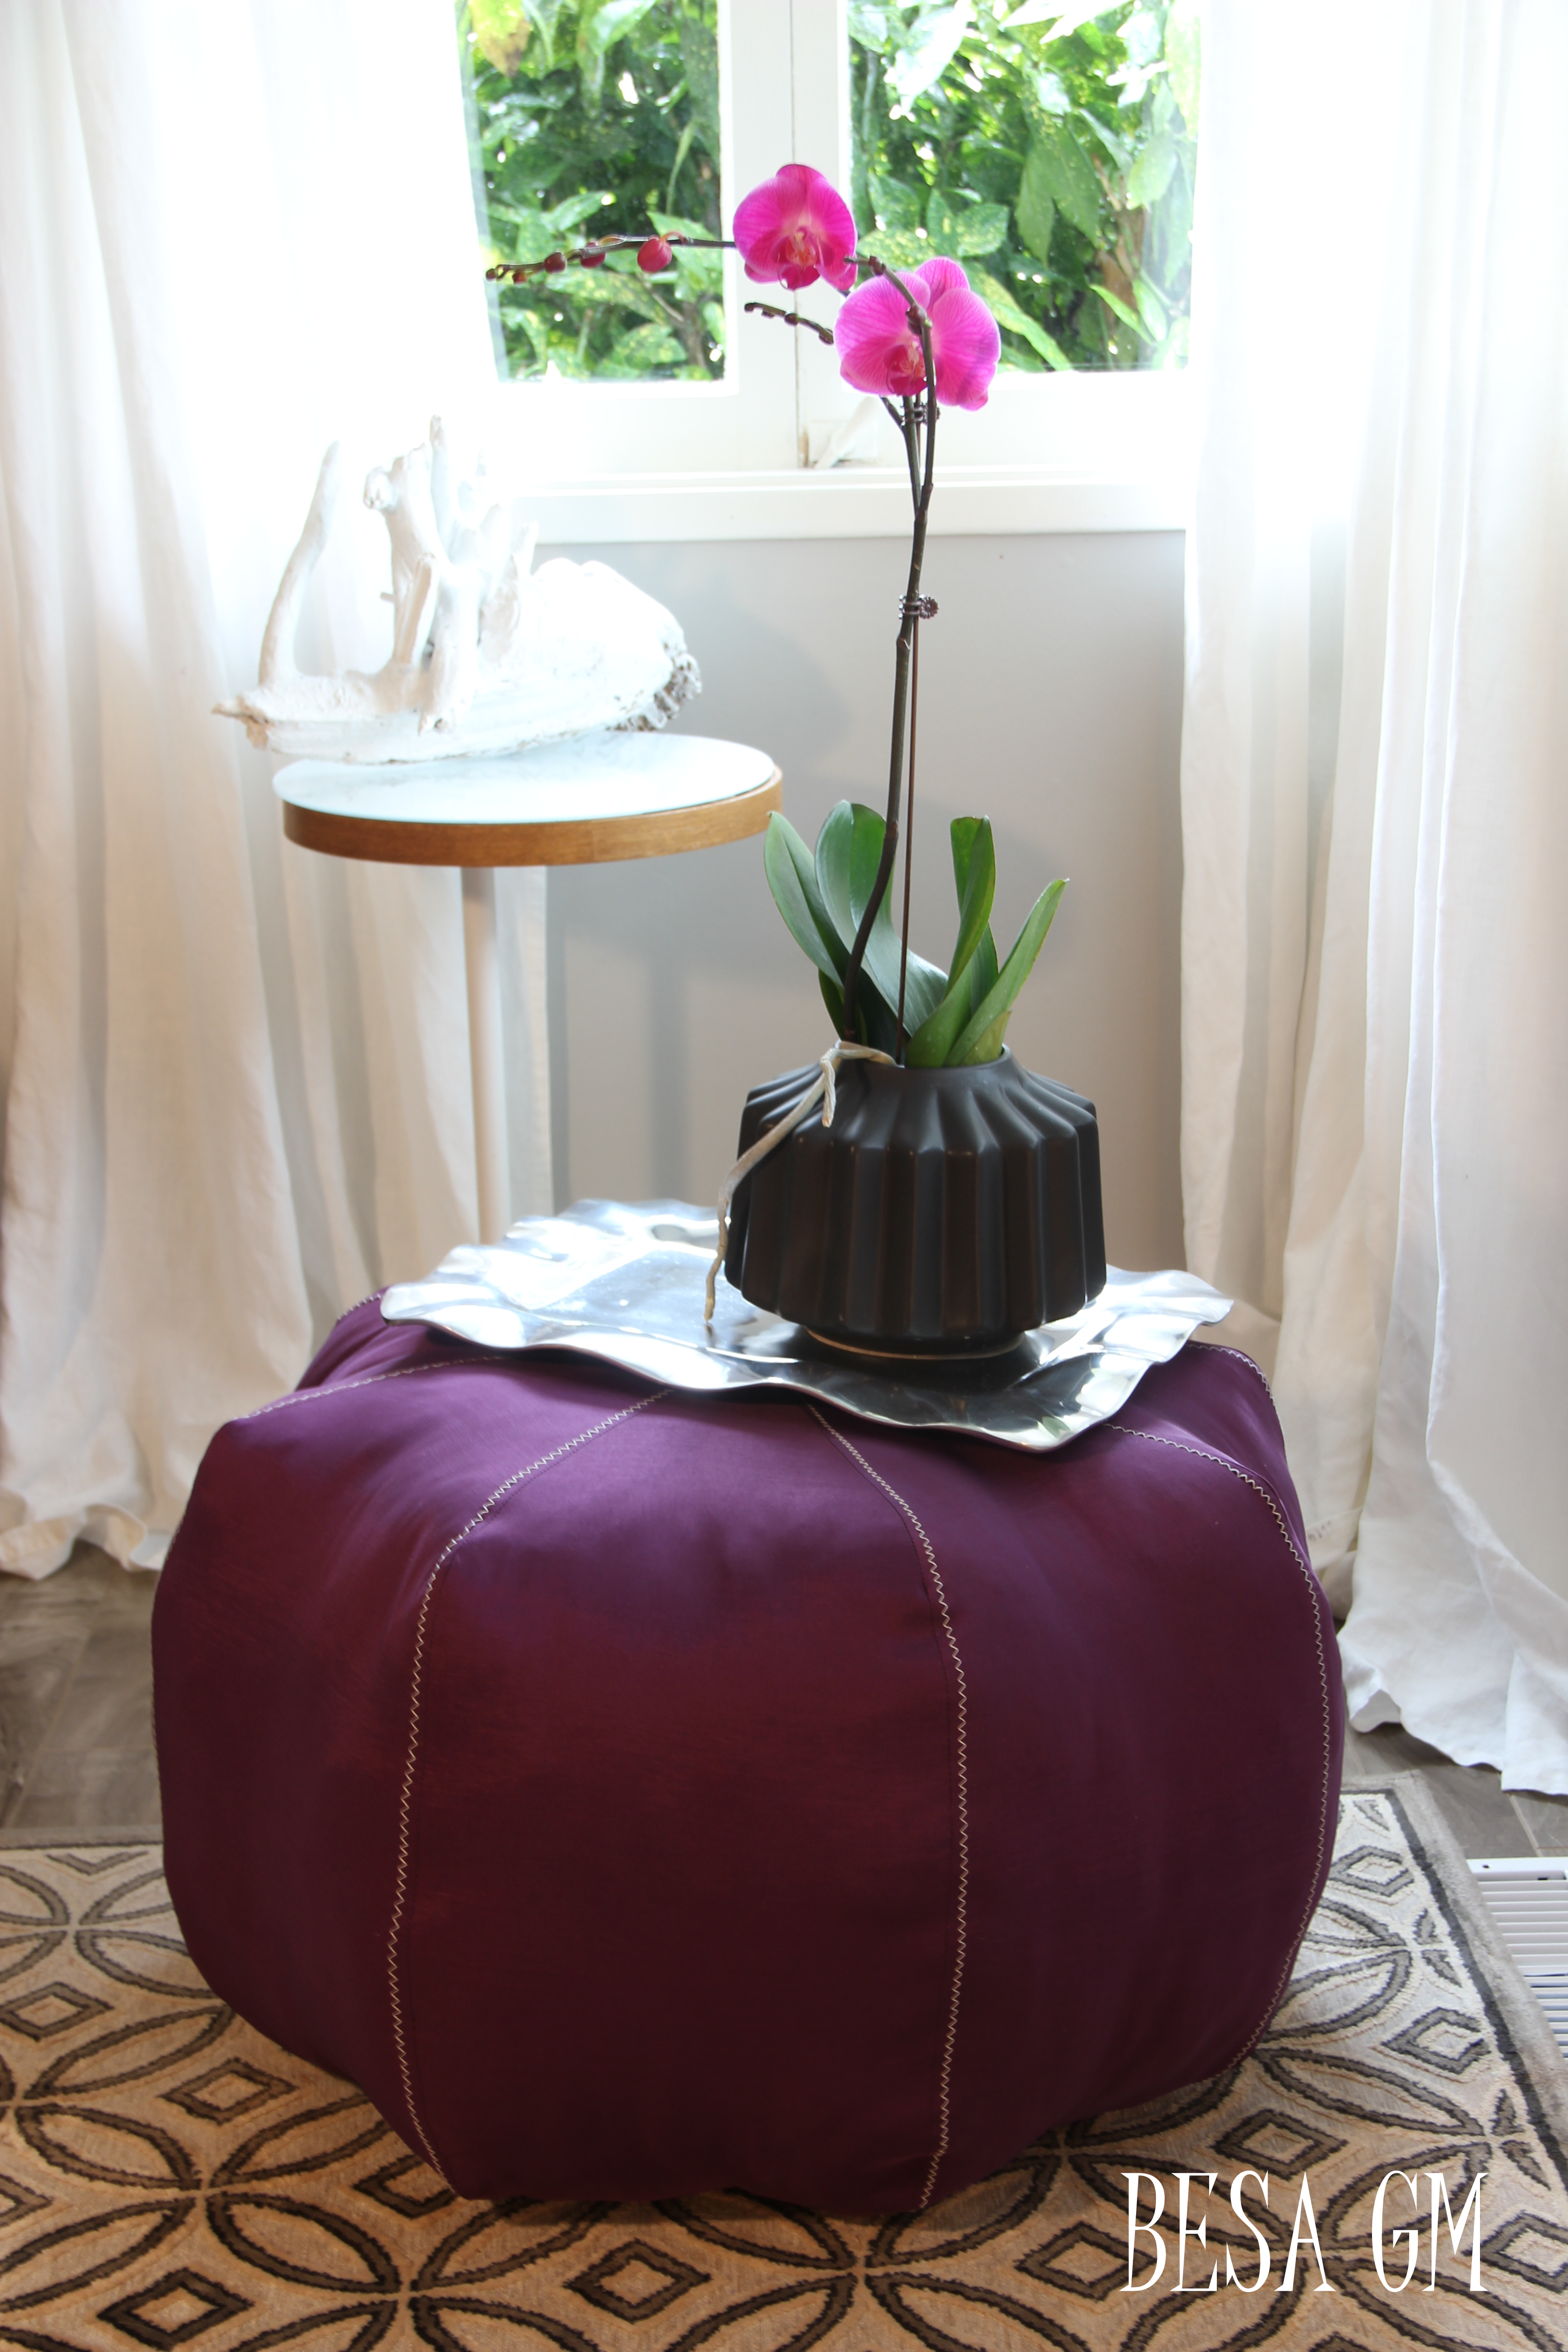
I spent less than 2 hours to complete this project, and I am so glad that I decided to infuse the color of the year into my home decor through this pouf.

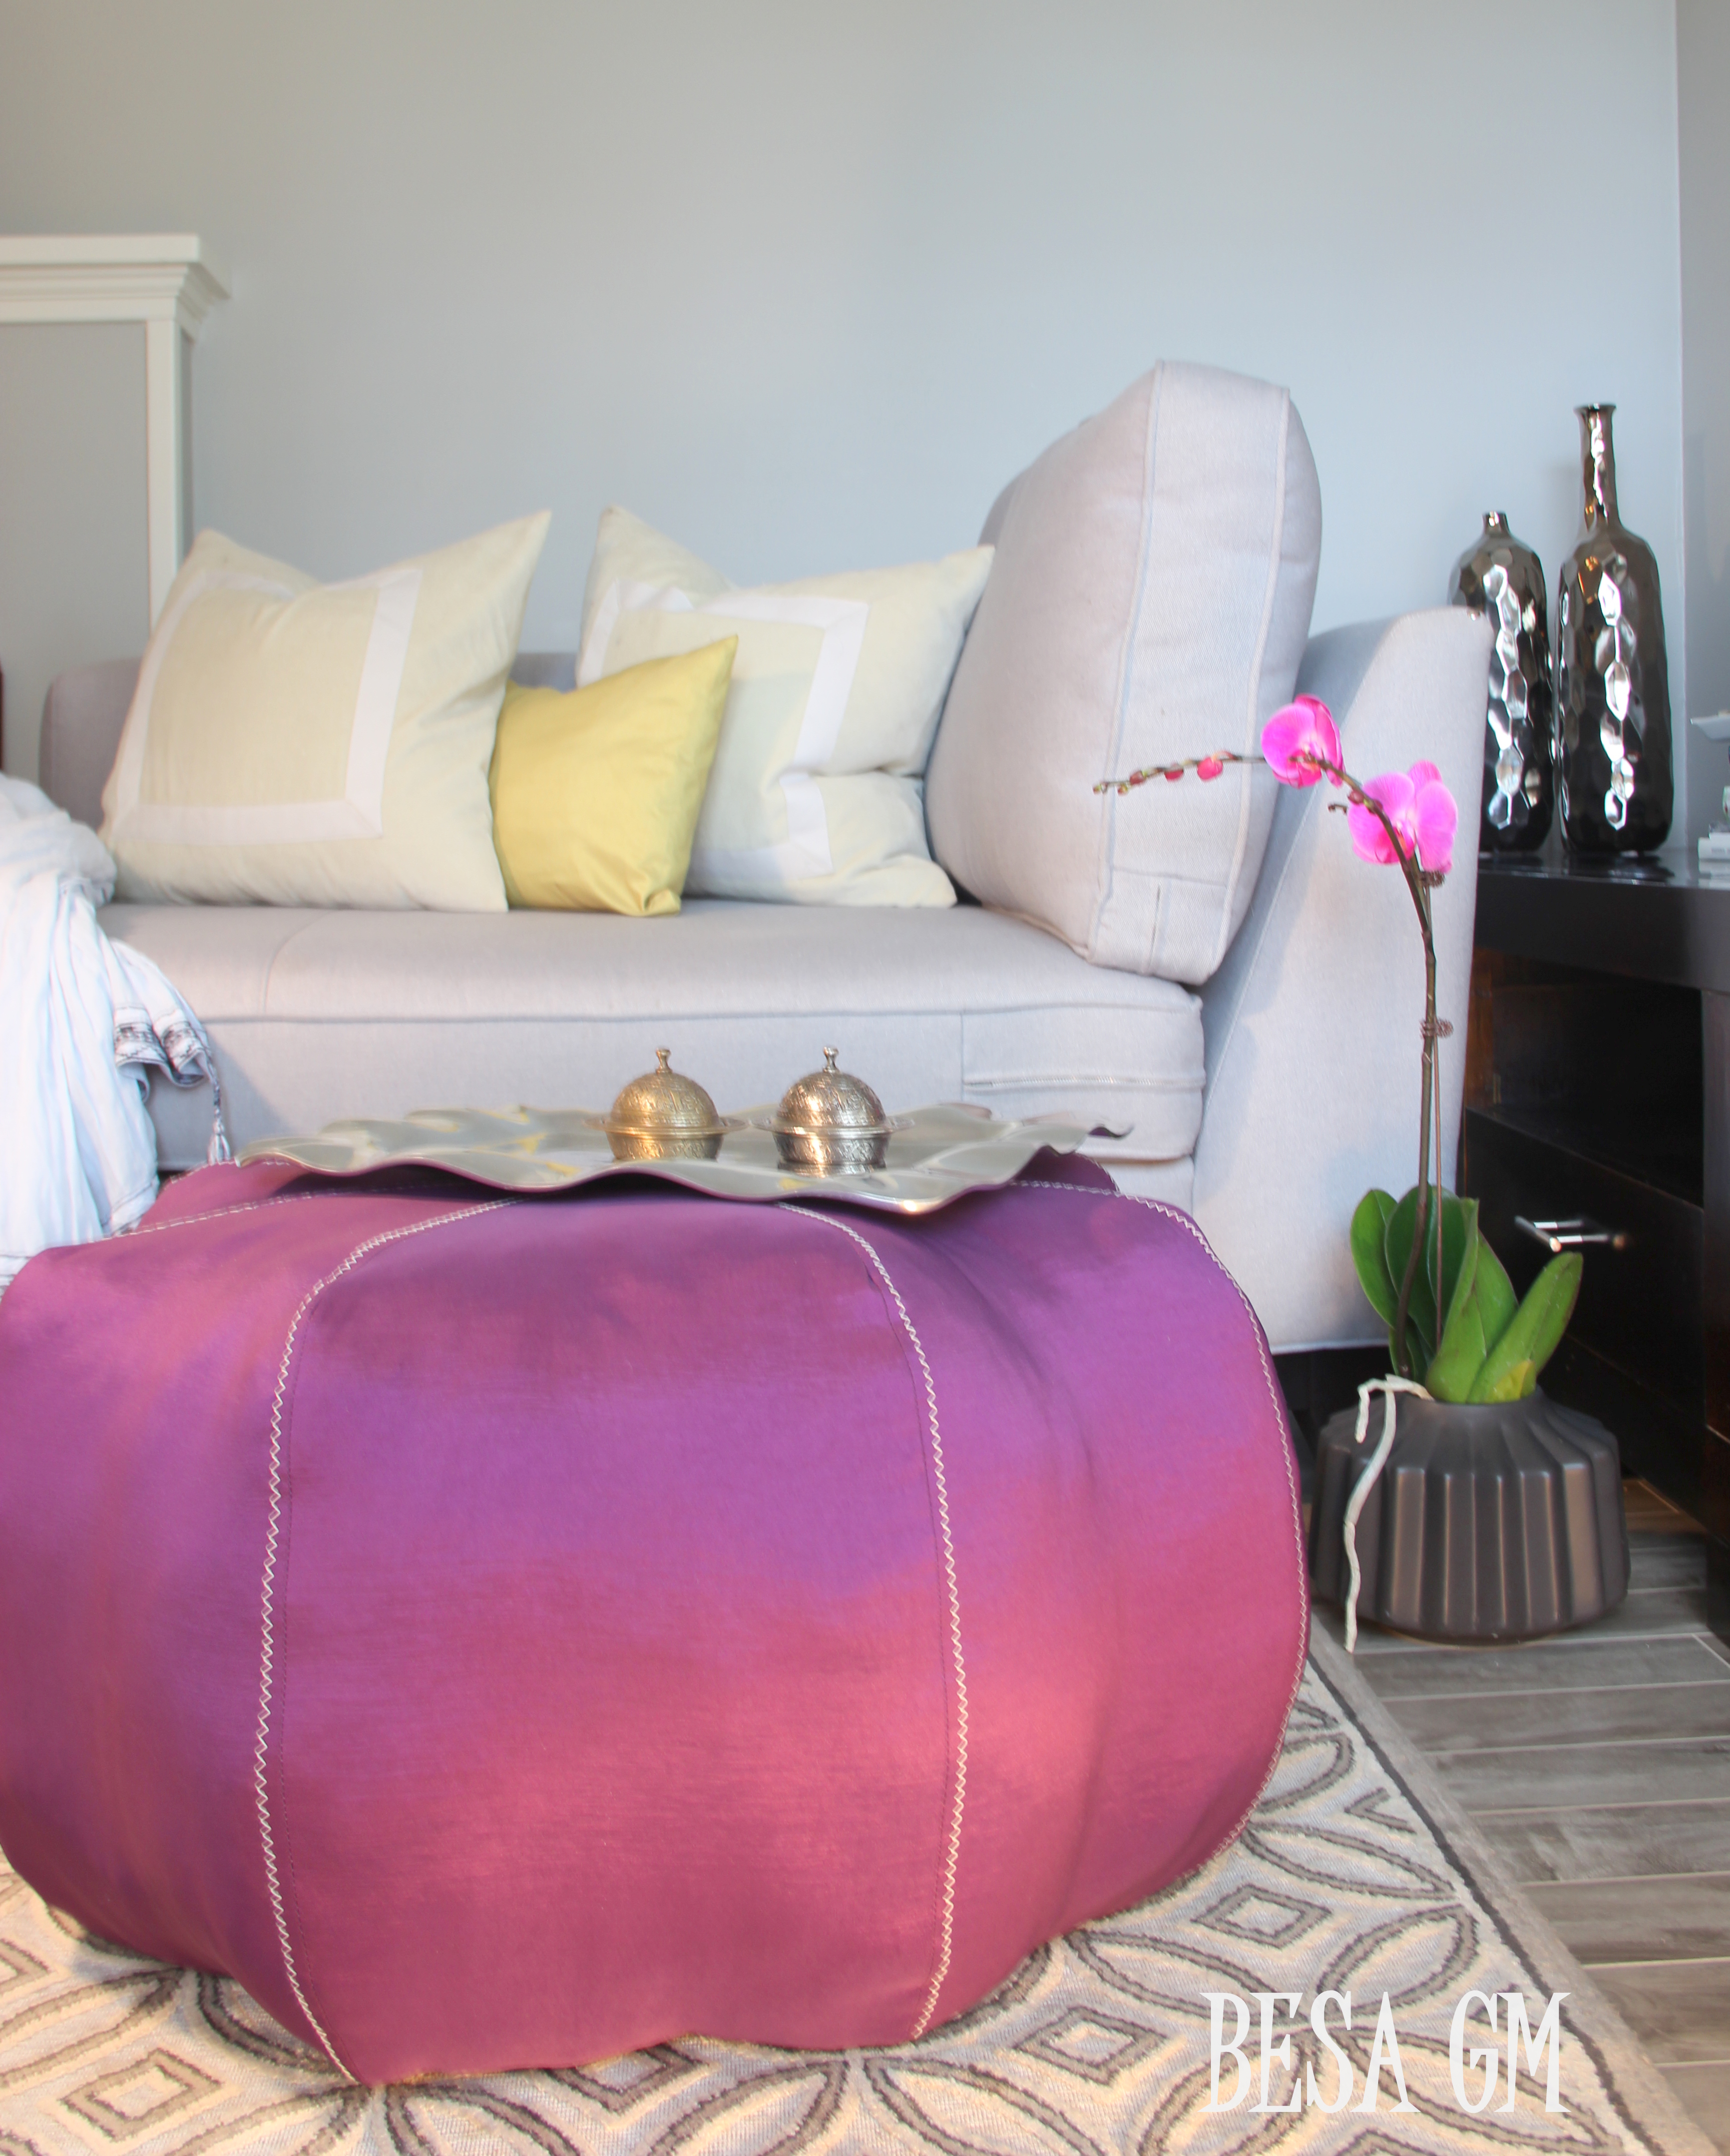
The pouf has added a splash of fun color in my living room, and I am loving it.
If anyone decides to tackle this project I would be so happy if you send me the pictures to see how your pouf turned out.
Great thanks to the following blog sites for featuring this post: Rain on a Tin Roof, Life in Velvet, The Cottage Market, DIY Vintage Chic; Time To Sparkle
Thank you for reading.
Besa

Like I said”.. Target needs to come knocking on your door to feature your line… That is awesome!!
Thank you so much for complimenting my work to that degree…you are such a sweet person. Thanks a million for taking time to visit my blog, to “like” my posts and making these sweet comments.
Komplimente Besa!Je shume e talentuar
Faleminderit Mimoza.
Pershendetje nga Deti!Je me e mira,bravo
Faleminderit Deti.
What a pretty pouf! I love your projects and your photos are beautiful! Thanks for linking up to The Makers!
Thank you so much for hosting the party, for stopping by to leave a comment and for your compliments.
This is amazing! I love the iridescent purple fabric–looks so luxe and comfy 🙂
Thanks so much for stopping by and taking time to comment.
This is totally cute! I Love this style but don’t want to pay the $$ stores charge for it! I might have to make a couple for my living room! Thank you for sharing!
Emily @ HouseandHone.com
They are quite expensive really, but relatively easy to make; so why pay top $$ when you can make your own.Thanks for stopping by and leaving a comment.
that is so, so good! I just bought one from amazon that was oversized looking, like this one. luckily I used a gift card I won, and it was free. otherwise I would maybe have tried to diy one somehow.
Glad that you got it for free, otherwise you would enjoy making one. The sewing and stuffing proccess was a lot of fun. Thanks for stopping by and for taking time to comment.
This is so pretty! I really love the shape as well. Thanks so much for linking up to The Makers.
THank you so much for visting and for leaving a comment and compliment.
This looks great! I’ve tackled a square pouf but not the moroccan kind…you got me thinking about making another one. Coming over from the link-up at The Makers.
Thank you so much for your visit.
Your pouf is positively perfect! I love that you made it yourself and would love for you to come and share on Fridays Unfolded!
Alison
Nancherrow
Thanks for the compliment Alison. I just stopped by your blog and added a link. Great thanks for hosting the party.
Really fabulous. It’s like making a pumpkin on a large scale…plus more complicated with the zipper. I’m in the process of making a slipcover for a big ottoman from a velvet curtain from GW. Happy Valentine’s Day Nancy
PS – Love your curtains!
Thanks so much Nancy for stopping by and leaving a comment. It was a real fun making the pouf. Hope that your ottoman slipcover turns great. Happy Valentine’s Day to you too.
Purple Pouf is lovely and your room is charming :))
Happy Pink Saturday & Happy Valentines Day!
So nice to meet you,
Kay Ellen
Thank you so much Key for visiting and taking time to comment and for the compliment. Nice to meet you too. Besa
I have a couple of really big floor pillows that I like, but this is even better! Love it! ~Kelly @ Eyes On The Source
Thank you Kelly.
Gorgeous (as always!) I LOVE, LOVE your pouf. Pinned! Thank you so much for linking up at Thursday STYLE.
Thank you Angela for the compliment, and great thanks for hosting the link party.
I had to pin this for future reference. It’s simple sewing. I think I’d put the zip in first up. Now I just need to find the right fabric and gather up any stuffing I see at the charity shops. Thanks for the great idea.
http://llibbyslifestyle.blogspot.com.au
Thanks so much for visiting and for taking time to leave a comment. Indeed it is a simple sewing and in no time you will end up with a great and comfy pouf. Will love to see how your’s will turn out, and thanks also for pinning.
That is actually quite amazing!
Thank you for stopping by my blog, and for your compliment.
This is so pretty! You can save so much money making your own! I have always been put off by the price of the premade poufs at the store. Love this!
It is so true, the premade puofs are quite expensive, so by making your own you may save a lot. Thanks so much for stopping by and taking time to leave a comment.
This is so elegant and I love the color! It jus pops. You did a fantastic job. I can see a career possibility here. Thanks for sharing with SYC.
hugs,
Jann
Thanks so much Jann for your sweet comment and great thanks for hosting.
Congratulations! I will be featuring your DIY Moroccan Pouf at Thursday STYLE tonight. I absolutely love this project, it’s gorgeous. We would absolutely love to see you back to link up tonight at 8 EST. We just love seeing your amazing work!
Beautiful pouf!! Actually I really love everything about your room!! 🙂 It’s all just so pretty!!
Thank you so much for stopping by and leaving such a sweet comment and a compliment. Your sweet treats look delicious, and photos are incredible. I pinned a few recipes, and looking forward to come back for more. Have a great week.
Beautiful! I really, really, really want a pouf. Now I’m inspired to DIY!
Thanks for stopping by, and I am so happy that you found an inspiration from this post. If you tackle this project, I would love to hear how your pouf turns out. Have a great weekend.