

Ever since entering the world of blogland I have seen quite a few painted wing chairs and sofas from bloggers out there, and many of them are quite fantastic.
While I was convinced that paint can fix and bring up to date almost everything, I was not sure whether the ordinary latex interior paint could fix and bring a cast-off chair into an up-to-date furnishing, so I wanted to undertake a challenge of painting an outdated wingback chair.
I found two (quite ugly) wingback chairs in the local adds for free, and had some leftovers of different colors of latex interior and exterior paint so I decided to paint one of the chairs.
I partially followed the instructions of Hyphen Interiors for painting a chair. I did not use the textile medium as I found this product to be quite expensive. Textile medium is a permanent bonding solution that when mixed with paint will become permanent to fabric, so when you wash the fabric the paint or the dye does not come off.
I used:
Less than 1 Quart of Latex Water Based Paint-White
1/2 Quart of Latex Water Based Paint-BM Sea Haze
Spray Bottle full of water
2 inch paint brush
sponge brush for edges
Sponge roller
Spray paint- white
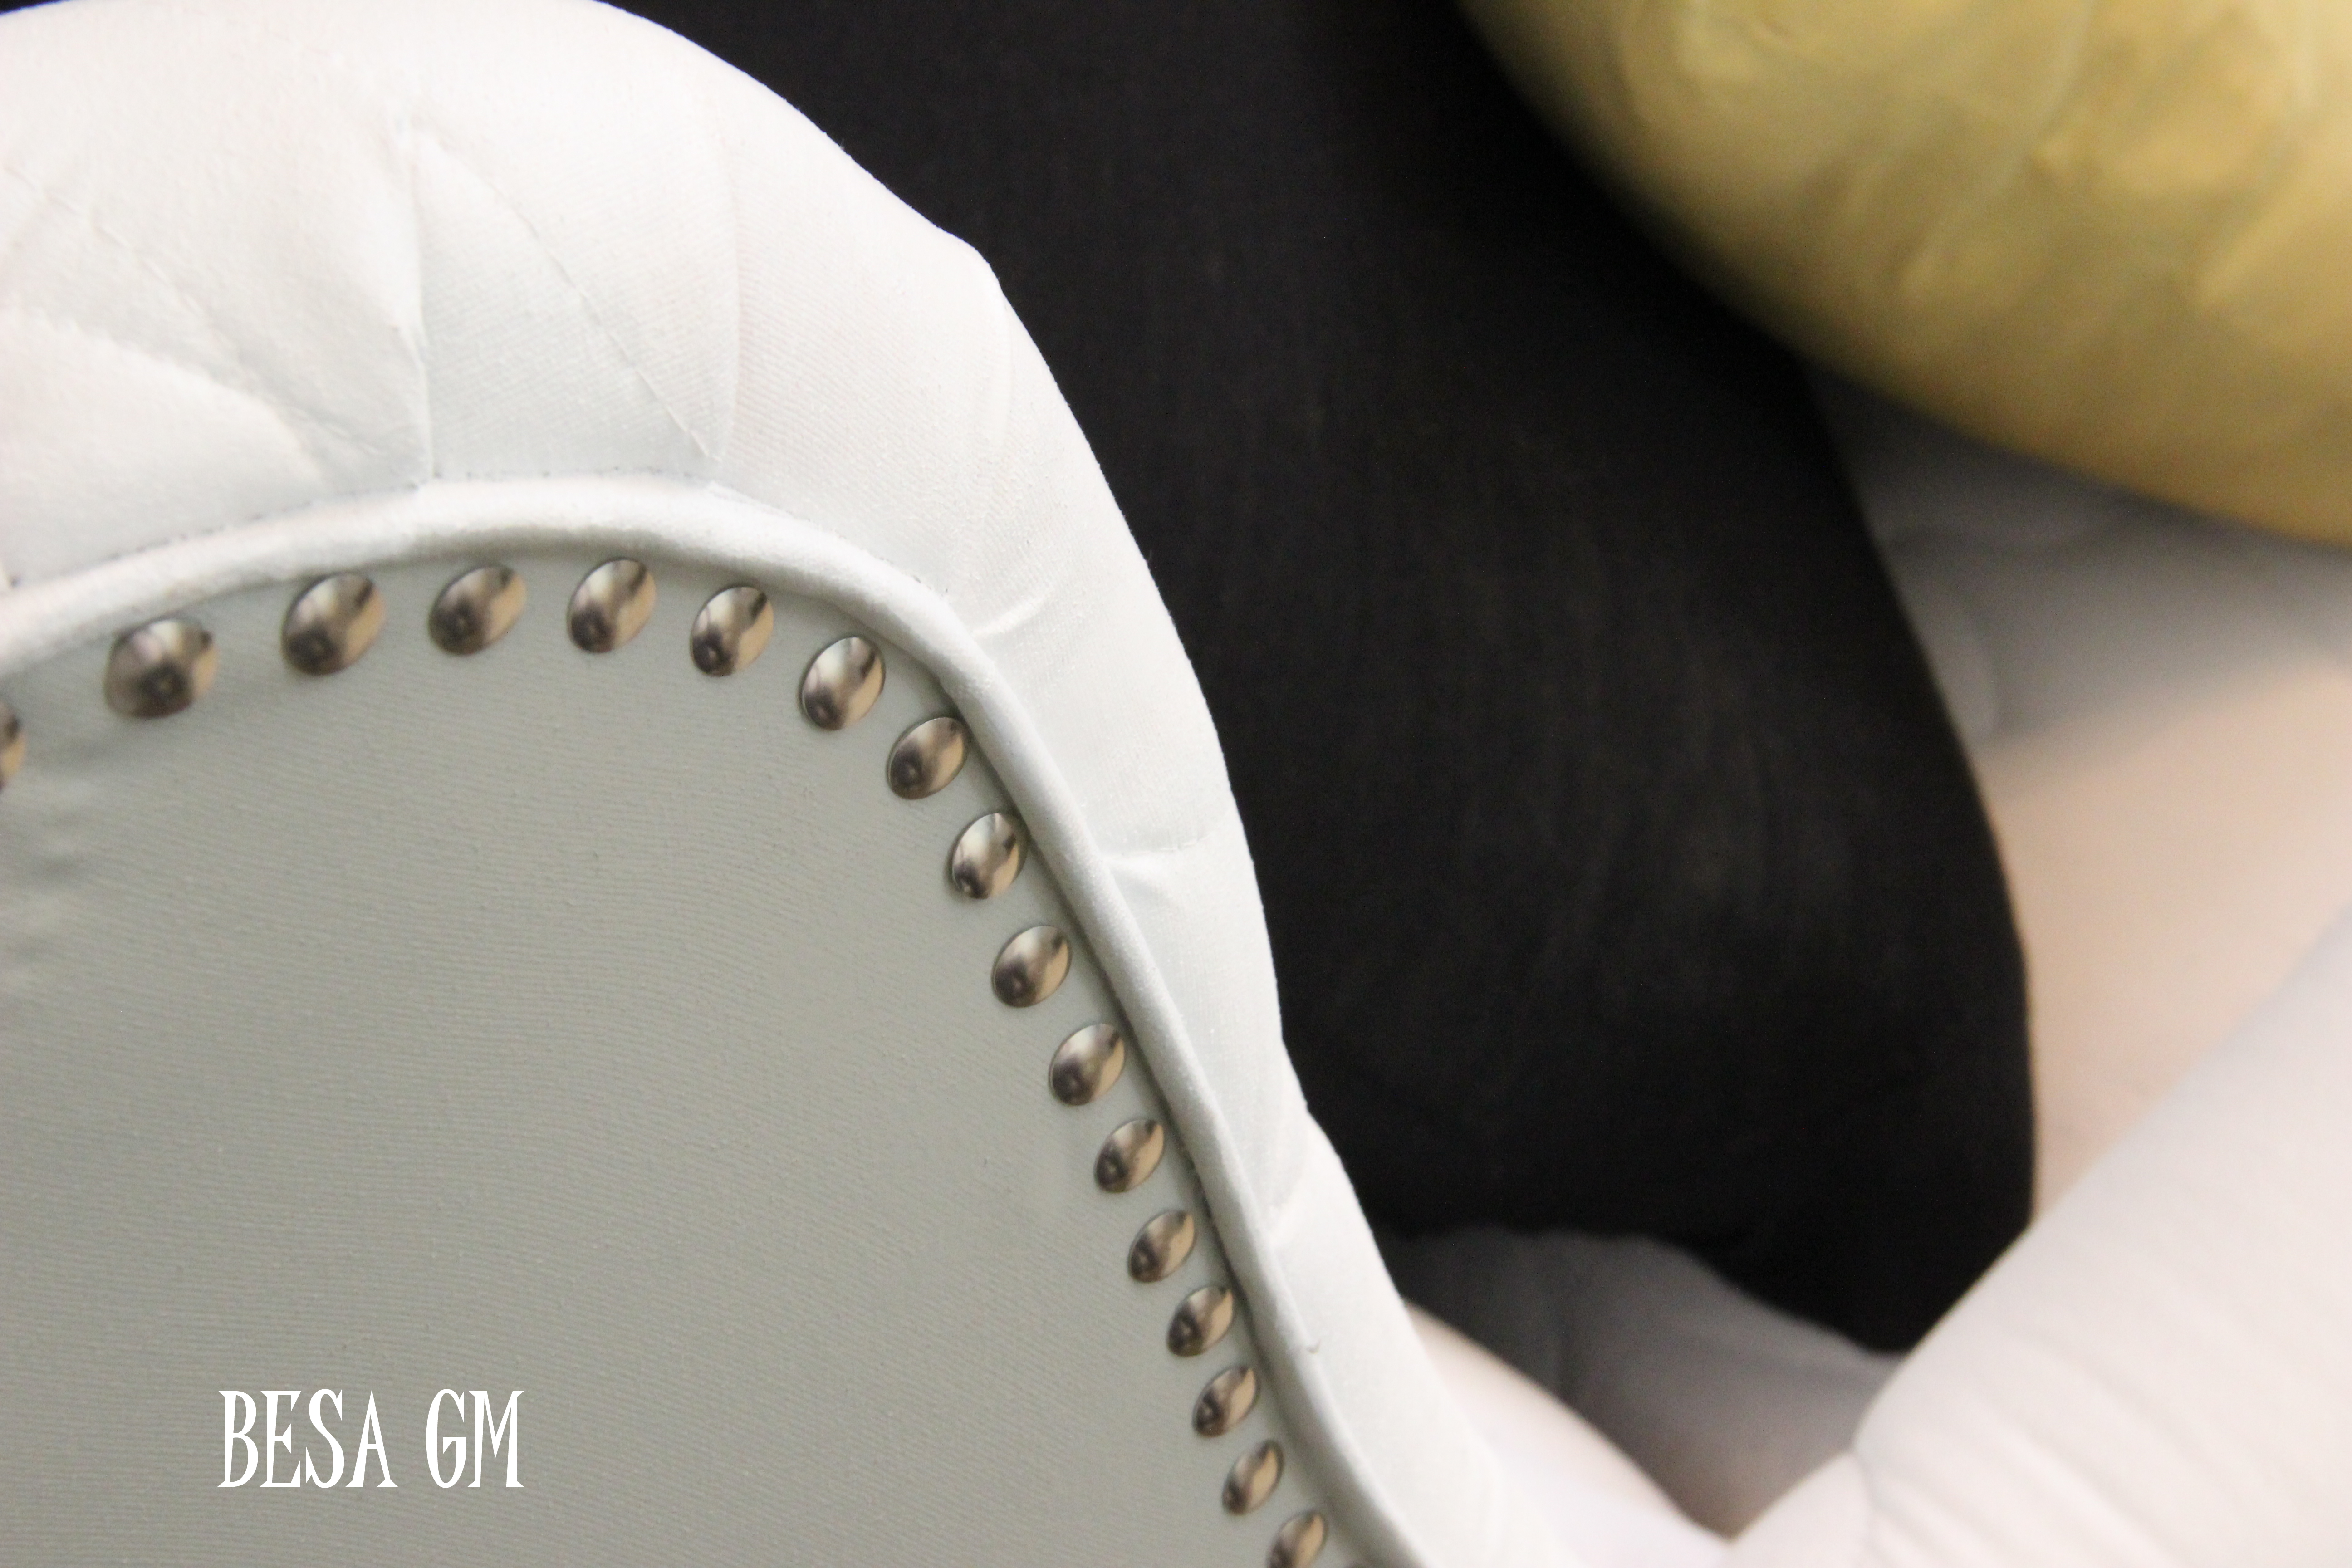
Thumbtacks- about 200
Total cost of the project: $1.25 for a package(300 counts) of thumbtacks purchased at a Dollar Store.
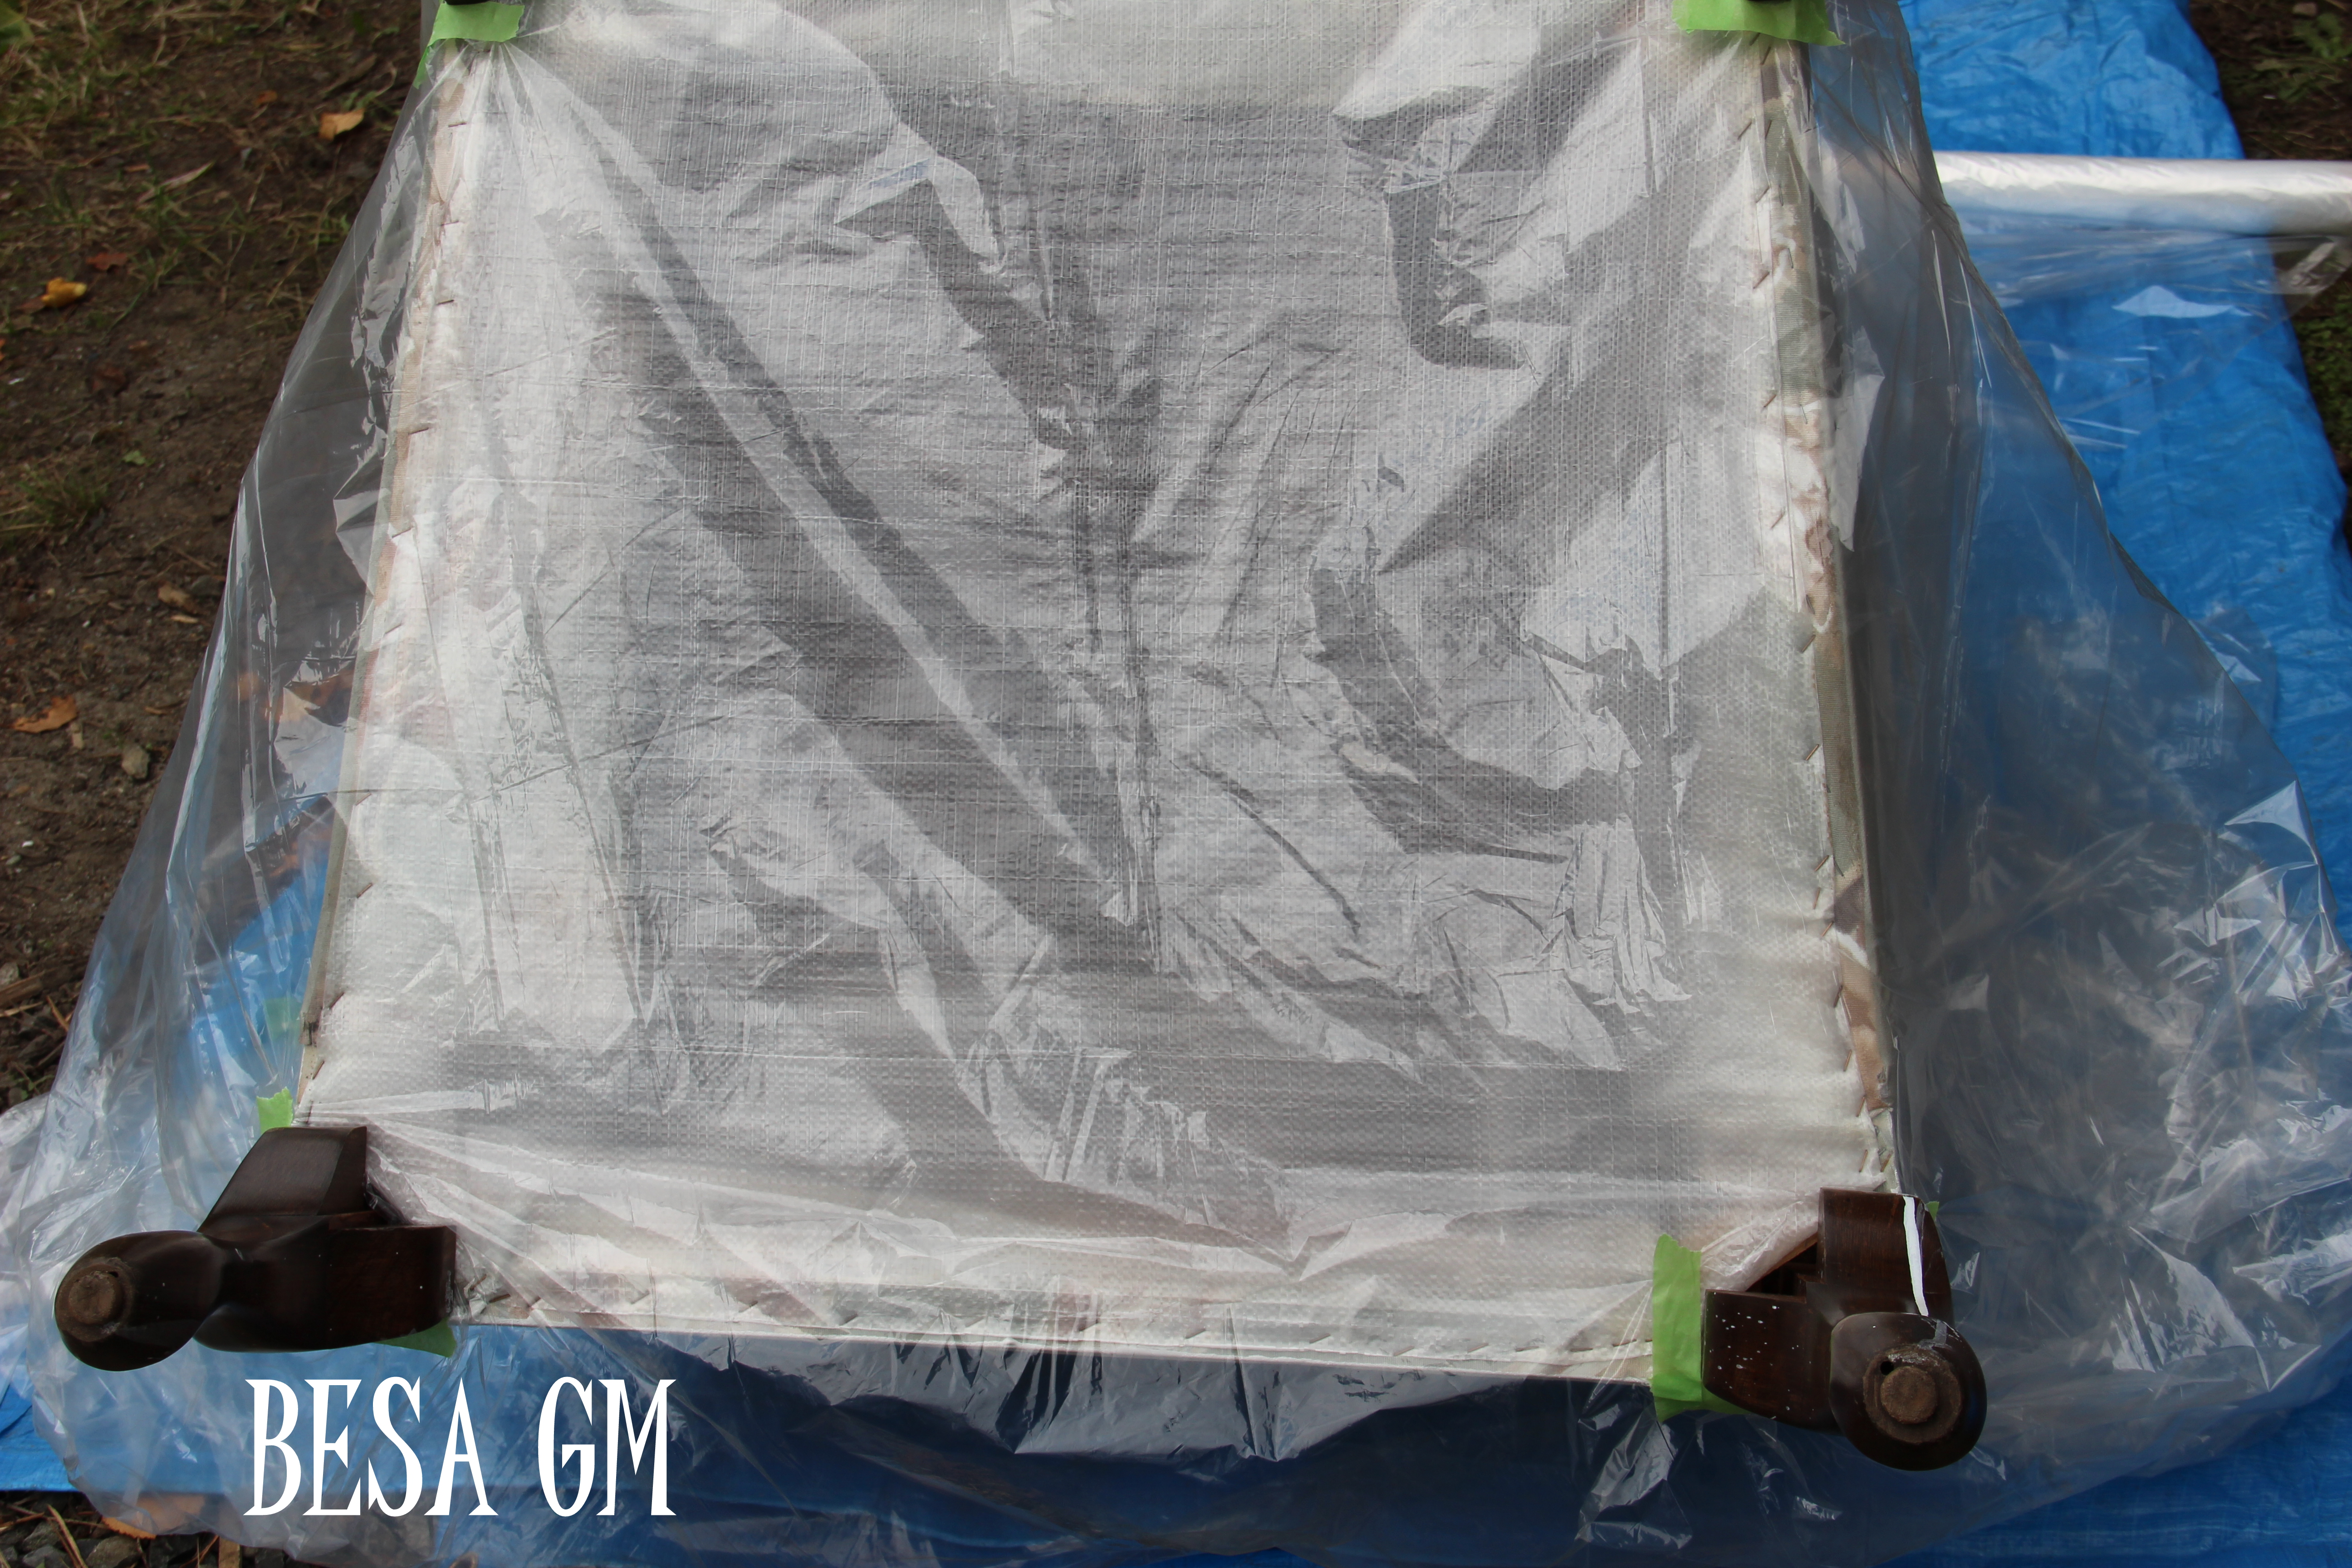
I mixed 1 part of white latex paint and 1 part water for the first and second coat. For the third and fourth coat I mixed 1 part of paint and 1/4 water. During the first and second coat I lightly sprayed the fabric with water before applying the paint. The spraying helps the paint to evenly penetrate into the fabric. I used a sponge roller to apply the first and second coat and small sponge brush for painting the edges and the piping. The third and fourth coat was applied with the brush. I did not sand between the coats as suggested by many bloggers who undertook this challenge previously, and I was satisfied with the results I was getting.

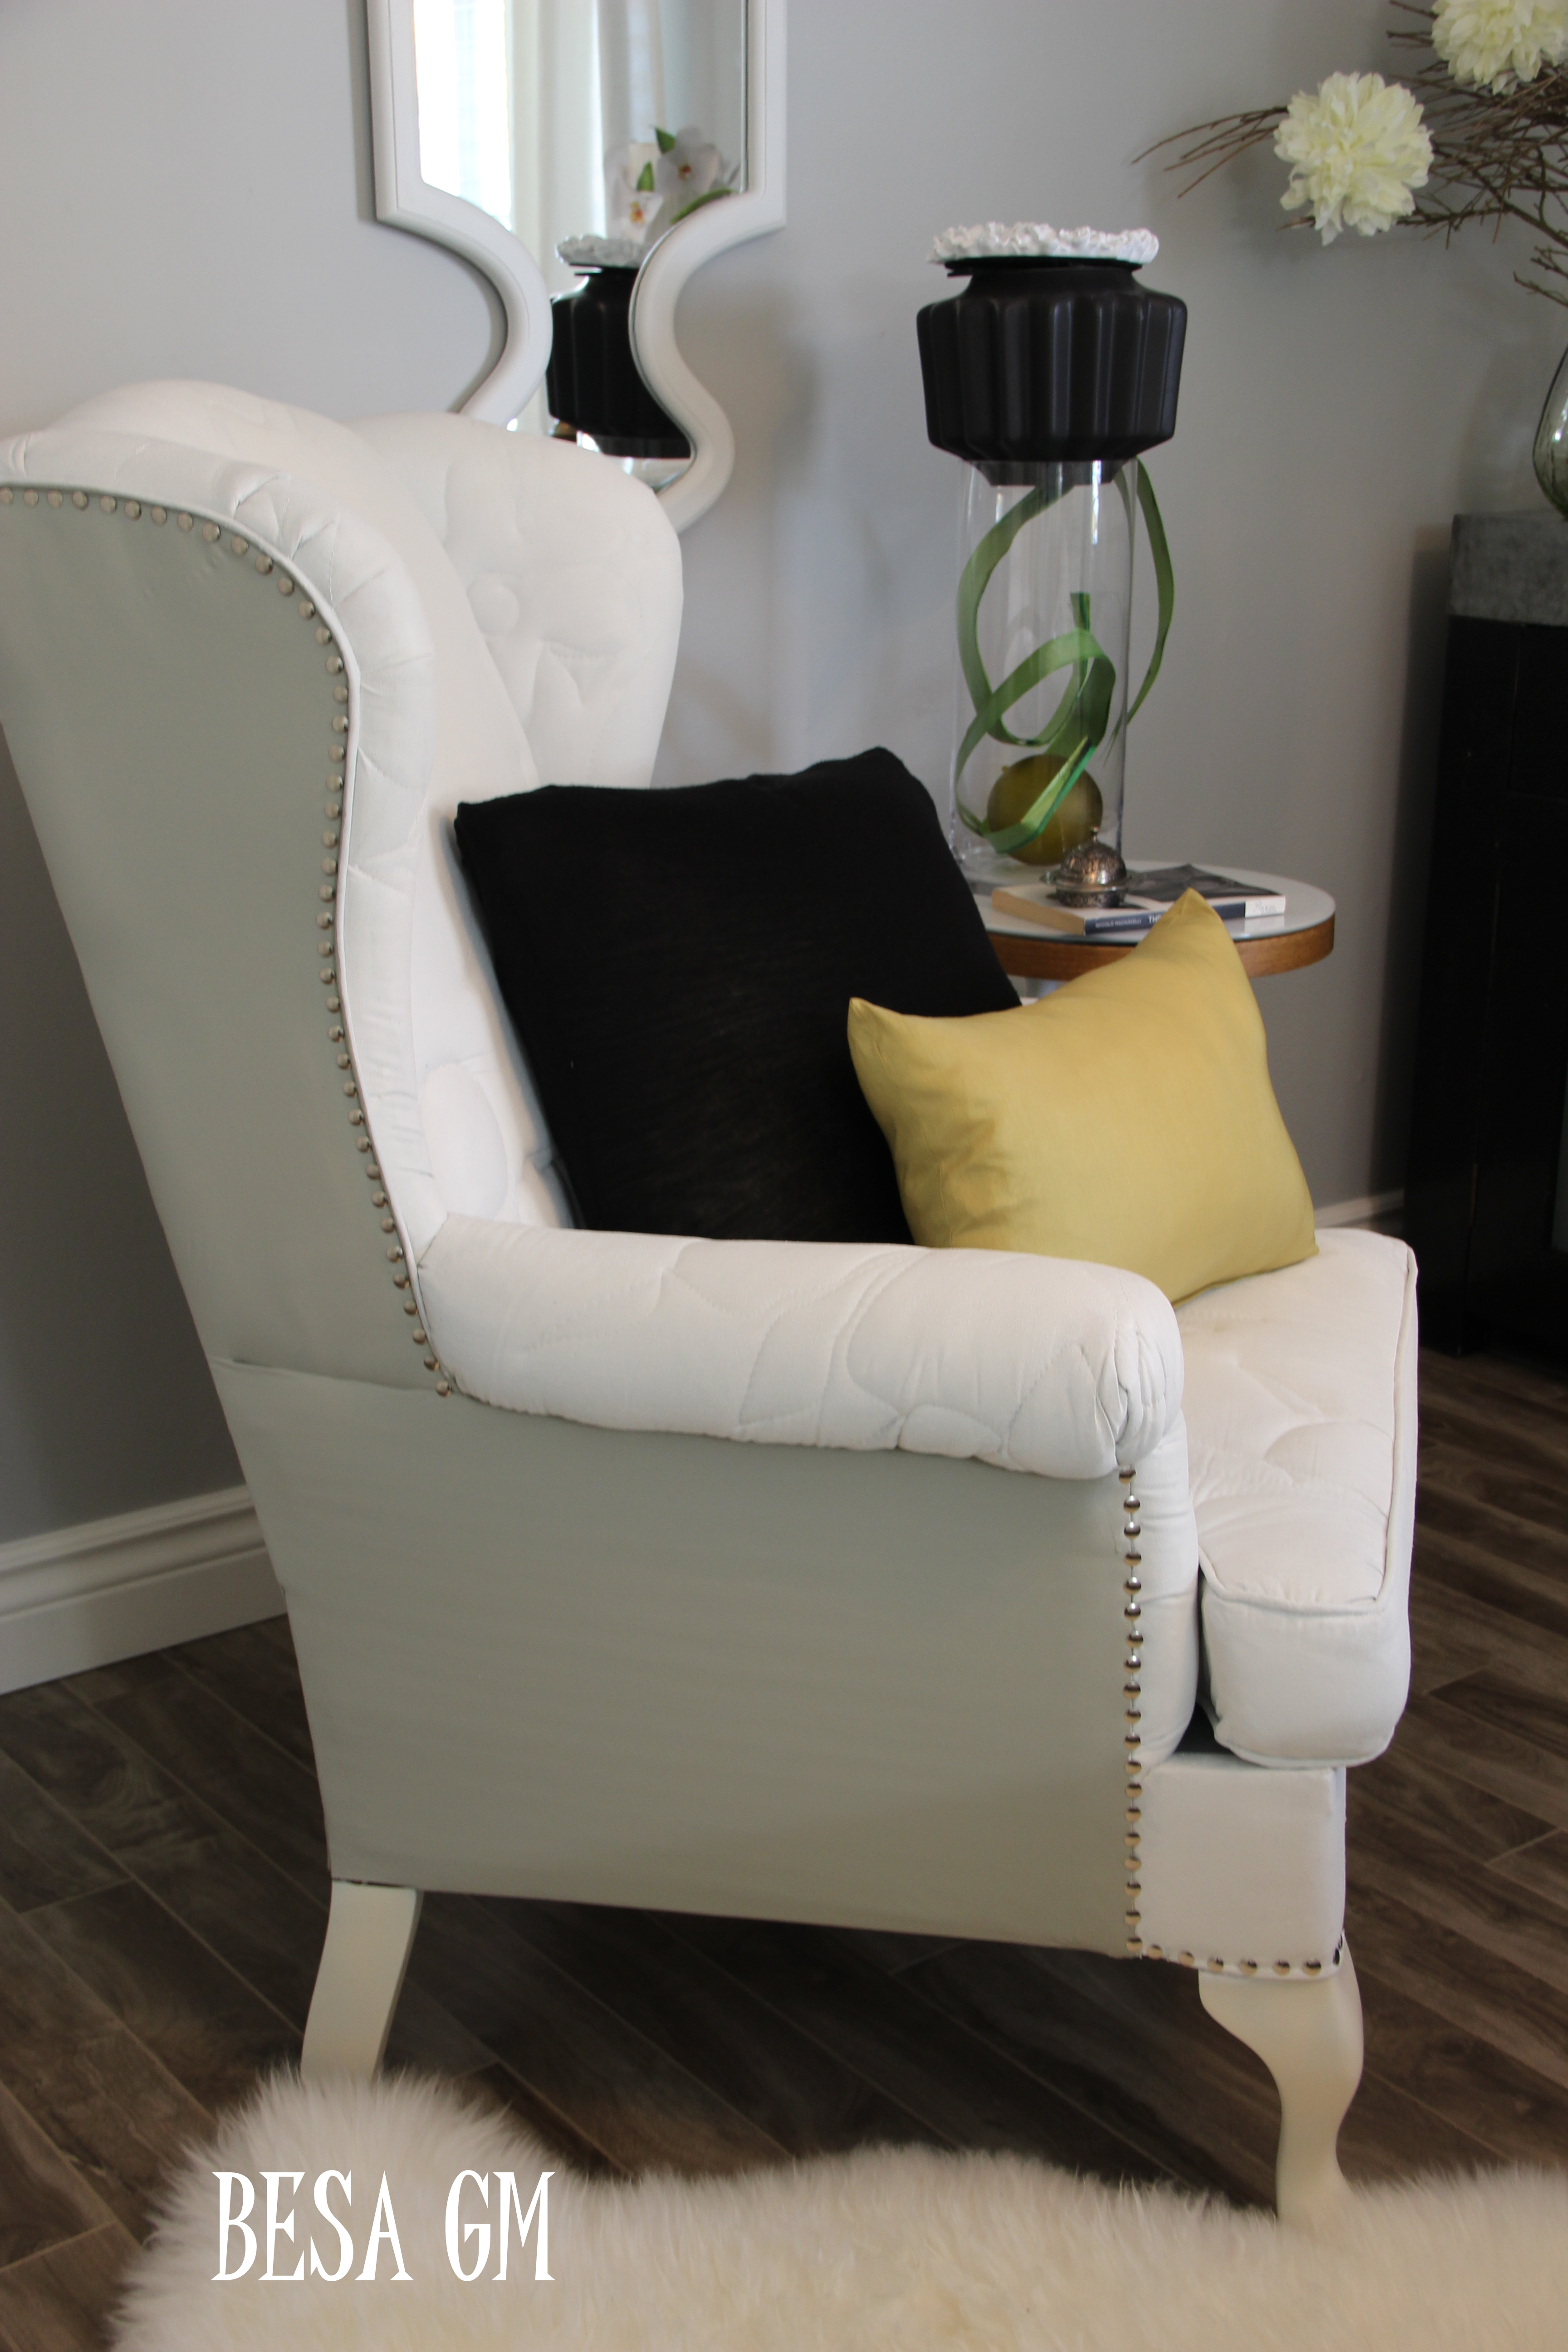
For the back and the sides of the chair I used undiluted paint and gave the chair two coats of paint-Benjamin Moore’s Sea Haze.I applied this color with a roller. Initially I started with Foothills – Sherwin Williams but I was not happy with the color choice so I switched to BM Sea Haze, and I am so glad I did.


I allowed 24 hours between applying each coat.
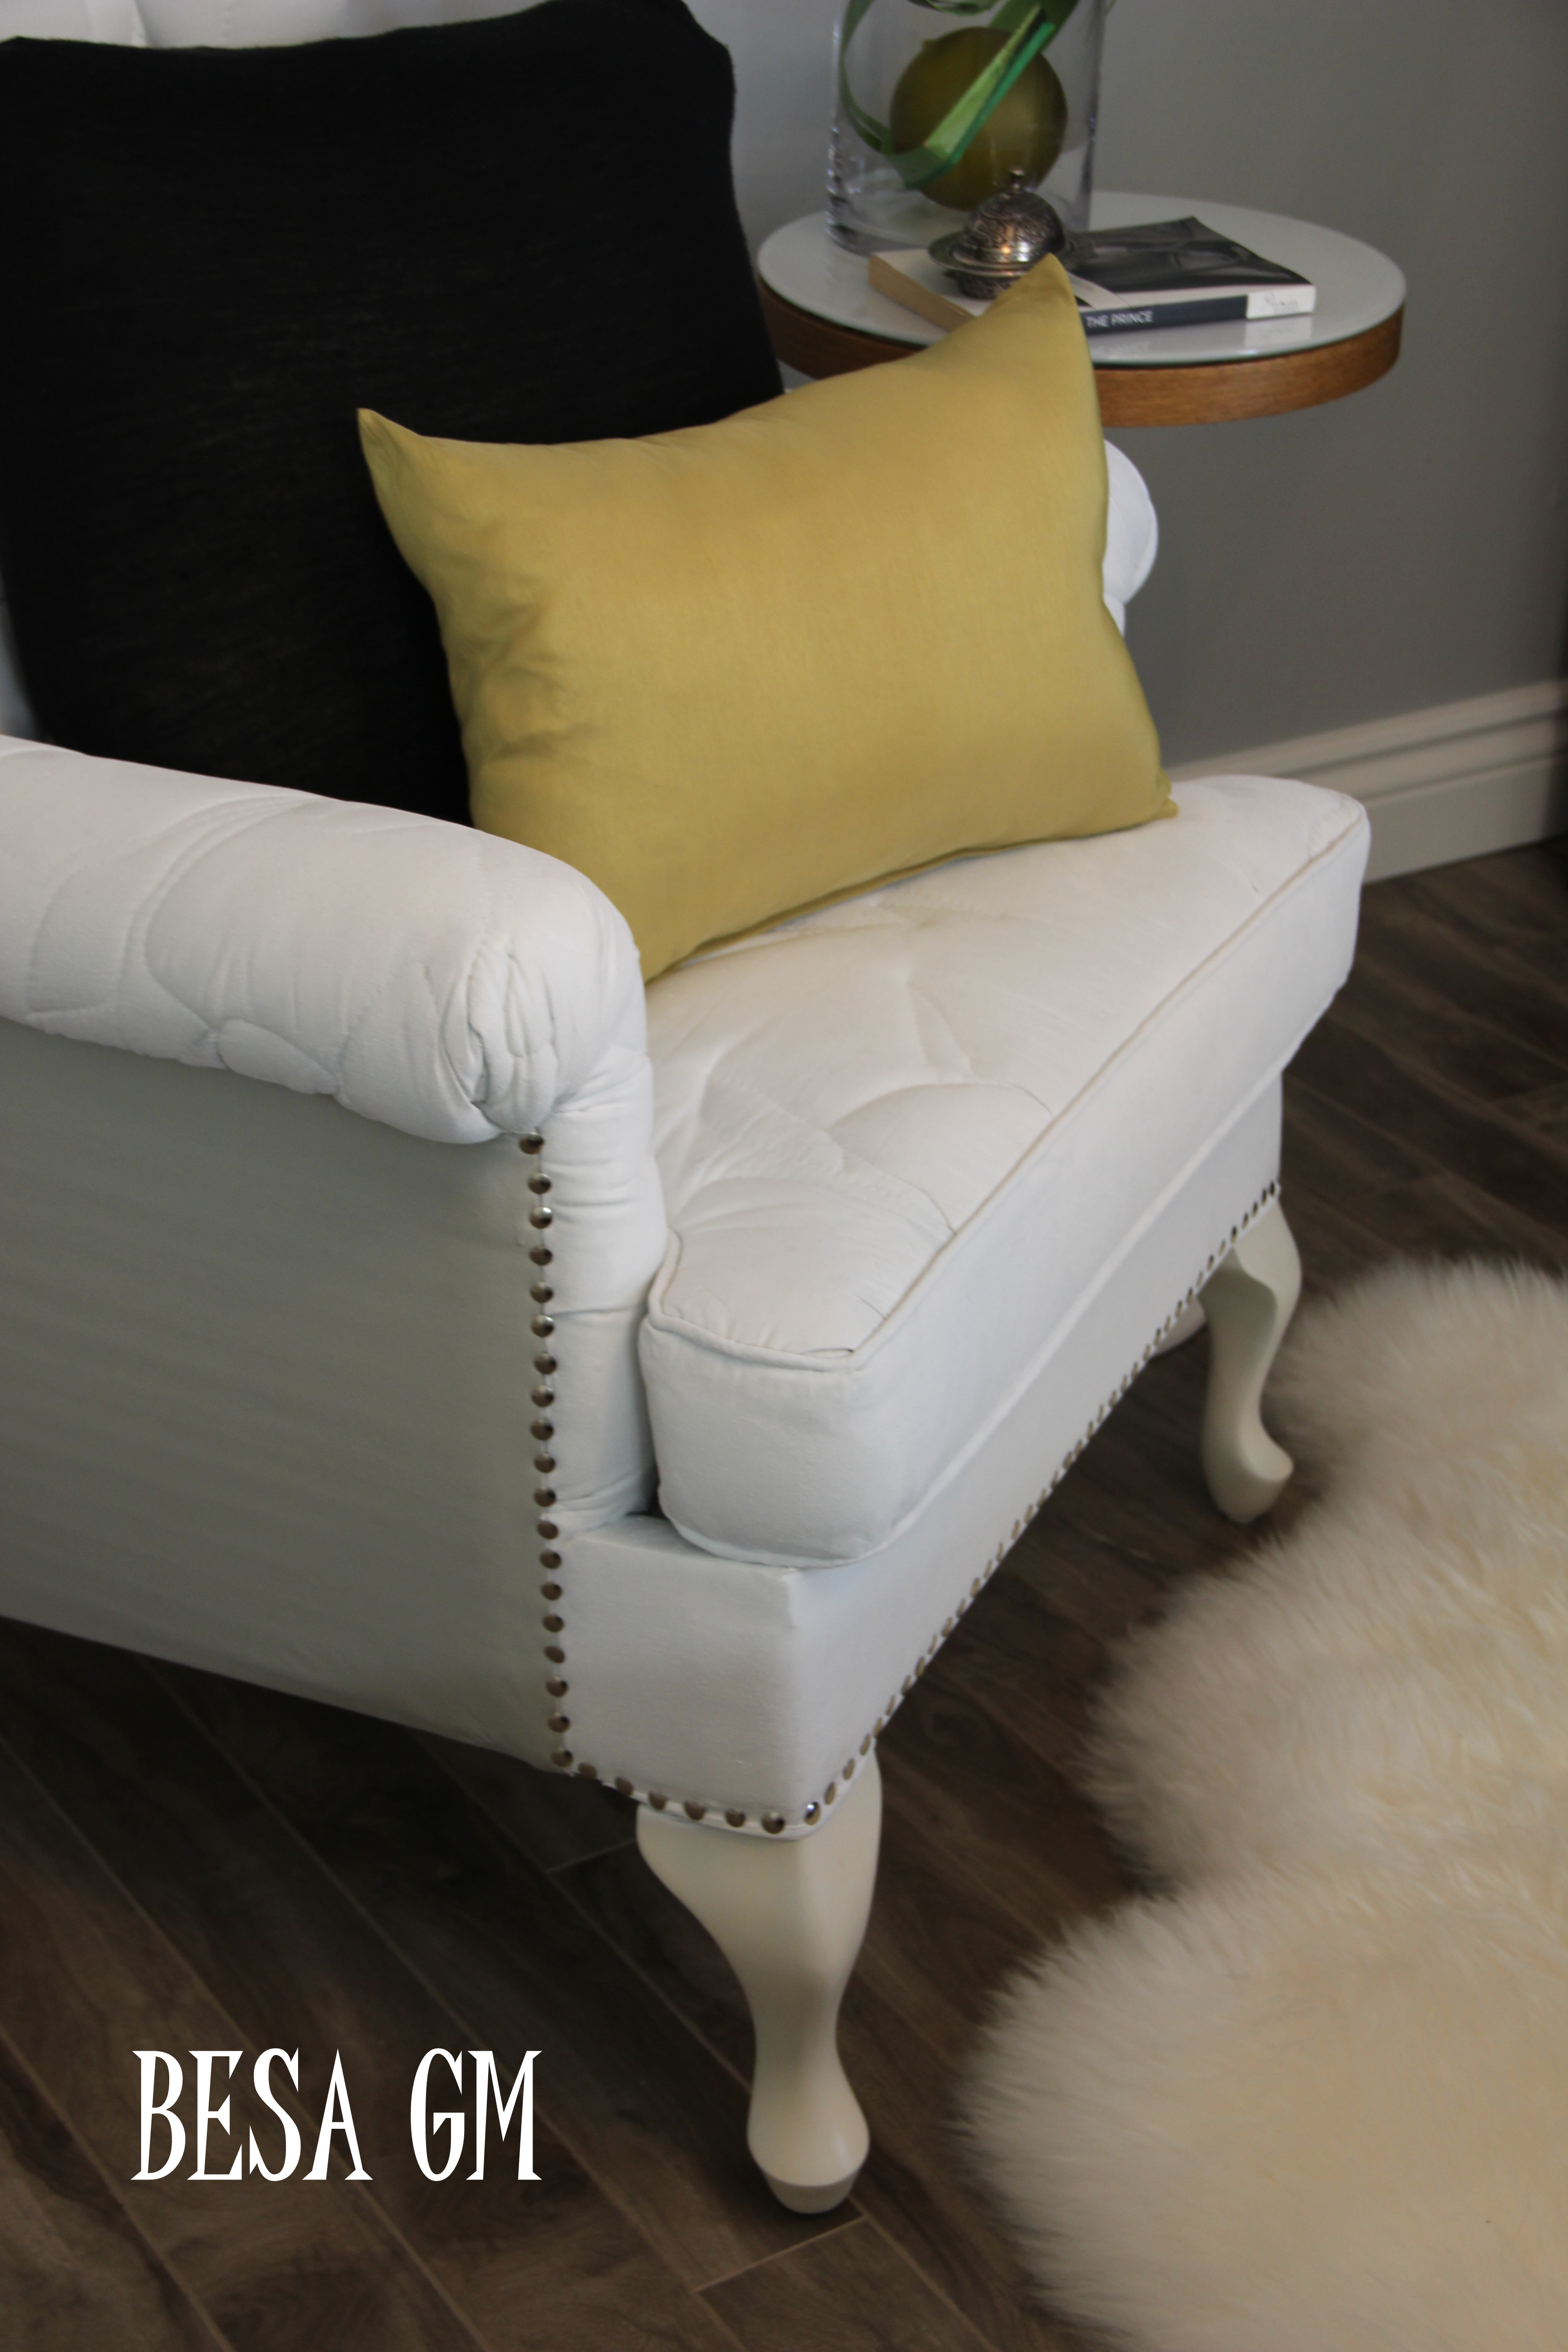
I spray painted the legs with Rust-Oleum-heirloom white.
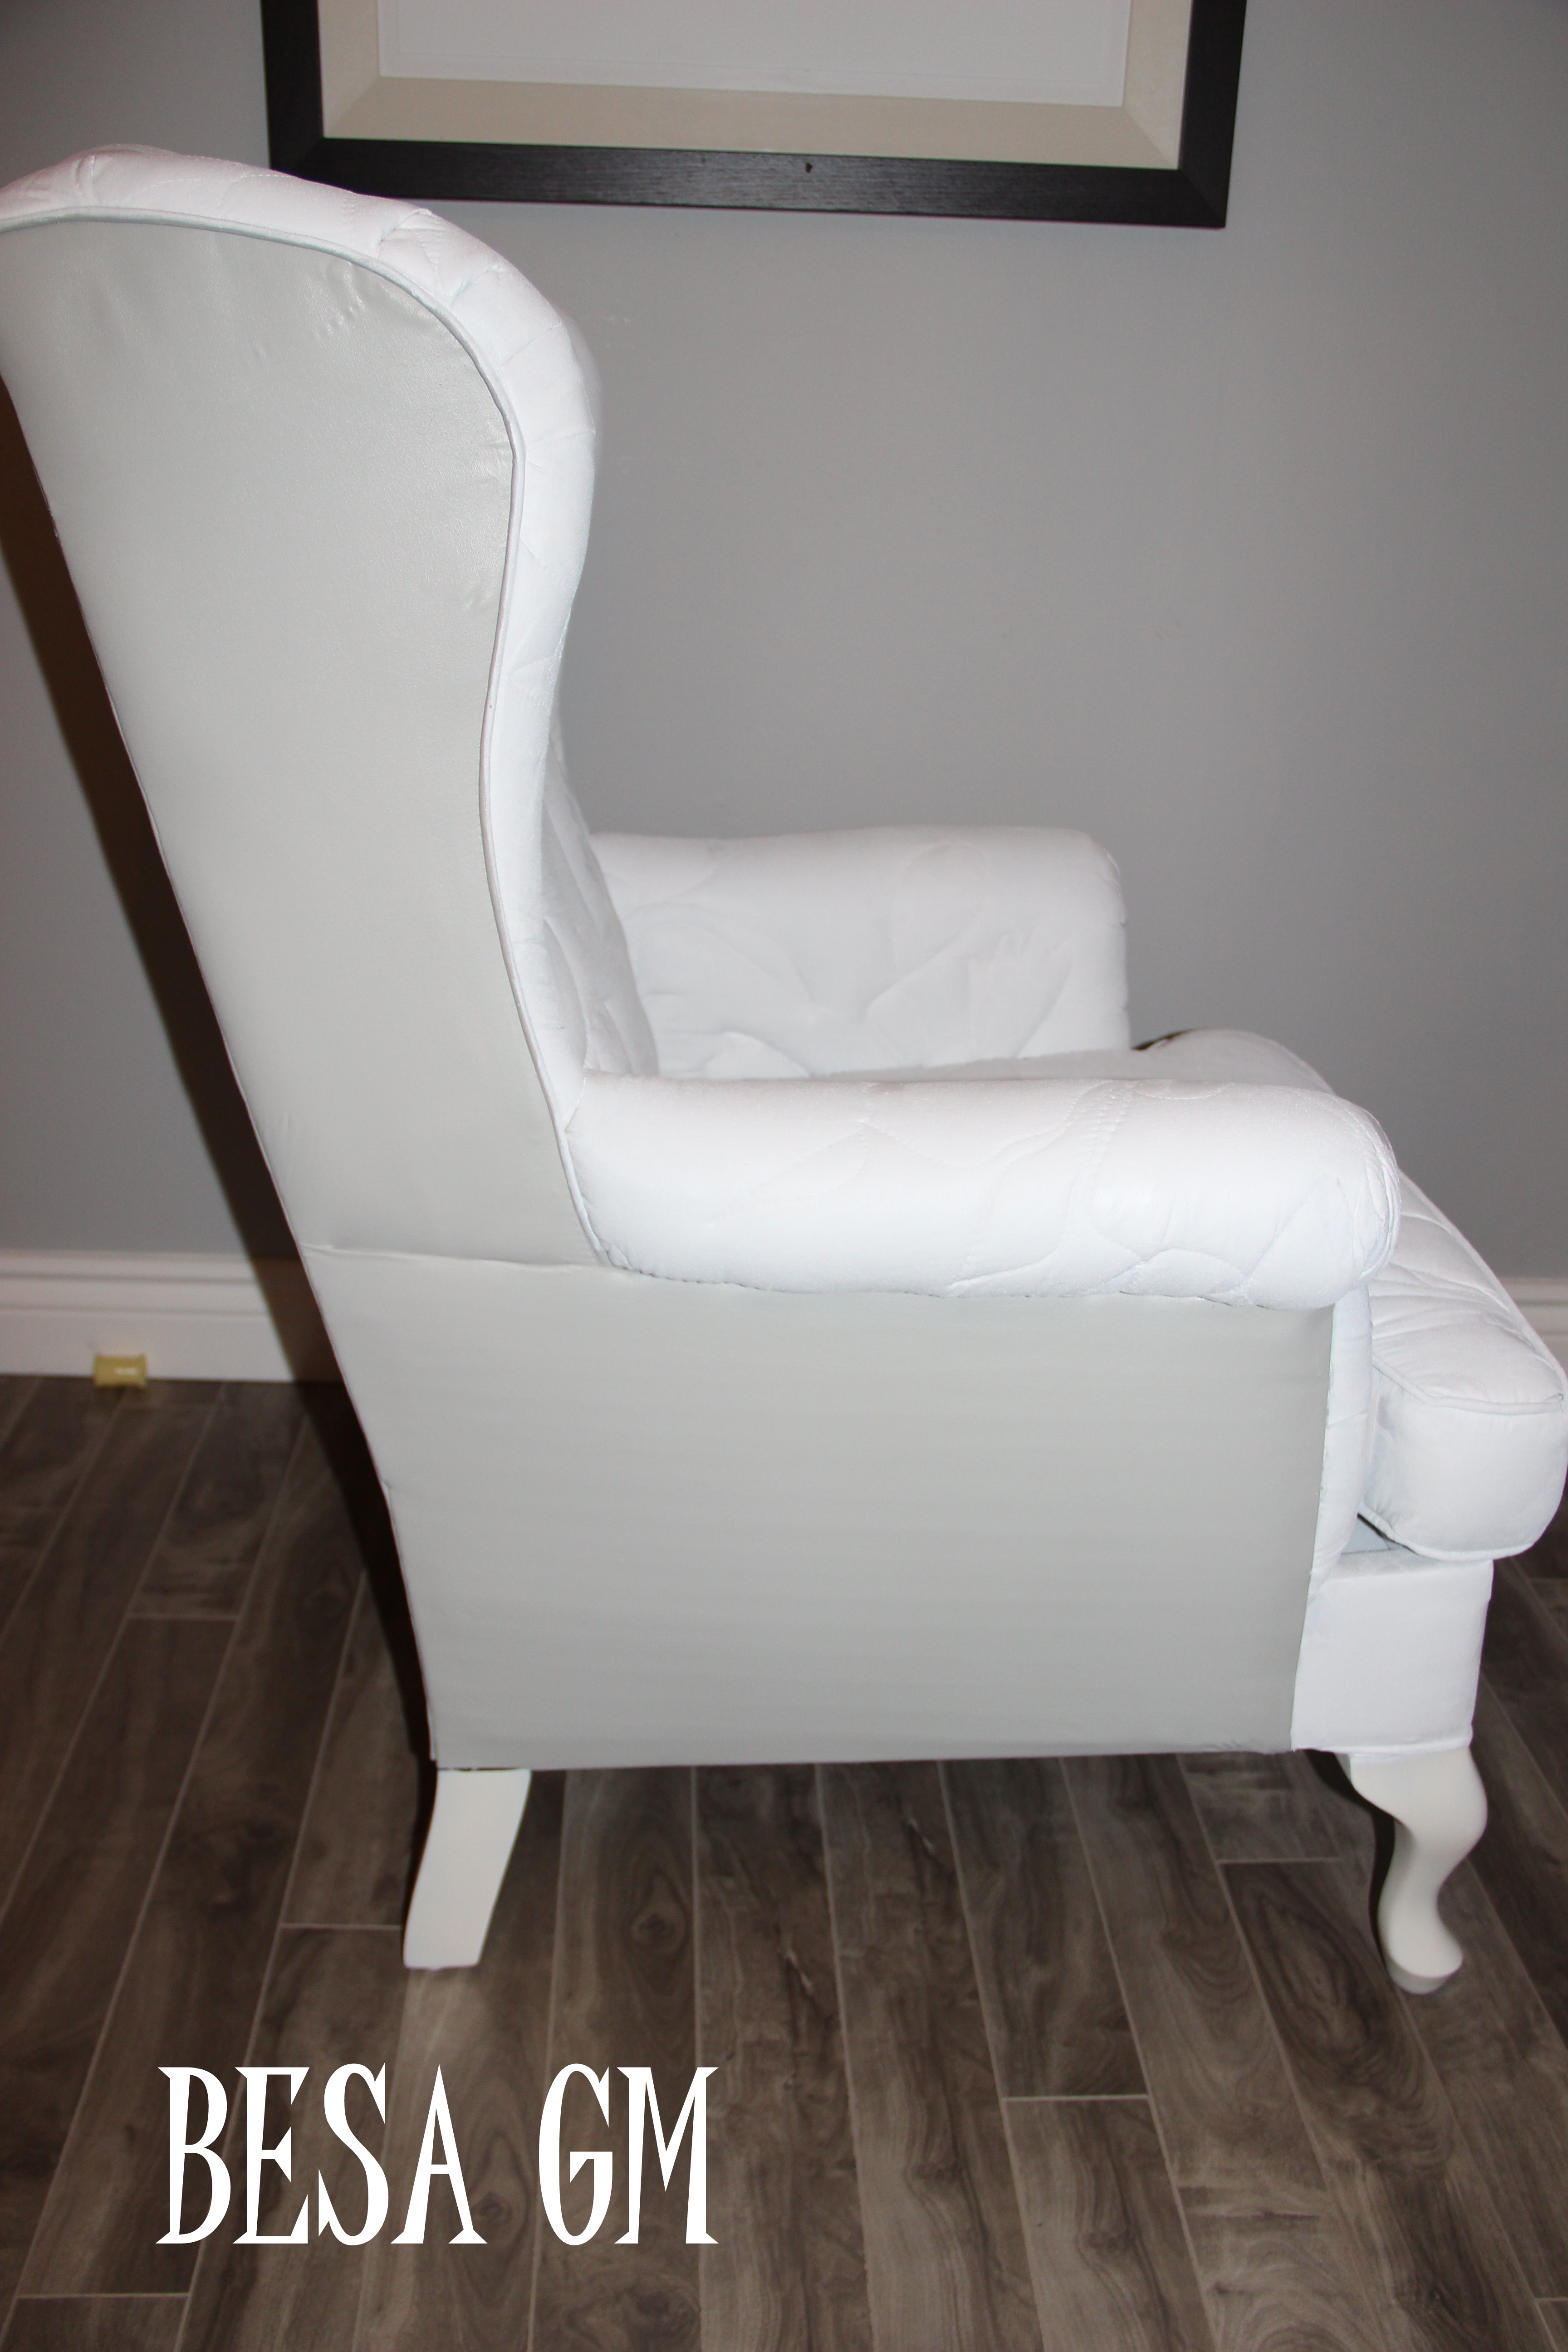
After applying all these coats of paint, the fabric turns into a vinyl/leather like material, so if you like leather you will be okay with it. My husband tried the chair, and his comment was funny: “it feels like you are sitting on heavy starched linens”. It made me laugh to tears.
Lastly , using a template as shown in the picture below, I nailed the thumbtacks about 1/2 inch apart around the piping on the wings and on the front bottom of the chair.

After drying, the paint does not get on your clothes even without the use of the textile medium. Moreover the paint does not crack when you sit on the chair. I am not sure what will happen after a while, but for now it seems that this chair may have a long life ahead.
Even though it may appear like a daunting and lengthy painting process, I did not find it as such. It was not tiresome either, considering that you only spend about 30-40 minutes of your time for each coat every 24 hours. It is a bit messy process though as it involves paint and a bulky chair in the middle of your garage (carport in my case),backyard or an indoor space, but other than that it is a fun project to undertake, especially if you are happy how your project is coming along.
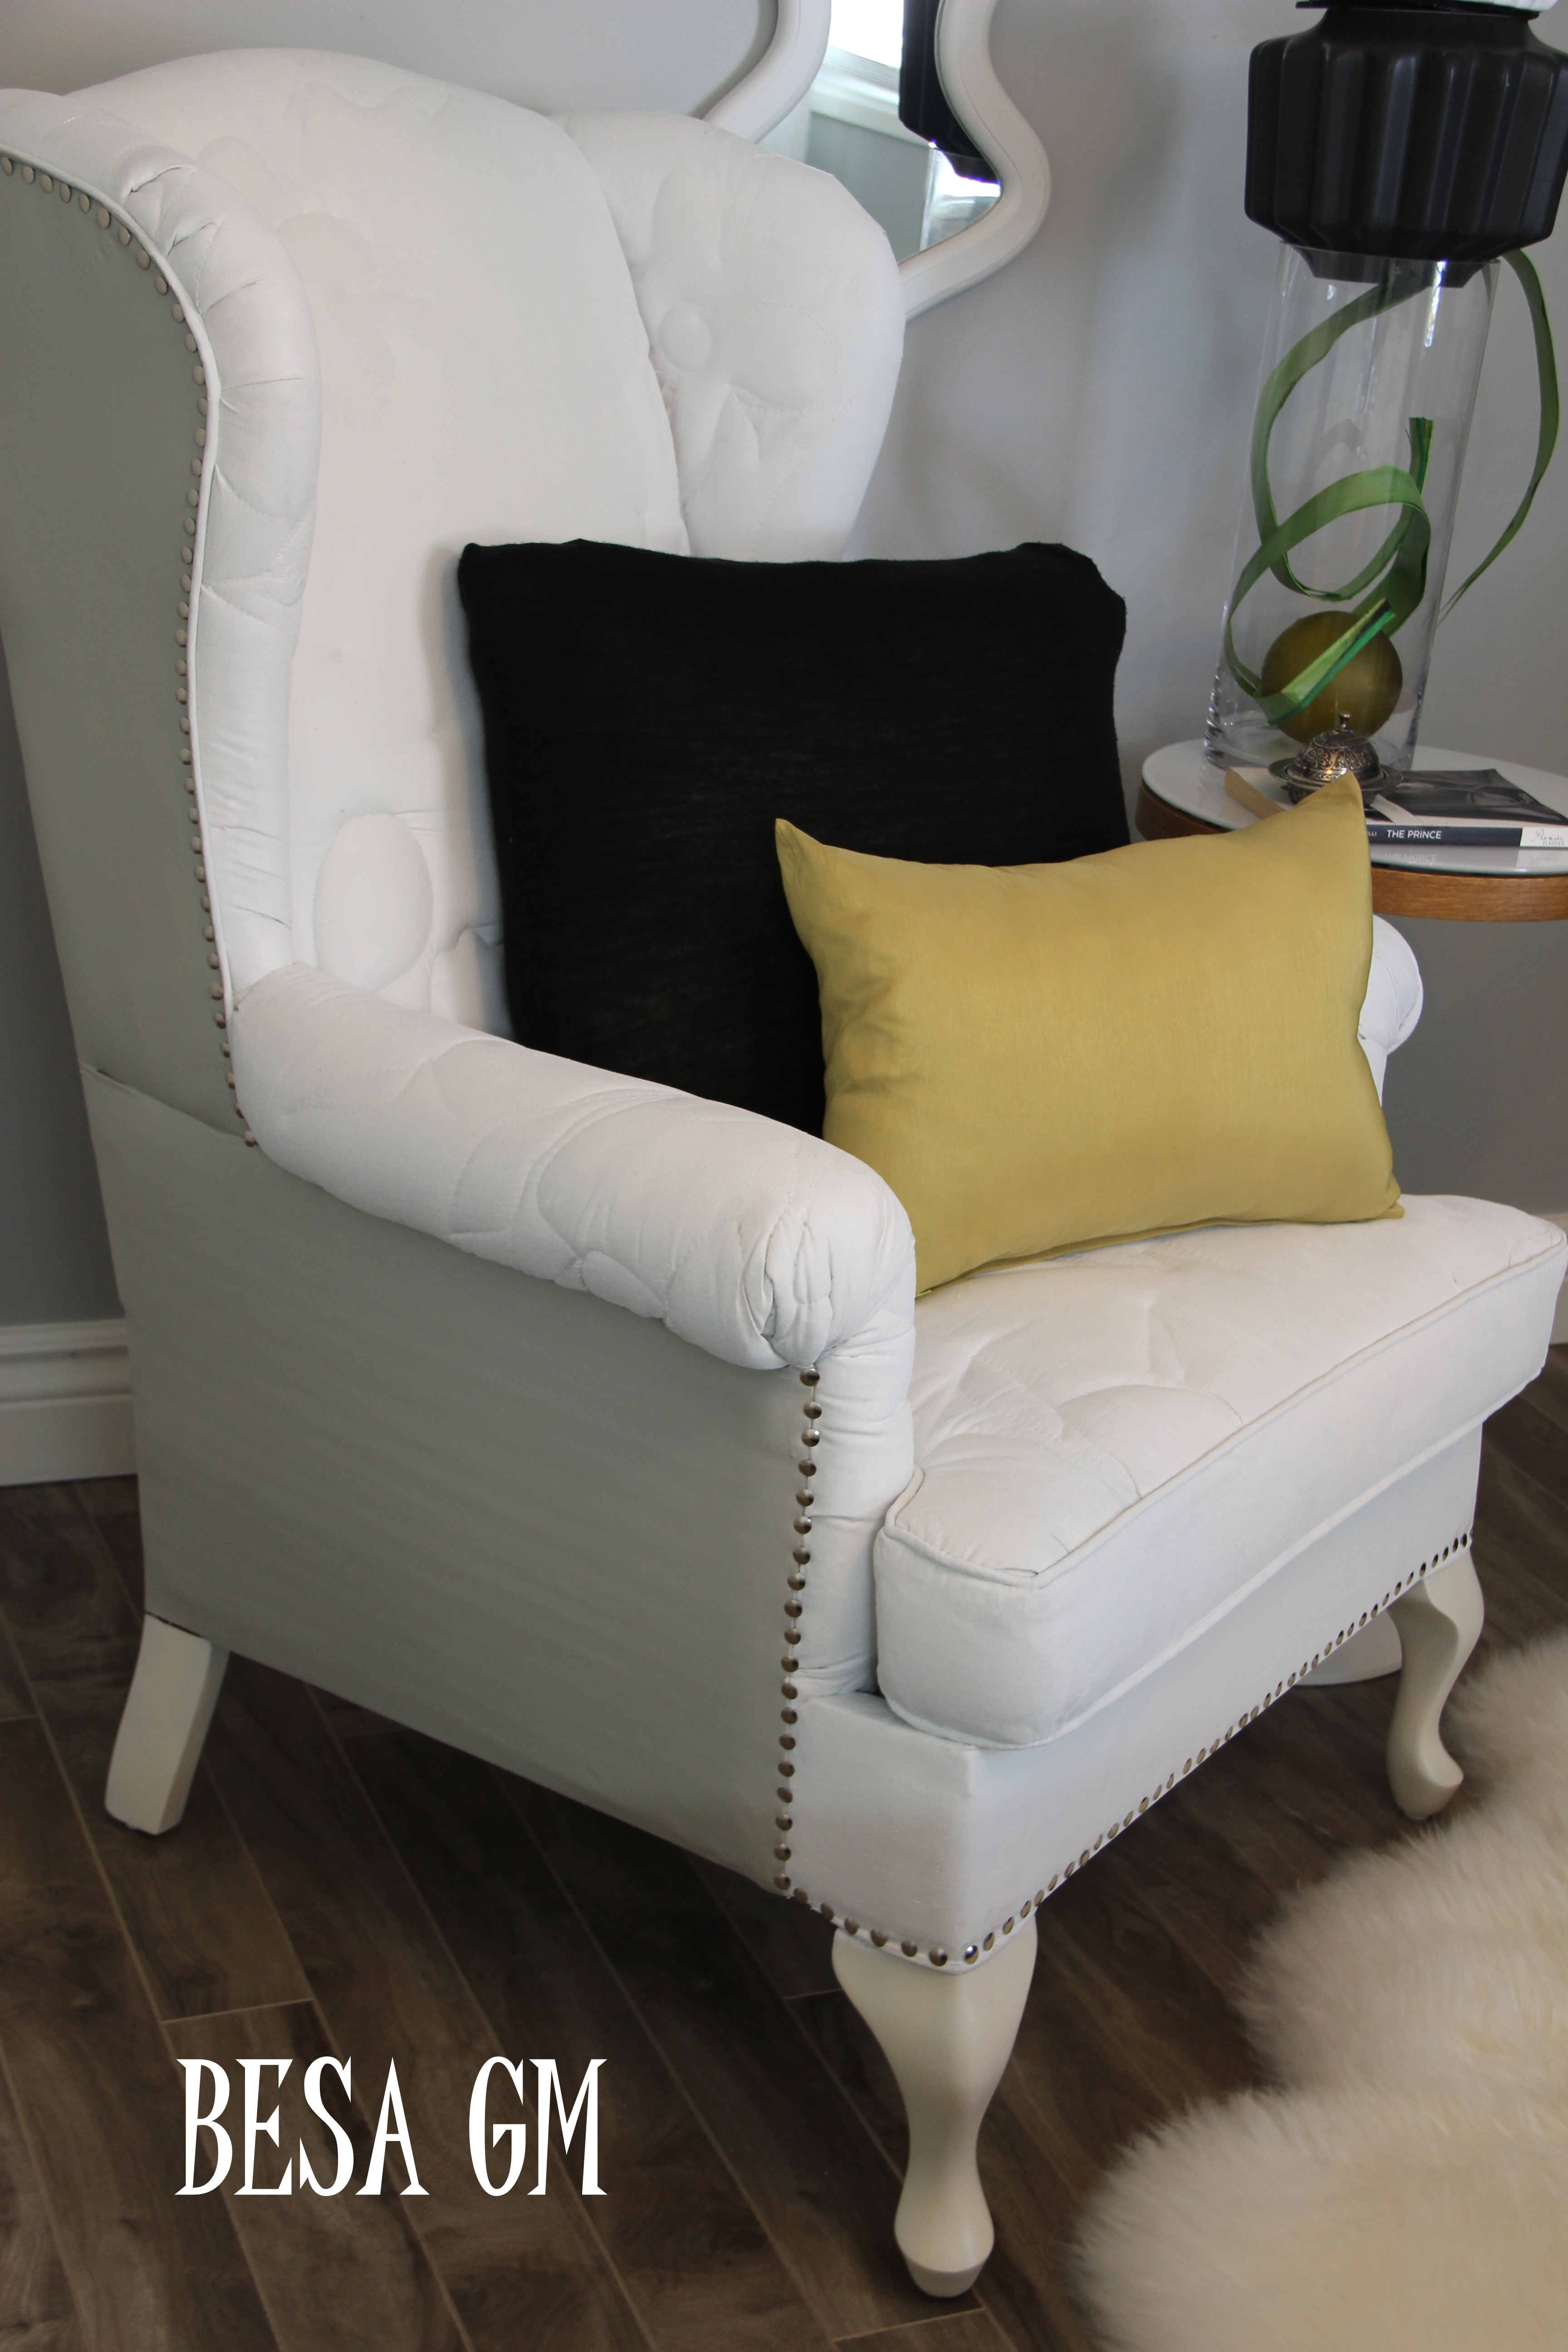
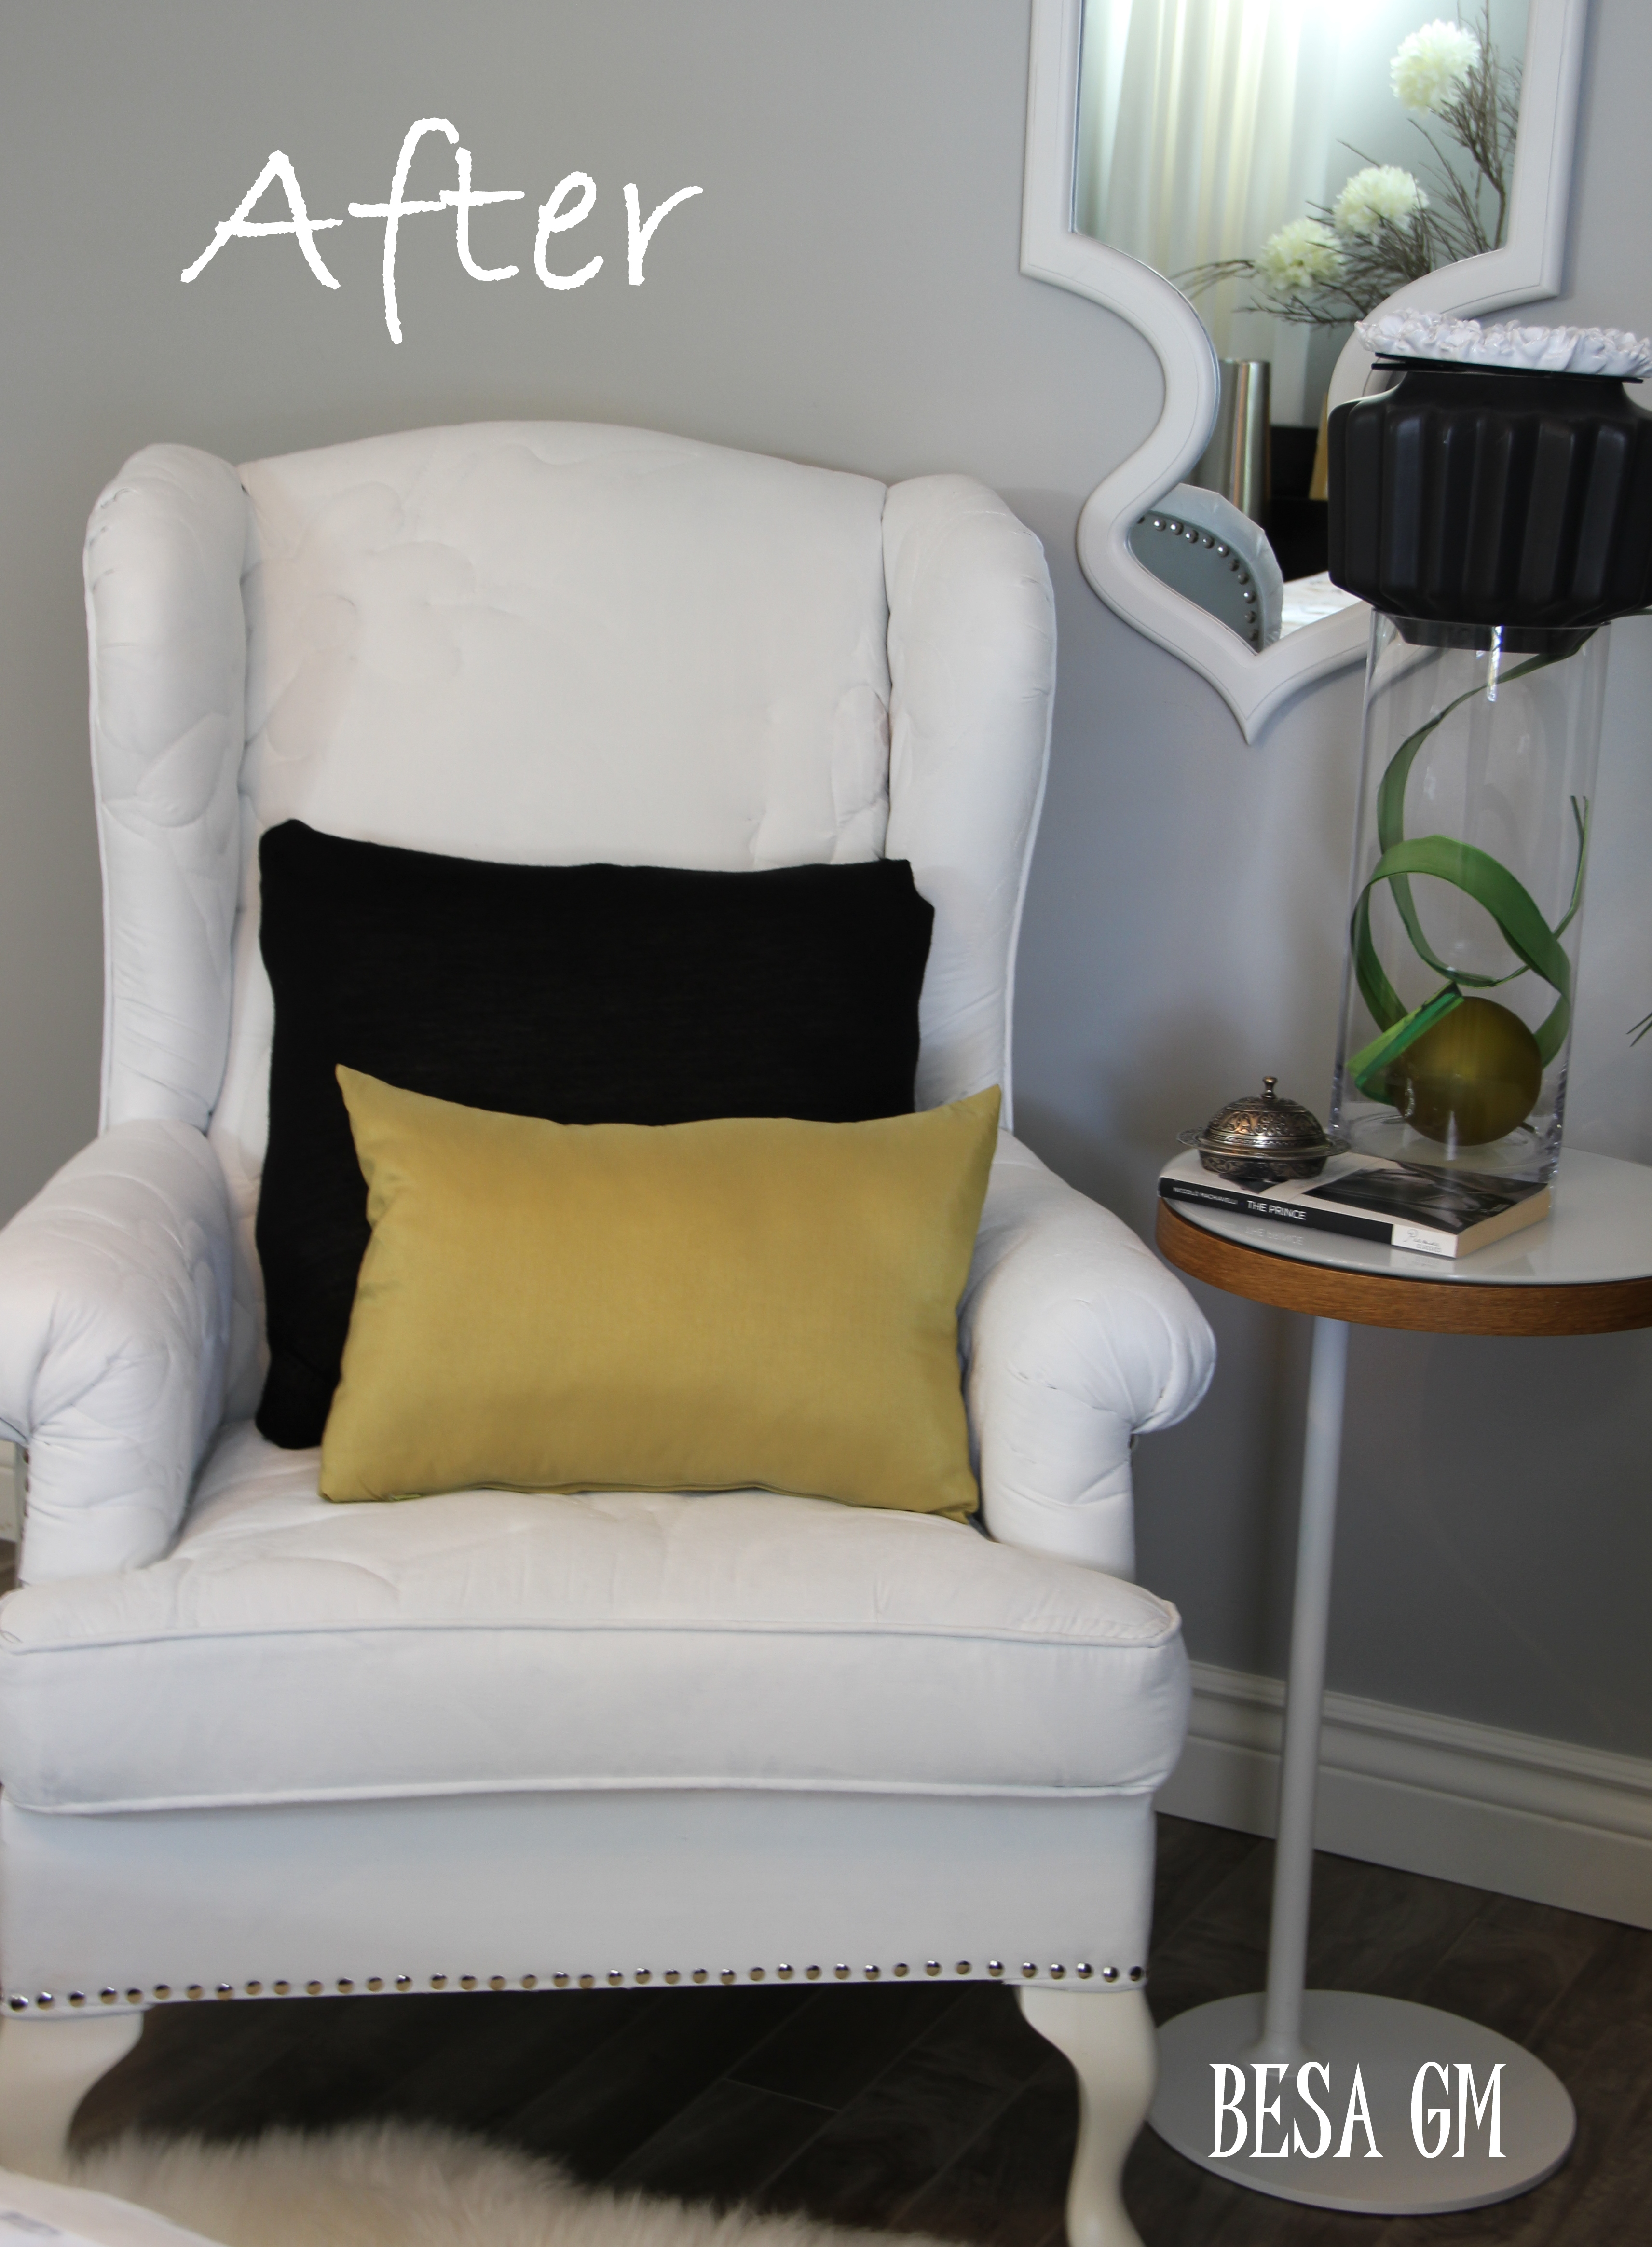
I am happy that my challenge paid of so the ugly wingback chair turned into a beautiful white swan.

Unfortunately, due to the limited space in my home I cannot make a use of this chair, so I am thinking of donating it to one of the charities in the area I live. It would be a perfect furnishing for a girl’s room, nursery or as an accent chair in a bedroom, hallway or elsewhere. Depending on the accessories, this chair may add a romantic feel as well as dramatic look to any space.

Do you have a chair in need of a face-lift? Well you may try painting it. It may turn as beautiful as my chair.

Linking to: The Shaby Nest; 504 Main; Romantic Home; Classy Clutter; Dwellings; By Stephanie Lynn; Liz Marie Blog; A Blossoming Life; Coastal Charm; DIY Showoff; Crafty Allie; The Charm of Home; Serenity Now; Give Me The Goods Monday; Silver Pennies
Great thanks to these lovely blogsites for featuring this post: Blissfully Ever After, The Cottage Market; The Shabby Nest: Serenity Now; Dimples and Pig Tales; Carrie This Home; A Pretty Life in the Suburbs, Lovely Crafty Home; Power of Paint
Thank you for reading.
Besa

That looks fantastic. Thanks for linking to my site and sharing. I love the colors and design that you chose. Outstanding. And, it’s good to know how it went without the fabric medium. I’ll add you to my chairs page!
Thank you Kristy for your comment, and for taking time to stop by my blog and check my painted chair post. It really means a lot to me as it comes from someone who, I may say, invented the upholstery (chair) painting process. I am thrilled to find out that you have added my project to your Chair Page http://www.hypheninteriors.com/chairs. Thank you again.
I put the chair under Other Methods on the page where all of the examples of painted upholstery are, since you didn’t use the fabric medium. Here is the link. Enjoy! http://www.hypheninteriors.com/chairs
Briliant idea Besa!! Thank you for sharing x
Thank you very much Arjeta! I appreciate the kind words and your stopping through to comment!
Dear Besa, your ideas are fantastic as always…you are the most creative woment that I have known:) thank you for sharing and miss u…Viska
Delighted with your comment Viska, especially when it comes from such a talented and accomplished woman such as you. Love you and miss you too.
I have wanted to try this on a fabric piece, but not as brave as you. It looks quite lovely.
Thank you for liking my chair project. You did so good in painting wood, and I bet you would do well painting fabric too, so I encourage you to try.
Your chair looks so pretty! Really turned out great and too bad you can squeeze it in somewhere!
Jennifer @ Decorated Chaos
http://decoratedchaos.blogspot.com
I appreciate your comment, and thanks for stoping by my blog. Indeed too bad that I am not albe to keep it.
Amazing transformation! I’d love a chair like that. Can’t believe how well it turned out. Thanks for sharing with us!
Thank you for the compliment.
Wow! Big difference, looks great!
Thank you! I appreciate your stopping through to comment!
Wow! what a great before and after! http://www.handmadeintheheartland.com
Thank you.
Impressive! I have a couch that I would love to transform, but I don’t think I’m brave enough to paint it!
That is amazing,,,what a difference! I have a hunter green one down in the basement so I’m thinking on trying it. Can’t believe those are thumbtacs either, you did a marvelous job on it!
Thank you Rondell for your kind words, and for stopping by to comment. If you paint your chair I would love to know how it turned out.
Wow! I’m amazed at the results! Thanks for sharing how you did it and linking up at Frugal Crafty Home Blog Hop! I’ll be featuring this post at our party on Sunday night!
Thank you for your comment and for hosting the party Carrie . I feel so honored to find out that you will be featuring my Painted Chair post. Cheers, Besa
Thank you ladies for hosting a great weekend link party, as well as for picking my Painted Chair post to be featured this week. So honored!Looking forwad to check back at your blogs for great inspiration. Thanks again.
Besa
Beautiful! I’d love it if you’d add it to our link party @ http://thecraftiestallie.blogspot.com/2013/11/its-that-time-again-friday-follow-along.html
Thank you for the invitation Allie. I am linking right away, and thank you for hosting the party.
Thank you very much hosting the party and for noticing and featuring my Painted Chair project. Great party, fabulous features and tons of inspiration.
What a wonderful makeover! I can’t believe it’s just painted! Thanks for sharing at TTF!
Thank you Linda for stopping through to comment and for hosting the linky.
Wow that is quite the difference! I would have never thought to use the thumb tacks for the nail head trim.
-Pam
Thank you Pam for liking my post and for the follow.
This looks incredible! I found your project on Serenity Now’s features and had to pop over to pay you a compliment on your awesome work!
Thank you for taking time to stop by my blog and pay a compliment. Very much appreciated.
I think this is so interesting! I am including it in my features at Give Me The Goods! I would love if you would include a link to our party on your post! Thanks!!
Amber @ Averie Lane
Sorry for an oversight; I will be including the link right away. Thank you very much for featuring my painted chair project. Very much appreciated.
Besa
You’re welcome! Its so pretty! and thank you!!
Thanks for linking up to the Friday Follow Along. We love your chair and hope you will stop by and see it featured this week 🙂
THank you for hosting the linky and liking my chair project. I will be stopping by for sure to check your blogs and the features of this week.
I have two very outdated fabric wingback chairs. Both were very expensive and I have been going to either make slips for them or recover them. You have given me the courage to try painting them first. What do I have to lose except ugly fabric. Thanks.
Thank you for stopping by my blog. Happy painting, and I would love to hear how chairs turn out.
Wow! Ugly duckling to beautiful swan. I LOVE how this turned out. Great job. Thanks for sharing at Silver Pennies Sundays! x
Thank you Danielle for hosting the party and for your sweet comment.
Thank you so much for featuring my painted chair. Greately appreciated.
Besa
Never heard of painting a chair! Where have I been, I paint everything else! Wowza! Cool! Love your thrifty tips too!
Jenna
Thank you Jena for stopping by and for taking time to comment on my chair project.
Looks awesome! I started painting some partially fabric covered dining chairs yesterday and the 24 hr between coats tip helps me bunches! Thank you for sharing!
Lori
Glad that you found the tip helpfull. Hope your chairs turn great.
What a beautiful transformation! I’m featuring your gorgeous chair in this week’s Power of Paint Party!
Thank you for the feature.
This is beautiful! I am redoing some wingback chairs as well and thought of painting but was not really sure about it. Are they comfy? I need something for more than looks? What does the texture of the chair feel like? Thank you for sharing!
After the painting you will get a vinyl like texture, so I would say that the chair does not feel very comfy.