The second week is already here and for me as well as, I believe, for all other ORC participants the time is just flying. If you are new here, thanks so much for checking out my Studio Office Space Design On a Budget project. You can check out my first post related to this project if you’d like to see or get reminded what I started with when I entered the One Room Challenge event.

As far as myself is concerned I can say that, this week was an intense working week around here and there were a lot of major tasks that I had to undertake on the first week of this challenge. First I cleared up the room from all the stuff that was in it, took off the sofa slipcovers and arranged that the old sofa and loveseat are taken to the junk yard. Arranging these tasks, due to some complications, took me almost two days.

After the room was freed from the bulky stuff, I started with prepping the walls so I could apply the paint on the walls and the ceiling. I did the filling of the cracks and nail holes on the walls and applied the primer. I also managed to start with the first coat of paint.

After I am done with the paint, there comes the hard job and I may say an intimidating task of stencilling the walls with a sharpie!
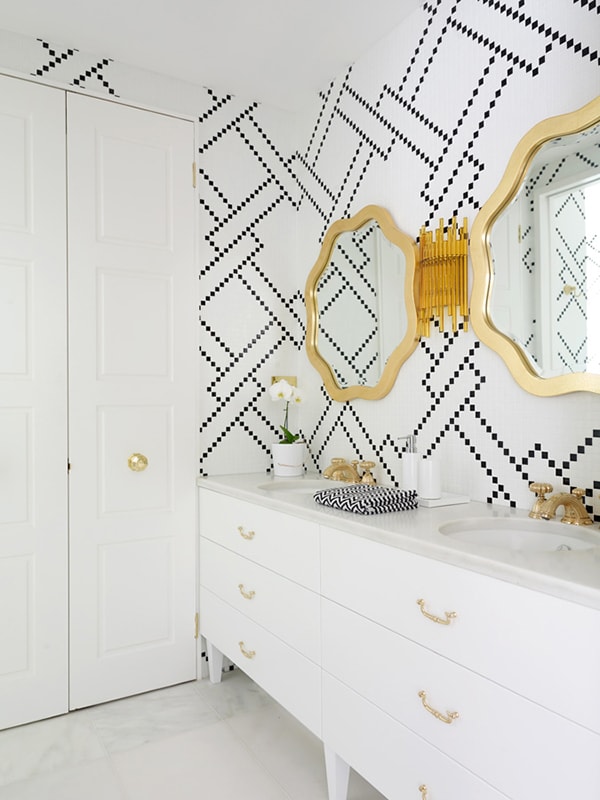
I was inspired by the talented Julia from cuckoo4design who created the most chic little square stencil which she used on her powder room walls. She turned a small powder room into a such lovely space in her home. Thank you Julia for creating this stencil, I am in love with the design.
 (IMAGE VIA CUCKOO4DESIGN)
To create this stencil she was inspired by this bathroom designed by Greg Natale. Everyone may agree that this is absolutely a stunner bath!

Unfortunately I couldn’t order the stencil, so I had to make my own.
I figured out how this stencil works for the repeat, and then I marked the small squares in a double A4 sheet. I enlarged the double A4 sheet twice using a photocopying machine, and laid the sheets with the design underneath the clear vinyl sheet.
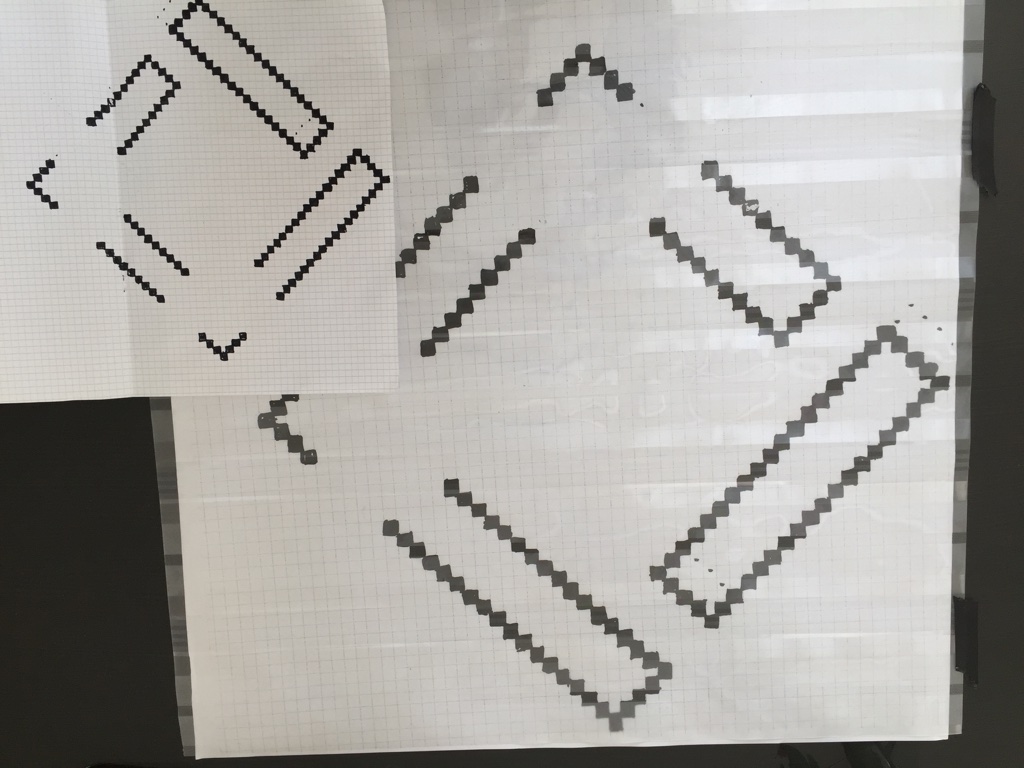
Using the exacto knife, and following the design underneath the vinyl sheet, I started cutting the small squares. I ended up with not so perfect stencil, but I am still determined to go ahead. I ask everyone to keep the finger crossed so I will not mees up the accent walls with this DIY stencil.

So this is all I have to share for this week. I am back to painting the room and hopefully will be ready by Saturday when I expect the floor refinishing guy to come and do the floors which are begging for refinish.
Be sure to check out the One Room Challenge Blog to see all the great participants as well as featured designers and their amazing home transformations!
Thank you for visiting my blog!
Besa

Can week 6 hurry up and get here!! Girlfriend this is truly going to be amazing!! I am patiently waiting but trust me.. ..i’m getting goosebumps.. lol… high 5 ..to you
Thank you my friend for the encouragment, but I am quite nervous about the outcome. I have a very sloppy stencil and let us keep finger crossed if this is going to work out.
My warmest cyber hug to you my friend!
I agree that this stencil is gorgeous. It will make the room! Good luck with week 3!
Thank you so much for checking the progress in my ORC project. Hopefully my DIY stencil is going to work well!