
I was thinking for a while about giving a refreshed look to a curtain that covers a north facing window in my living room. This window does not present any privacy issue, so initially when I made this panel I opted for a sheer fabric, and instead of attaching the panel to a rolling mechanism, I attached it to the wall using velcro tape. I glued one side of the velcro tape to the wall and sewed on the other side of the tape to the curtain panel.
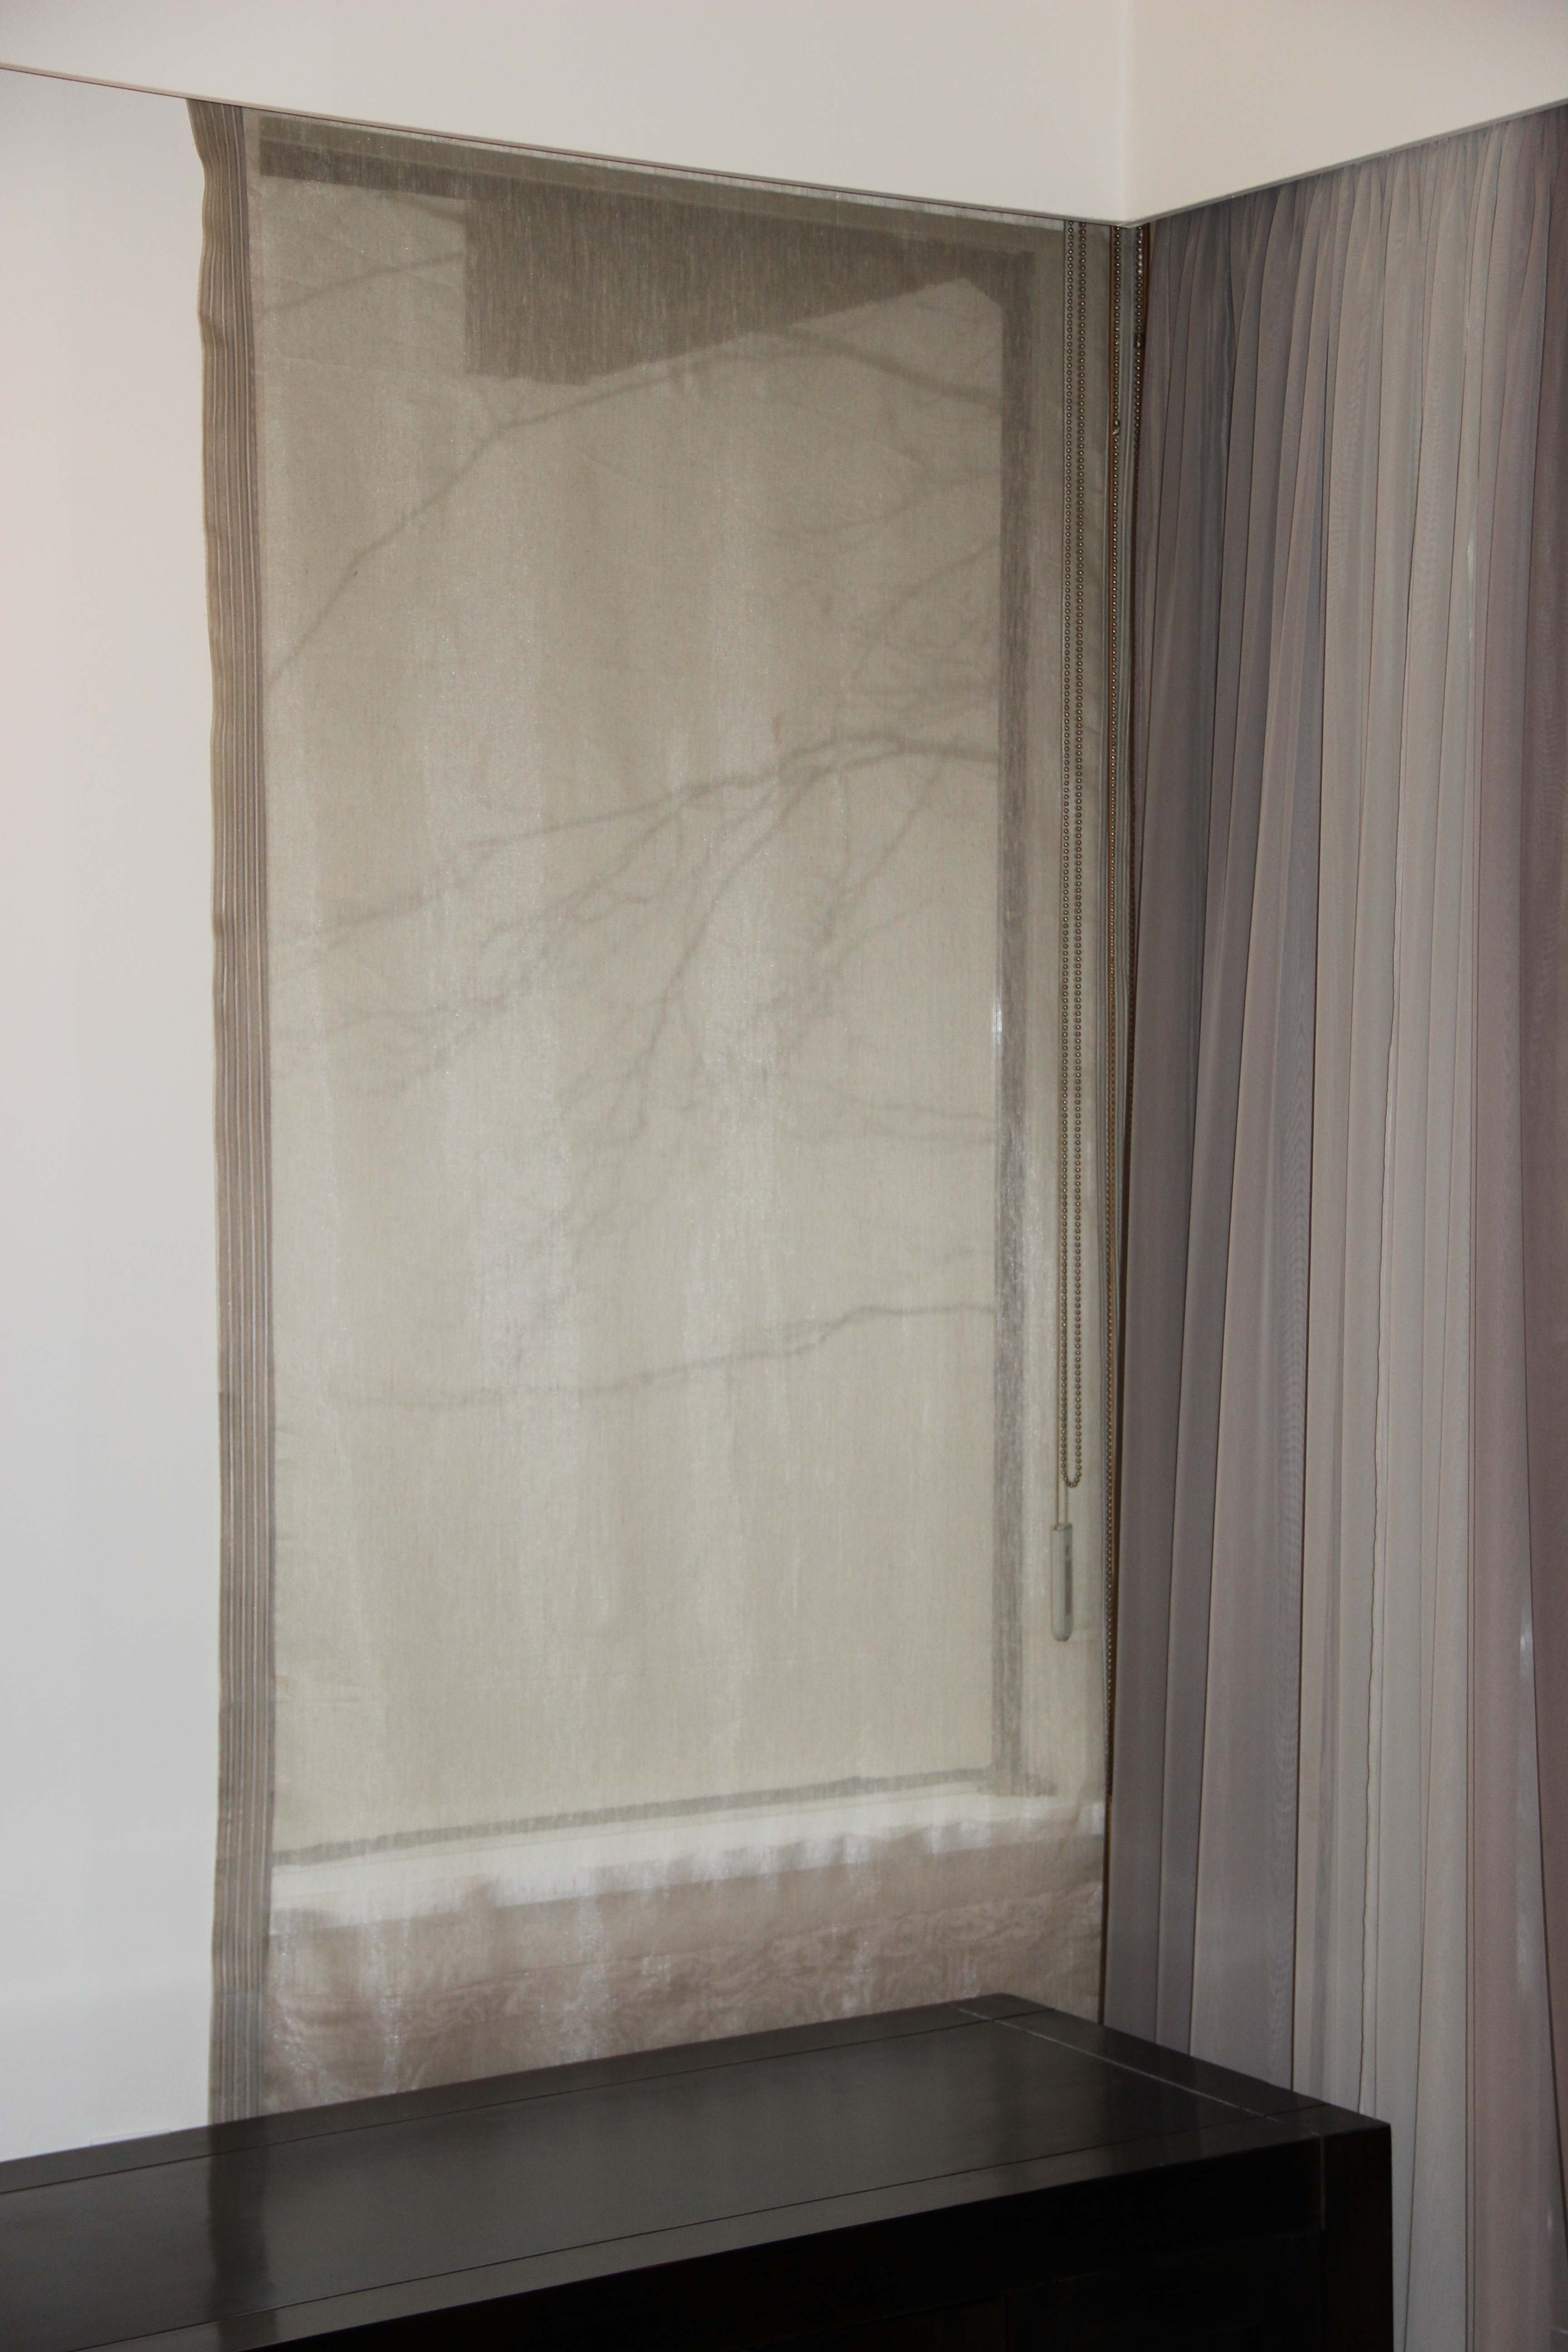
For over eight years this curtain panel served the purpose and seemed that it was blending in nicely with the decor in my place. As the time went by the curtain itself, as well as that window corner appeared to look quite tired and boring and gradually, instead of disliking that corner, I started hating it.
My TV is right beside this window so, like it or not, I was kind of forced to face the curtain and that boring corner whenever I was watching TV. As much as I wanted a new look for my curtain, I also did not want to spent too much money or time creating that new look.
Well, I was lucky. I achieved what I wanted and only spent $ 0.50 and 30 minutes of my time.
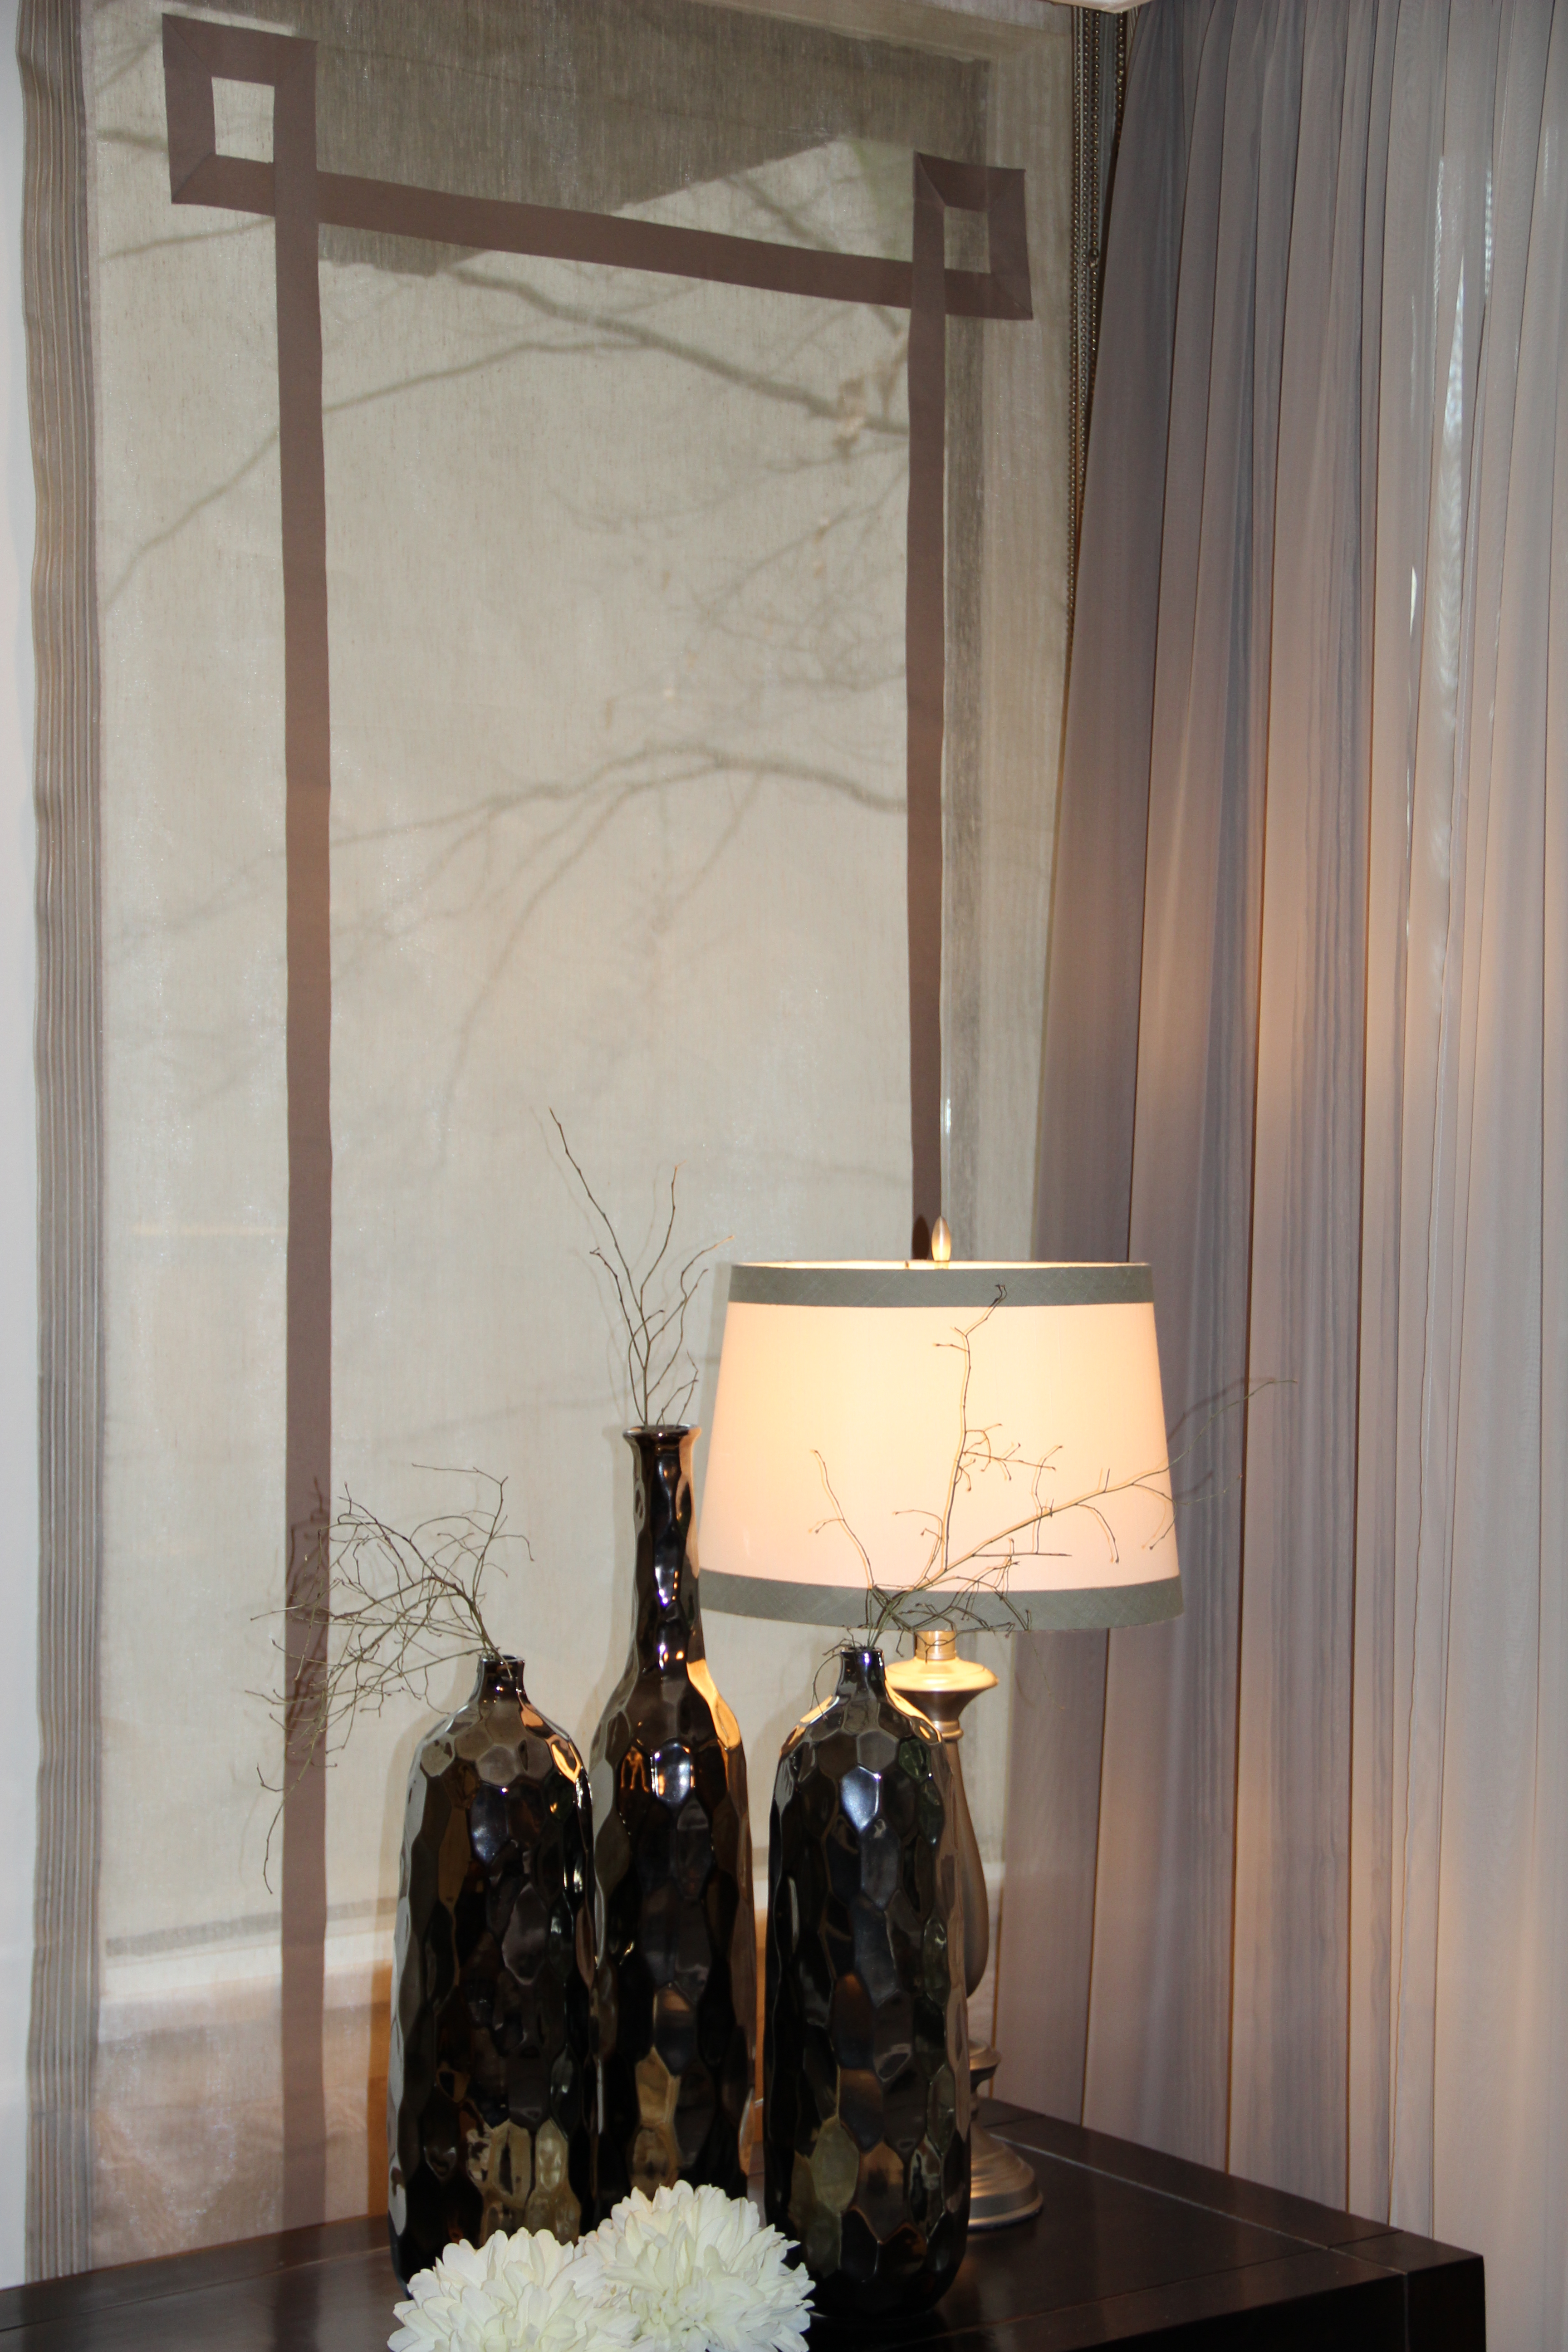
I found an Iron-on Rug Binding tape in a color I wanted. It was on sale in a local fabric/sewing supply store ( Dressew, West Hastings, Vancouver BC also available online at http://www.createforless.com/ ). I bought two packages for $ 0.50.

I already had in mind the design, so I used the dressmaker’s chalk to mark the lines that would serve as a guidance for the tape to be ironed on.
I used the top of the panel as the starting measuring point. I draw a line 8 inches from the top and side hems, and then created two squares on each side at the top.
Subsequently, I started with ironing on the tape along the marked lines.


Even at the ironing stage, I was getting really exited as it seemed that the project is coming along very nicely, so I could not wait to finish and hang up the panel on to the wall.
Less than 30 minutes I was done with the ironing process, and proceeded with hanging up the panel.

The result was amazing. The old tired looking panel not only looks refreshed, moreover, it makes a “statement” in my living room.
Thrilled with the result, I did not stop there, so I “shopped” around my apartment to find some decorating items for that new corner in my living room. As you can see I found these vases and I think those added a “city chic look” to this corner.

Well, I am very happy with the outcome. Hope that you like it too.
Thank you for reading.
Besa

Love your curtain panel and in fact, am inspired to make one for one of my kitchen windows.Thanks for sharing.