
Almost thirty years ago, when my husband and I were renovating and decorating our first condo, we pretty much drained our budget with the first two purchases: kitchen cabinets and living room furniture. In fact, not only we drained our entire budget, but we had to pay for the purchases in instalments for one long year. Our budget was drained and our condo looked pretty much empty without any decorative items. However, I wasn’t prepared to live in an empty looking space so I started a series of DIY projects to make our condo a functional, well decorated and happy living space.
The first DIY in our first condo was creating a much needed shelf in our bathroom to put our toiletries, towels, toilet paper etc. I DIY-ed a hanging shelf then from a leftover long board from the kitchen install using a long piece of rope that we already had. THe created shelf was a completely free item which turned so stylish and chic, and for us was a life saver as it gathered all necessary bath stuff.
These days also, I did a few hanging shelves which I needed for a project, and I want to share them with you the process so you may get inspired to make them too. It is an easy and supper fast project that can be finished in less than an hour.
For this project you need a piece of board 45 cm long 15 cm wide (any size will work), cord, a ring, measuring tape to mark the openings for holes, drill for the holes, scissors to cut the cord.

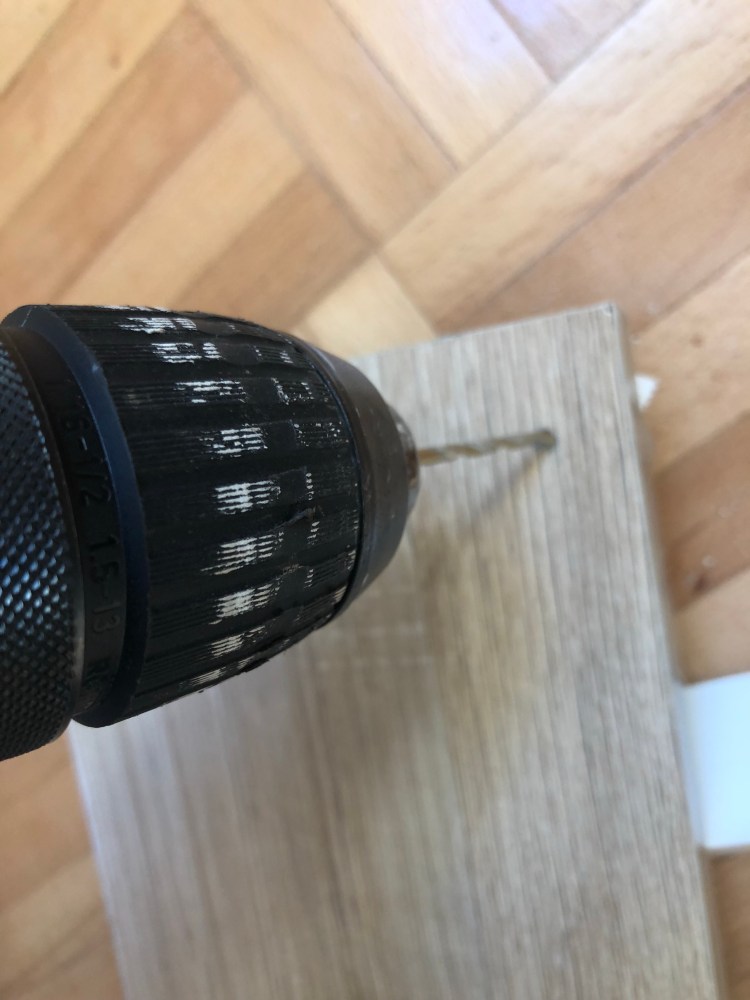
First you mark the holes and drill through the marks.
To hang your shelf, cut two pieces of cord to your desired length, remembering to leave room for the knotted ends. I cut 2 pieces of 1 metre cord.
Fold the two pieces in half, and place the folded end underneath the metal ring.

Pull the folded end over the metal ring, then pull the rest of the cord up and through the loop.


Separate two of the strands. Pull each strand through one of the drill holes. Repeat on the other side.


Adjust the length of the cord to make your shelves hang as high or low as you want. Then, tie knots at the end of each piece of cord. Trim off the excess cord if needed, and hang your shelf.

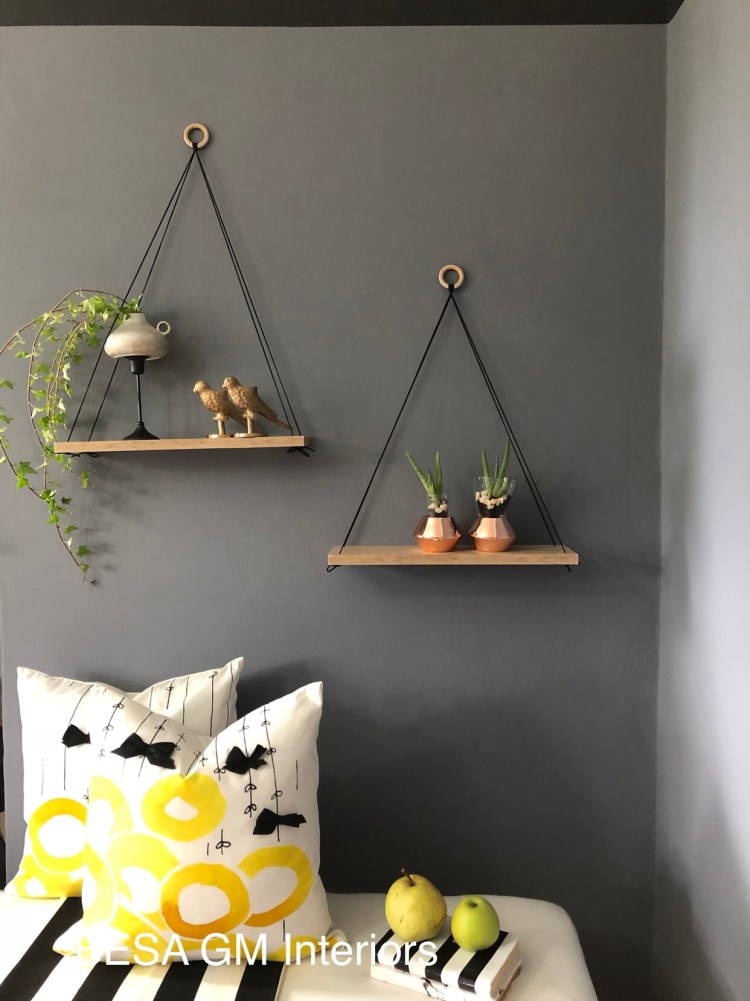
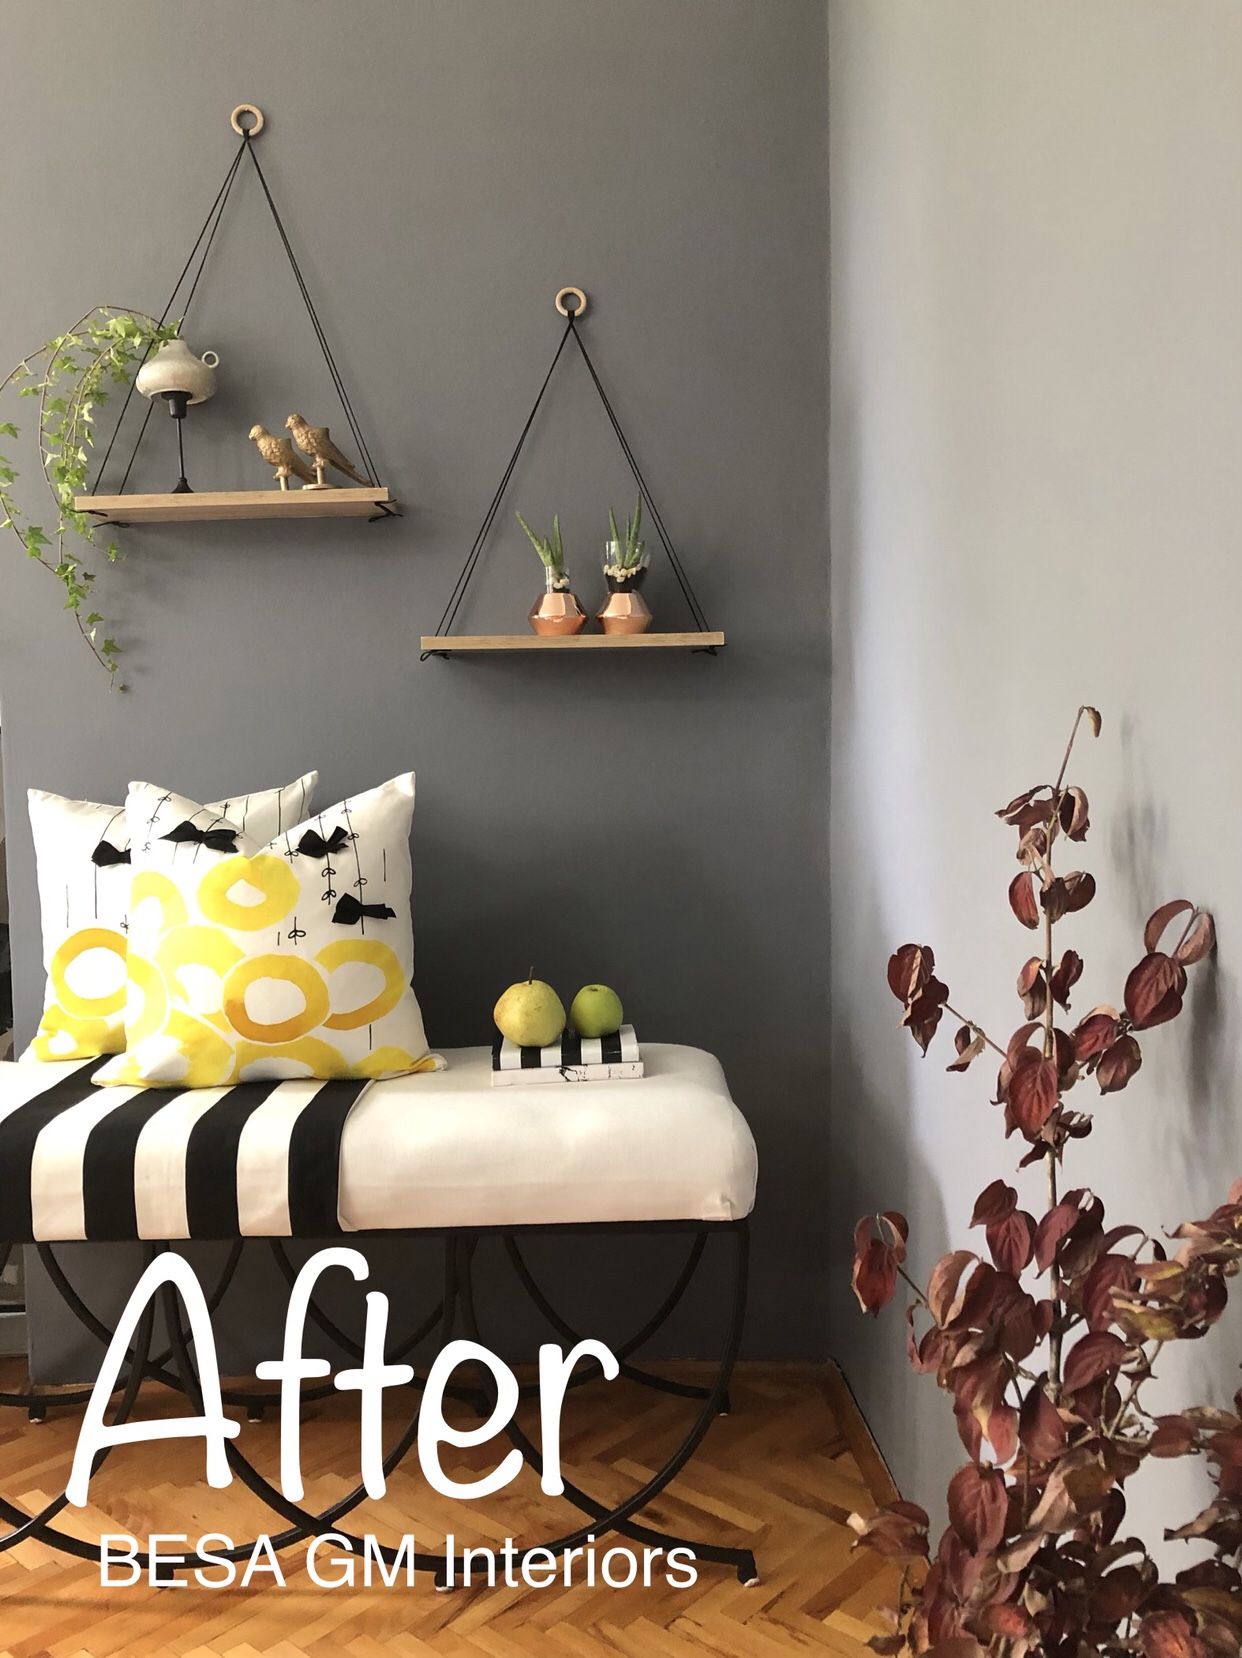
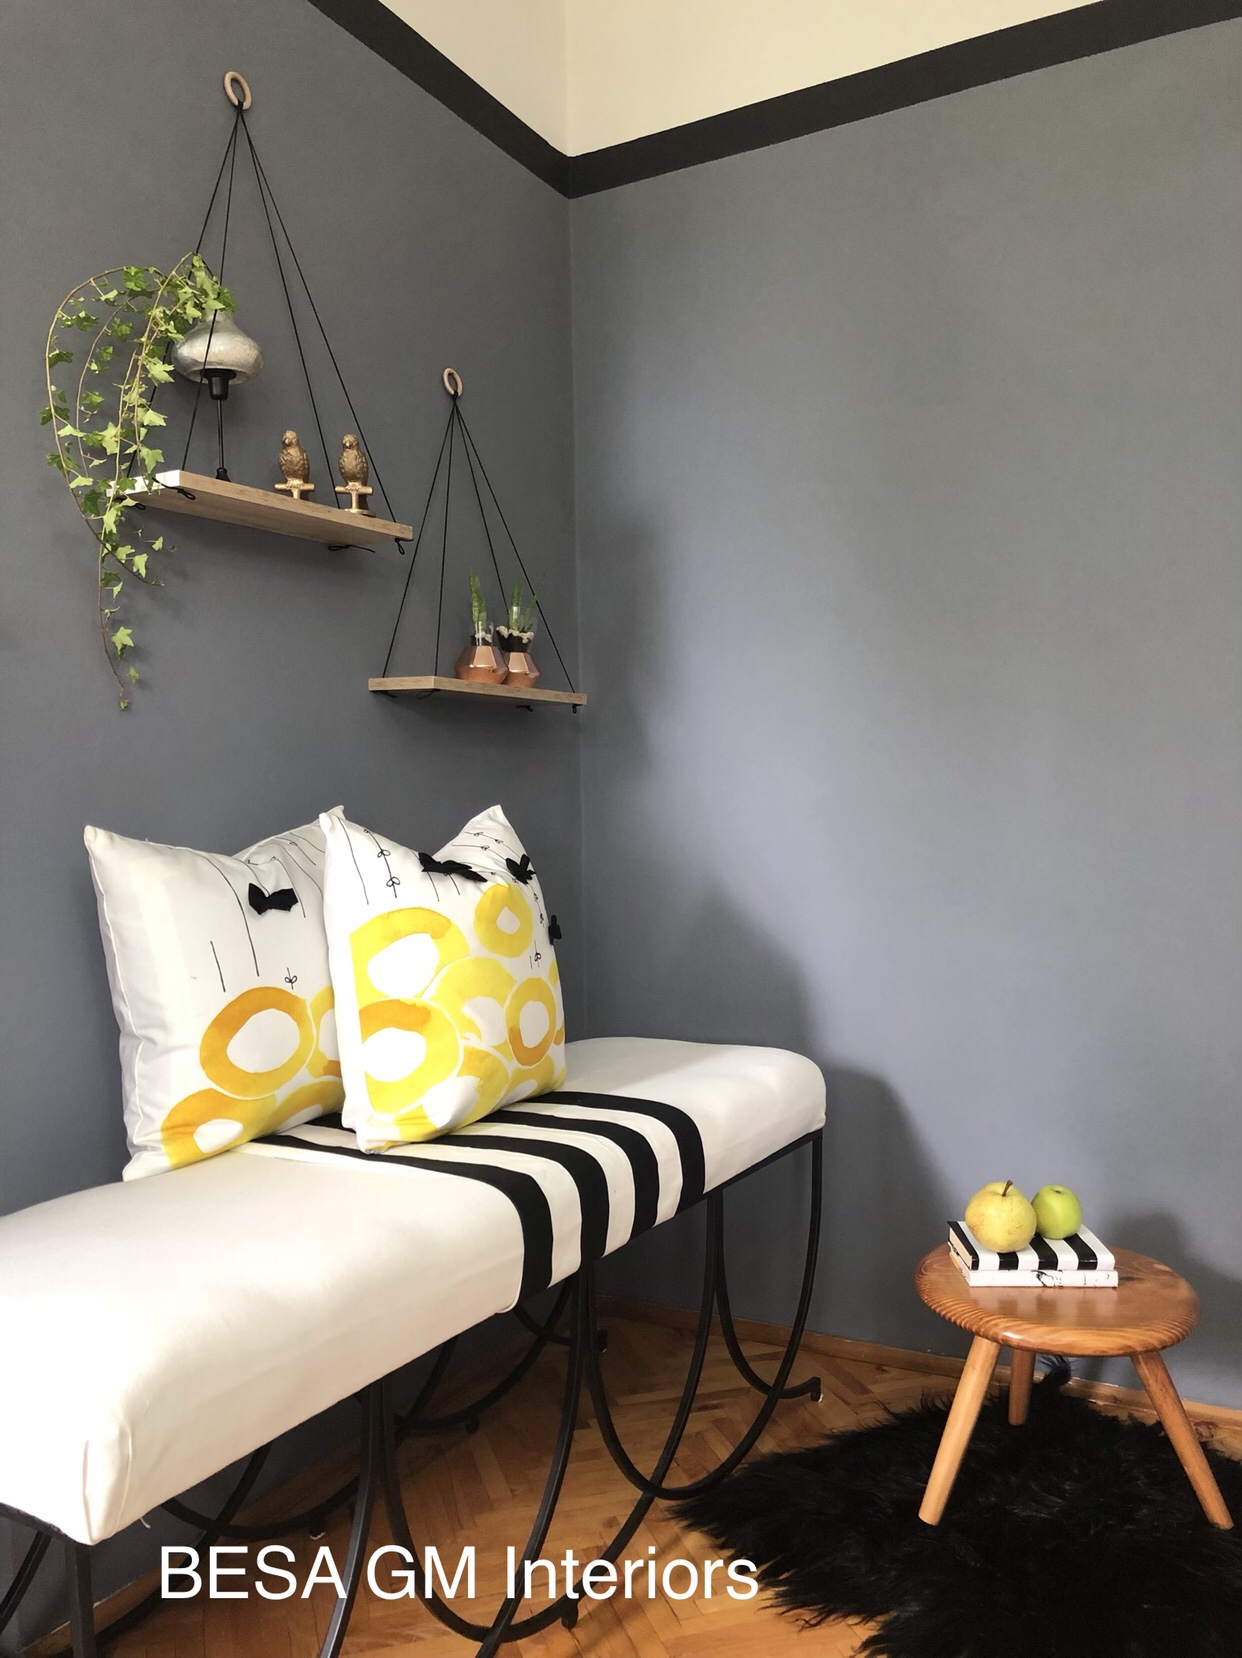
The result is a simple design that makes a big impact in your space, and the most important thing is that you did it yourself!

If you make one please share it with me. I would love to see how your’s turned out.

Thank you for visiting this blog!
Raftet Varese – Nje projekt “Beje Vet” i shpejte dhe i lehte
Gati tridhjet vite me pare, kur une dhe bashkeshorti im ishim duke e renovuar banesen tone te pare, e kishim hargjuar pothuajse tere fondin e parave te nevojshme per renovim dhe mobilim pas blerjes se elementeve te kuzhines dhe kolltuqeve te dhomes se dites. Jo vetem qe i hargjuam te gjitha parat, por pjesen me te madhe te blerjeve u dasht qe t’a paguajm me keste per nje vit. Pasi qe pothuajse e kishim shterur bugjetin tone per ate vit, mundesit per te blere gjera dekorative per zbukurimin e baneses ishin te vogla. Megjithate, une nuk isha e pergatitur te jetoj ne nje vend te padekoruar bukur i cili edhepse i mobiluar dukej si i zbrazet dhe pa jete; keshtu qe fillova me nje vazhde te projekteve te tipit Beje Vet (DIY) ne menyre qe t’i beja hapsirat e baneses sone me funkcionale dhe te dekoruara bukur.
Projekti i pare i tipit Beje Vet ne banesen tone ishte punimi i nje rafti vares ne banjon tone i cili ishte me se i nevojshem per vendosjen e toileteris, peshkirave, letres toalet etj. Une e punova atehere nje rafte te tille vares duke e perdorur nje derrase e cila kishte tepruar nga instalimi i kuzhines, si dhe nga nje cope litari te cilin veqme e kishim. Rafti te cilin e krijova ishte nje gjesend qe nuk kushtoi asnje cent ( dinar ne ate kohe) dhe i cili rezultoi te jet shume i bukur dhe funkcional pasi qe ne te i grumbulluam te gjitha gjesented e nevojshme te toaletit.
Keto dite, duke e involvu metoden Beje Vet, i punova disa rafte te tilla varese per nje projekt ne te cilin jam duke punuar dhe do t’a ndaj me ju, lexuesit e ketije bllogu, procesin e punes se krijimit te ketyre rafteve duke shpresuar qe kjo te ju inpsiroj qe edhe ju VET ta beni nje te tille. Ishte nje projekt shume i lehte dhe i shpejte i cili u kompletua per me pak se nje ore.
Materiali i nevojshem per kete projekt eshte nje cope derase me gjatesi 45 cm dhe gjeresi 15 cm (ose cfardo gjatesie ose gjeresie qe ju konvenon), nje unaze cfardo madhesije, litar ose cfardo shiriti tjeter sipas deshires, metri per caktimin e vrimave, drilli per hapjen e vrimave, gersheret per keputjen e litarit.
Se pari i beni me shenje poziten ku do te hapen vrimat (ne kater skajet anesore te derrases) dhe me drill elektrik i hapni vrimat. Madhesija e vrimes duhet te korespondoj me trashesine e litarit.
Per t’a krijuar pjesen varese te raftit, i preni dy fije te litarit ne gjatesi te cilen e deshironi, duke pase parasyshe qe te shtoni edhe pake gjatesi per nyjet qe do te lidhen perfundi derrases. Per kete projekt une i keputa dy fije te 1 meter gjatesi.
Te dy fijet i beni bashk dhe i paloni ne mes duke e krijuar keshtu nje vegez siper se ciles e vendosni unazen.
E terhiqni pakez vegezen e krijuar nga unaza dhe neper te i kaloni fijet e litarit.
I terhiqni fijet fort ne drejtim te unazes ne menyre qe ta beni nje nyje
I ndani nga dy fije ne secilen ane. E kaloni secilen fije pertej seciles vrime ne te dy anet.
Bejeni nivelizimin e fijeve te litarit ne menyre qe raftet t’i varni ne lartesine e deshiruar, dhe pastaje secilen fije te kaluar neper vrime e lidhni ne nyje. I preni pjeset e teperta te fijeve nese ka nevoje, dhe e beni varjen e raftit.
Rezultati eshte: nje dizajn i thjeshte qe bene impakt te madh ne hapsiren tuaj, dhe me e rendesishmja Ju e keni bere VET.
Nese e Beni Vet nje te tille ju lutem me thuani se si doli i juaji.
Ne Miremengjesi Kosove – RTK live, ku per shiquesit e ketije programi bera prezentiminnse si mund t’a punojme vet nje raft vares!


Ju faleminderit qe e vizituat kete blog!
Besa

Oh wow!! These are fantastic! I love the mid-century look of it – they have cool vibe to them, Your are super talented with your creations !!!
Thank you my friend! They turned really nice, and it takes no effort and so little time to make them!